In part one you set up a Checkmk server that does not monitor anything yet. This guide shows how to add your first host: you install the Checkmk agent, register it with TLS encryption, let it discover services automatically and set up notifications via email and Pushover. On top of that, you monitor an external service without any agent at all.
Prerequisites
- A Checkmk server from part one, reachable over your domain (here
monitoring.example.com, sitemonitoring) - The cmkadmin password from part one
- A second seed or server you want to monitor, with SSH access as root
- The name or ID of the monitoring seed for the firewall rule
How the monitoring works: the Checkmk server pulls the metrics from the agent (pull mode, port 6556). Registering the agent happens once through the web interface on port 443, the same encrypted path as the web UI. No additional open port on the server is needed for it.
Install the Checkmk agent
Download the agent directly from the Checkmk server so the version matches automatically. You find the exact filenames in the web UI under Setup > Agents > Linux. On the host you want to monitor:
wget https://monitoring.example.com/monitoring/check_mk/agents/check-mk-agent_2.5.0p5-1_all.deb
apt install -y ./check-mk-agent_2.5.0p5-1_all.deb
The agent ships two components: the actual agent script and the agent controller (cmk-agent-ctl), which manages the encrypted connection. Check that the controller is available:
cmk-agent-ctl --version
Add the host in Checkmk
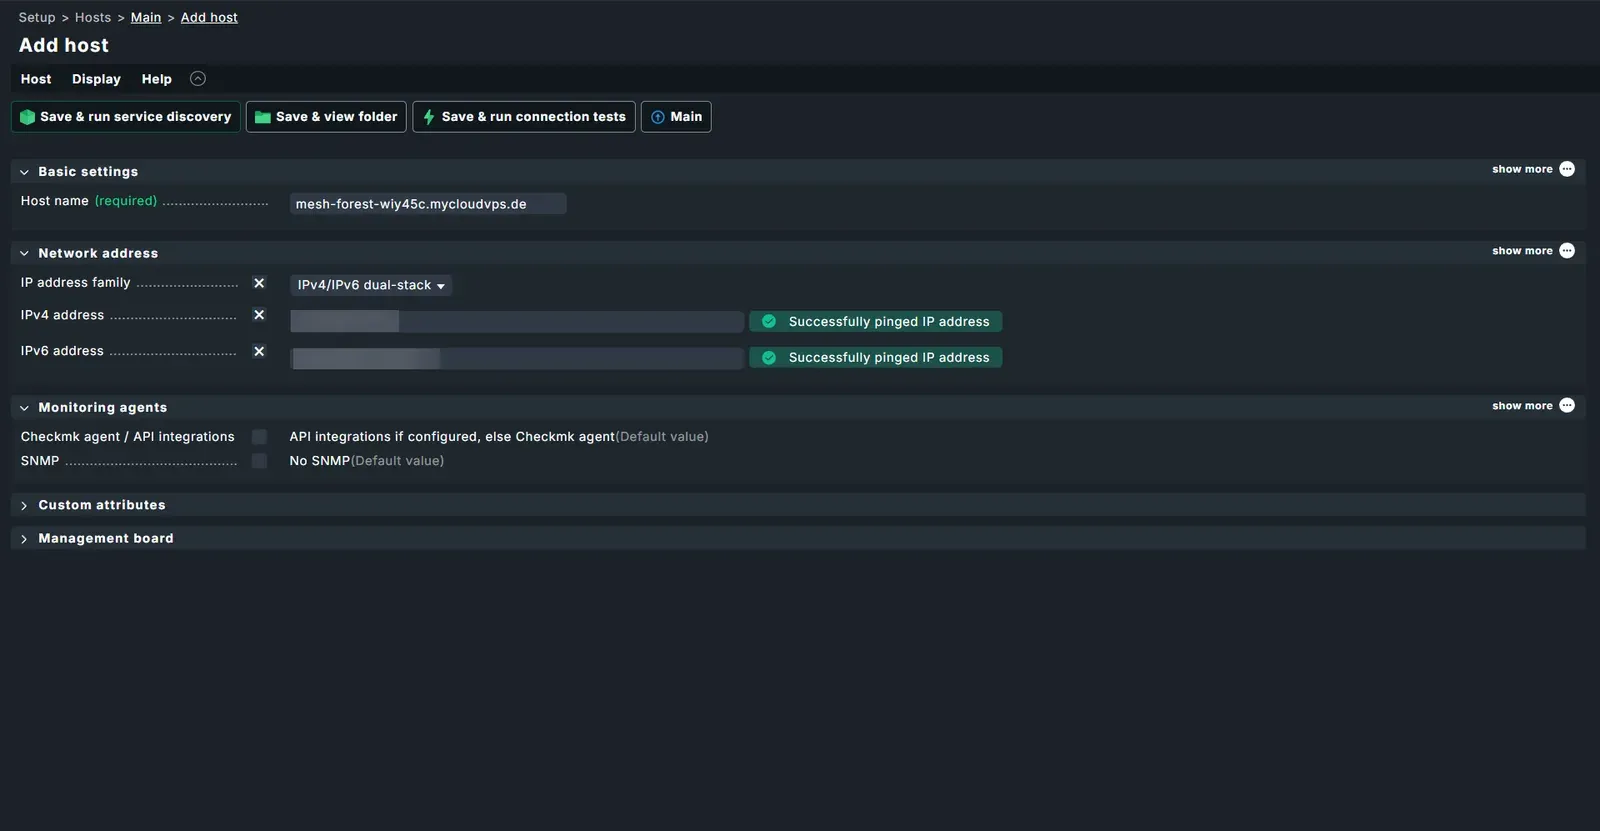
First, make the host known to the server: an agent can only be registered for a host that already exists in Checkmk. In the web UI, go to Setup > Hosts > Add host. Enter:
- Hostname: a meaningful name, e.g.
web-01 - IPv4 address: the host's IPv4 address (or a name resolvable via DNS)
- IPv6 address: the host's IPv6 address, if it is reachable over IPv6. If the host is IPv6-only, also set IP address family to IPv6 only.
Save with Save & view folder. Service discovery comes later, the agent needs to be registered first.
Register the agent
Until the agent is registered, it does not serve its data encrypted. Registration establishes the trust between host and server.
Registering requires a Checkmk user with the matching permission. Your cmkadmin password has no business being on the monitored hosts, though. For exactly this purpose, every Checkmk installation ships the automation user agent_registration: its role allows a single action, registering agents, and it cannot log in to the web UI. You provision a secret for it once and use it for all hosts afterwards.
In the web UI, go to Setup > Users and open the user agent_registration. In the Security section, generate a new secret under Automation secret for machine accounts via the dice icon. Copy it right away, Checkmk does not show it again after saving. Save with Save. User changes take effect immediately, no Activate pending changes needed here.
Run the registration on the host you want to monitor. --hostname must match exactly the name you just created in Checkmk:
cmk-agent-ctl register \
  --hostname web-01 \
  --server monitoring.example.com \
  --site monitoring \
  --user agent_registration \
  --password '<registration-secret>'
On the first run, the controller shows the fingerprint of the server certificate and asks with [Y/n] whether to establish the connection. If the fingerprint matches, confirm with Y.
Note: --server monitoring.example.com without a port connects over HTTPS (443) and therefore through the reverse proxy from part one. A dedicated registration port on the server is not needed.
Check the connection status:
cmk-agent-ctl status
The output shows the registered connection to the monitoring site and that encryption is active.
Firewall for the monitored host
The Checkmk server pulls the data from the agent over TCP 6556. This port must be reachable on the monitored host for the monitoring server, and only for it. With the firewall from dataforest cloud, you can set the monitoring seed directly as the source, not just an IP address.
If the host does not have a firewall yet, create one in the dashboard under Network > Firewalls > Create firewall (name e.g. checkmk-host) and add the following inbound rule. If the host already has a firewall, add the rule there.
| Name | Sources | Protocol | Port |
|---|---|---|---|
| Checkmk agent | Seed monitoring | TCP | 6556 |
| SSH | All IPv4, All IPv6 | TCP | 22 |
As the source for the agent rule, select the monitoring seed under Connected resources / Sources. That way only your monitoring server may query the agent. Then attach the firewall to the monitored host.
Via API, with the monitoring seed as the source (type: seed) and attached to the monitored host:
curl -X POST "https://api.dataforest.net/api/v1/public/firewalls" \
  -H "Authorization: Bearer <API-Token>" \
  -H "Content-Type: application/json" \
  -d '{
    "name": "checkmk-host",
    "inbound_rules": [
      { "protocol": "tcp", "port": "6556", "comment": "Checkmk agent", "sources": [{ "type": "seed", "seed_id": "<monitoring-seed-id>" }] },
      { "protocol": "tcp", "port": "22", "comment": "SSH", "sources": [{ "type": "cidr", "cidr": "0.0.0.0/0" }, { "type": "cidr", "cidr": "::/0" }] }
    ],
    "attachments": [
      { "type": "seed", "seed_id": "<host-seed-id>" }
    ]
  }'
<monitoring-seed-id> is the UUID of the monitoring server, <host-seed-id> that of the monitored host (both from GET /seeds).
Discover and activate services
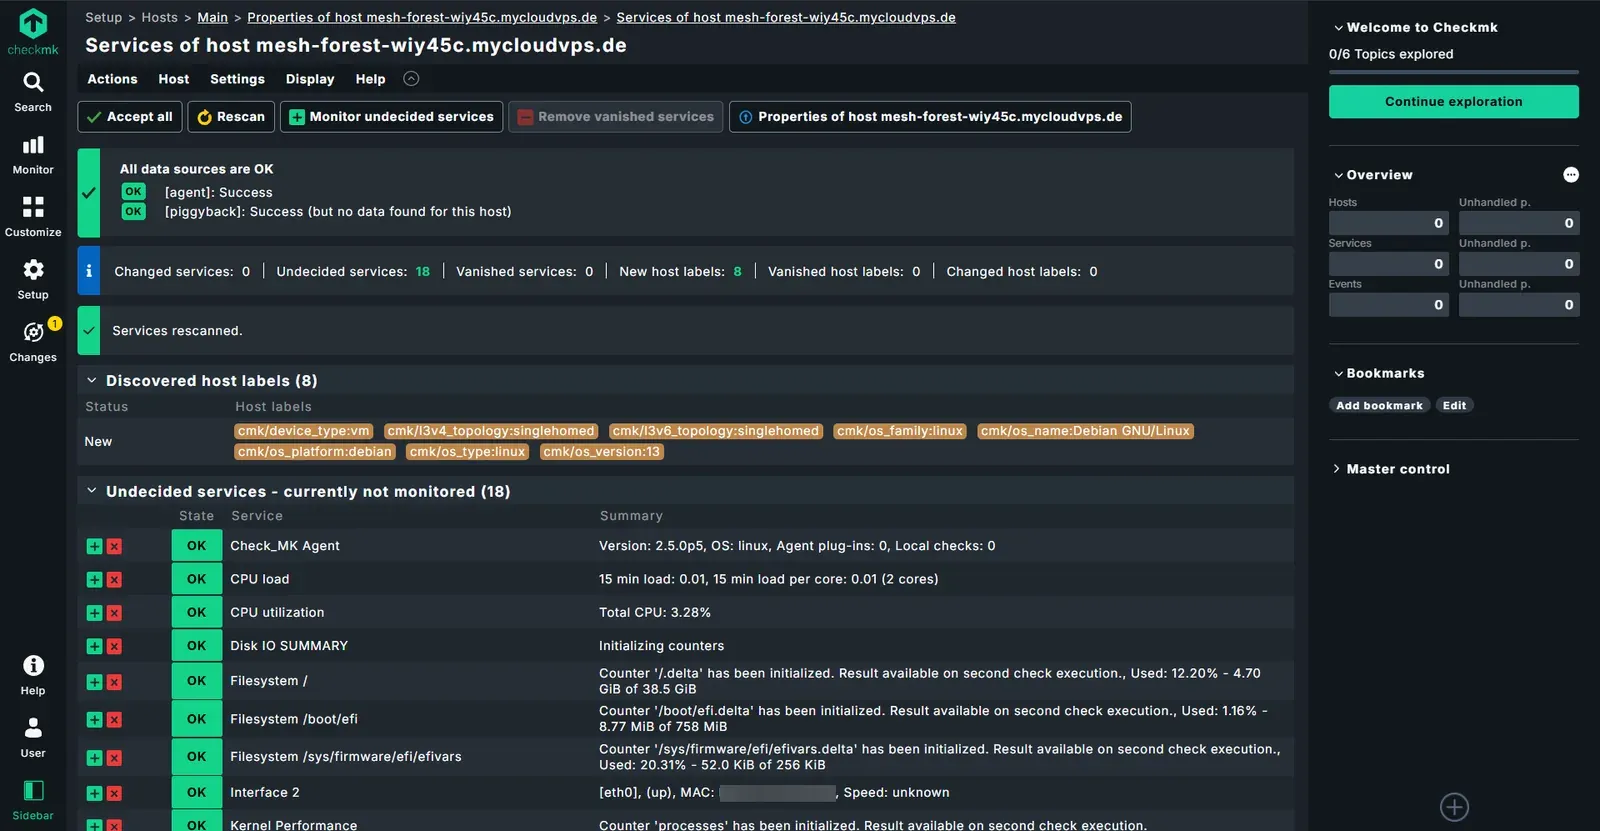
Agent registered, port open: now Checkmk can collect the services. Under Setup > Hosts, open the host web-01 and choose Host > Run service discovery from the menu. Checkmk connects to the agent and lists everything it found on the discovery page: CPU, memory, file systems, network interfaces, running services and more. With Accept all you add all suggested services to the monitoring.
Changes are collected in Checkmk and only take effect with an explicit step. Click Changes in the left navigation (the number of pending changes is shown next to it). Under Quick activation of pending changes, click Activate pending changes to apply the new configuration.
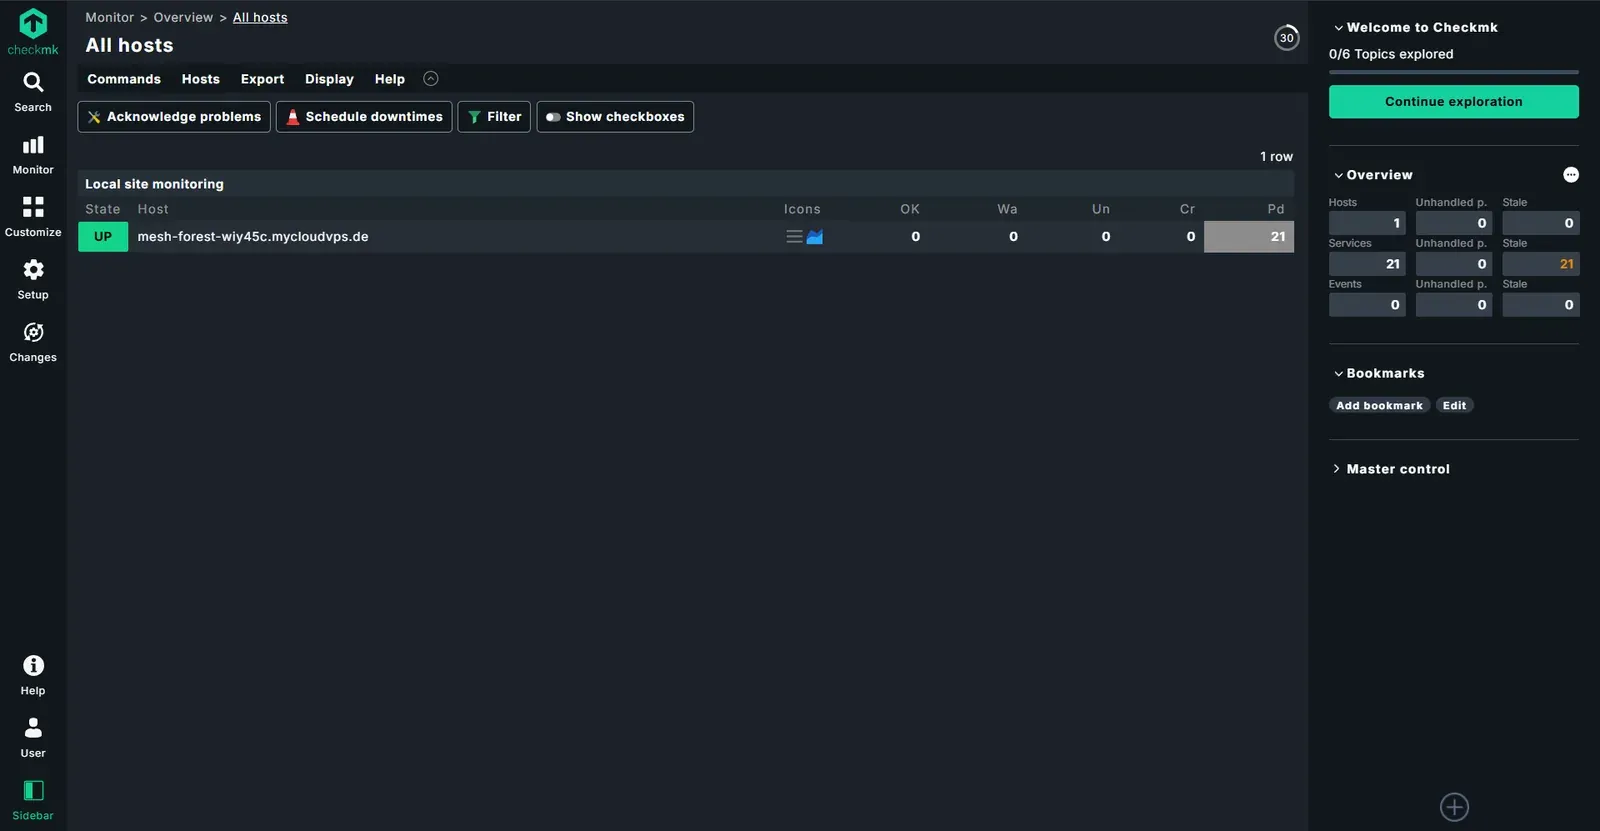
A few moments later the first services appear under Monitor > All hosts. Freshly discovered services turn green (OK) shortly after activation, once the first metric arrives.
You can follow the same on the server's command line. As the site user:
omd su monitoring
cmk -II web-01
cmk -O
cmk -II web-01 runs the service discovery for the host, cmk -O activates the changes (the counterpart to Activate pending changes).
Monitor an external service
Not everything needs an agent. You monitor external websites, APIs or servers agentless. That is a good use case for a server at dataforest cloud: thanks to the own network with an open peering policy, you check external targets from a very well-connected location.
Add a host for the external target via Setup > Hosts > Add host (e.g. example-website with the website's public IP) and set Monitoring agents > Checkmk agent / API integrations to No agent. Checkmk then monitors the host via reachability (PING), without anything being installed there.
For deeper checks such as status code, response time and certificate lifetime, add an HTTP check under Setup > Services. Remember to click Activate pending changes afterwards.
Set up notifications
Monitoring is only useful if you learn about problems. Out of the box, Checkmk sends an email to the contacts of a host or service as soon as a problem occurs.
For the emails to arrive, set an address on the user. In the web UI, go to Setup > Users, open the user cmkadmin and enter your address under Email address. The default notification rule then sends problem messages to that address.
This requires that the server can send email. The outbound firewall rule for SMTP (port 587) from part one covers that.
Pushover (recommended)
Email tells you about problems, but push messages to your phone are far more direct when it matters. Checkmk ships a built-in Pushover integration. Pushover has a one-time cost after a 30-day trial (about 5 USD per platform), after which it stays usable, including for other alerts.
First, sign up at pushover.net and create two keys:
- Note the User Key (or a Group Key) from the front page.
- Under Create an Application/API Token, create an application for Checkmk and copy the API Token.
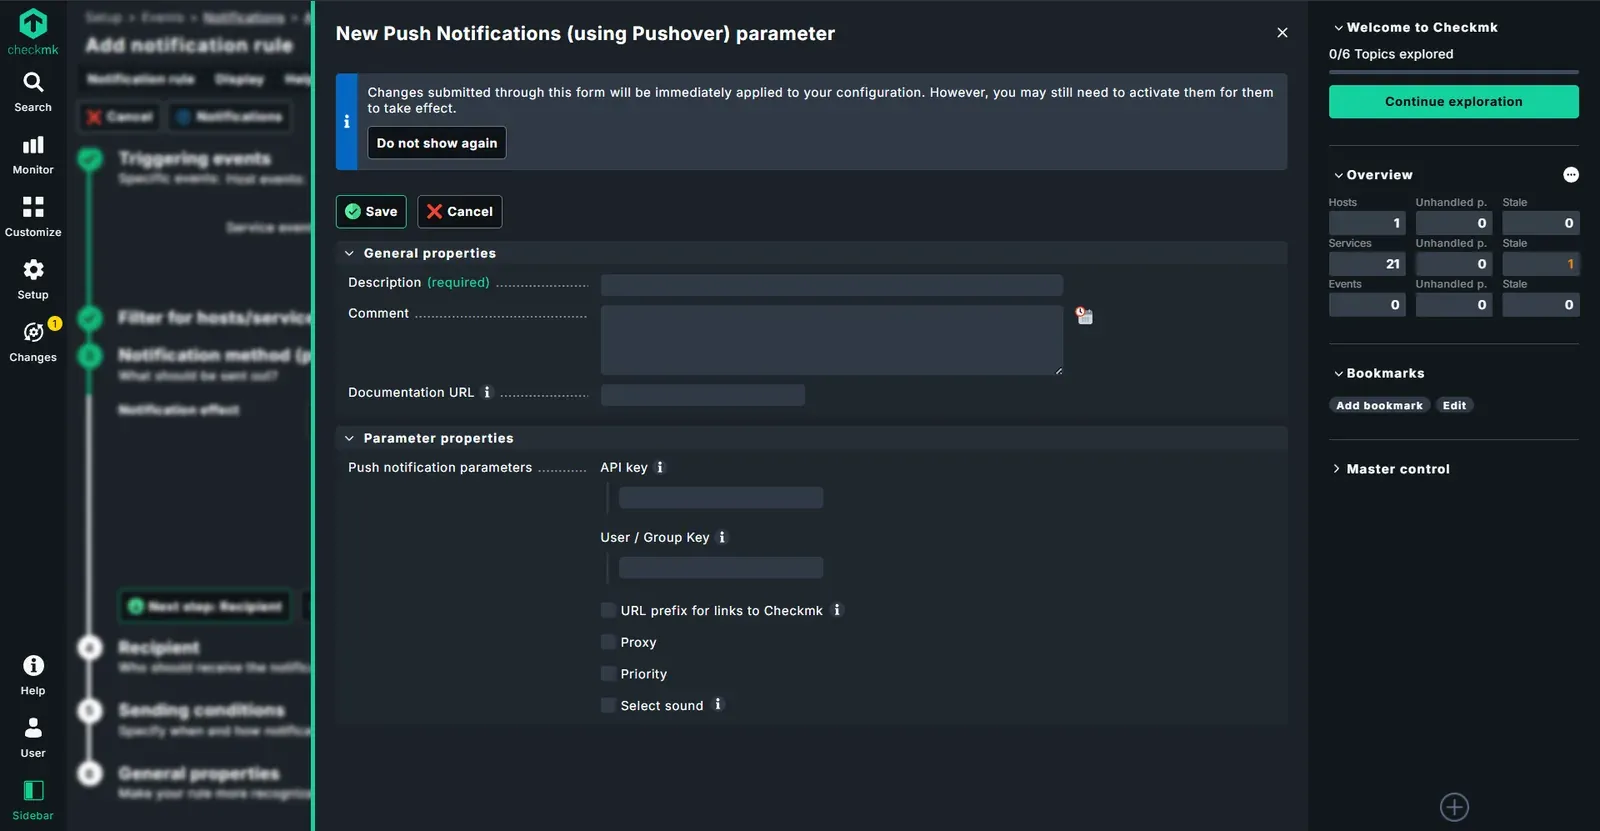
Then in the Checkmk web UI, go to Setup > Events > Notifications. Under Parameters for notification methods, open the Pushover entry and choose Add parameter. Fill in two fields:
- API key: the application's API token
- User / Group Key: your user key (or group key)
Then create a notification rule, or extend the existing one, so that it uses the method Push Notification (using Pushover). Apply with Activate pending changes.
To test, trigger an artificial notification, for example via Monitor, select a service and send a custom notification from the commands. The message should appear on your phone shortly after.
Summary
Your first host is now fully monitored: the agent is installed and registered with TLS, the services are discovered and activated, and you are notified about problems by email and Pushover. On top of that you monitor an external service without an agent.
You add further hosts the same way: install the agent, add the host, register it with the existing secret, allow the monitoring seed access to port 6556 in the firewall, discover services, activate. For an overview of more possibilities, see our monitoring solution.