Instead of using one of our images, you can also install an operating system yourself from an ISO in our catalog. This guide walks you through a Windows Server installation: mounting the ISO, making the disk visible in Setup, configuring the network by hand and setting up access via Remote Desktop. Plan for 30 to 45 minutes, all of them spent in the web console. Any other way in comes at the very end, with Remote Desktop. A Linux ISO follows a different path, described in the guide Install Linux yourself from an ISO.
The Windows ISOs in the catalog are Microsoft's evaluation editions and expire after 180 days. For permanent operation you need a Windows Server licence of your own: check its Microsoft licensing terms for whether they cover running it on a cloud server. You run the installation yourself, which is what the ISOs in our catalog are there for.
The seed may well hold a running system. The installation overwrites it. Back up anything you want to keep first.
An ISO is a foreign system. What comes from an ISO is not prepared for our platform: it can behave differently than our images, and individual steps may look different on your screen than they do here. For questions about the system itself, the vendor's own documentation is the place to look.
What changes on the seed permanently
The moment you mount an ISO for the first time, the seed switches to restricted mode. From then on the cloud no longer knows what is on the disk, so it turns off the features that require a known system:
| Feature | ISO mounted | After ejecting |
|---|---|---|
| Reset root password | unavailable | permanently unavailable |
| Reinstall, upgrade | unavailable | available again |
| Rescue mode | available | available |
| Console, restart, backups, snapshots, firewalls | available | available |
So rescue mode stays available, but it takes precedence at boot: while it is active, the Seed starts the rescue system rather than the mounted ISO.
Restricted mode stays in place even once you eject the ISO. The only way out is Empty seed and reinstall with one of our images. Above the tabs in the seed detail view, two markers show the state: ISO active while a medium is mounted, and Restricted mode afterwards.
In practice this mostly means: access is now your responsibility. You set the Administrator password in Windows Setup, and if you lose it, the cloud cannot reset it. The console is then the only way back into the system.
Note down your network details
On a self-installed system nobody sets up the network for you. There is no DHCP on our network, so Windows needs a static address, and specifically the address assigned to your seed: a filter on the virtual network port drops packets with foreign source addresses.
Collect the values before you start. Open the Network tab in the seed detail view and click the address row under Public network. The values expand below it:
| Value | Meaning |
|---|---|
| IP address | The public address of your seed |
| CIDR | The prefix length of the subnet, exactly as shown in the tab |
| Subnet mask | The same value in dotted notation, for dialogs without a prefix length |
| Gateway | The gateway your seed is reached through |
| DNS server 1 and 2 | The two servers for name resolution |
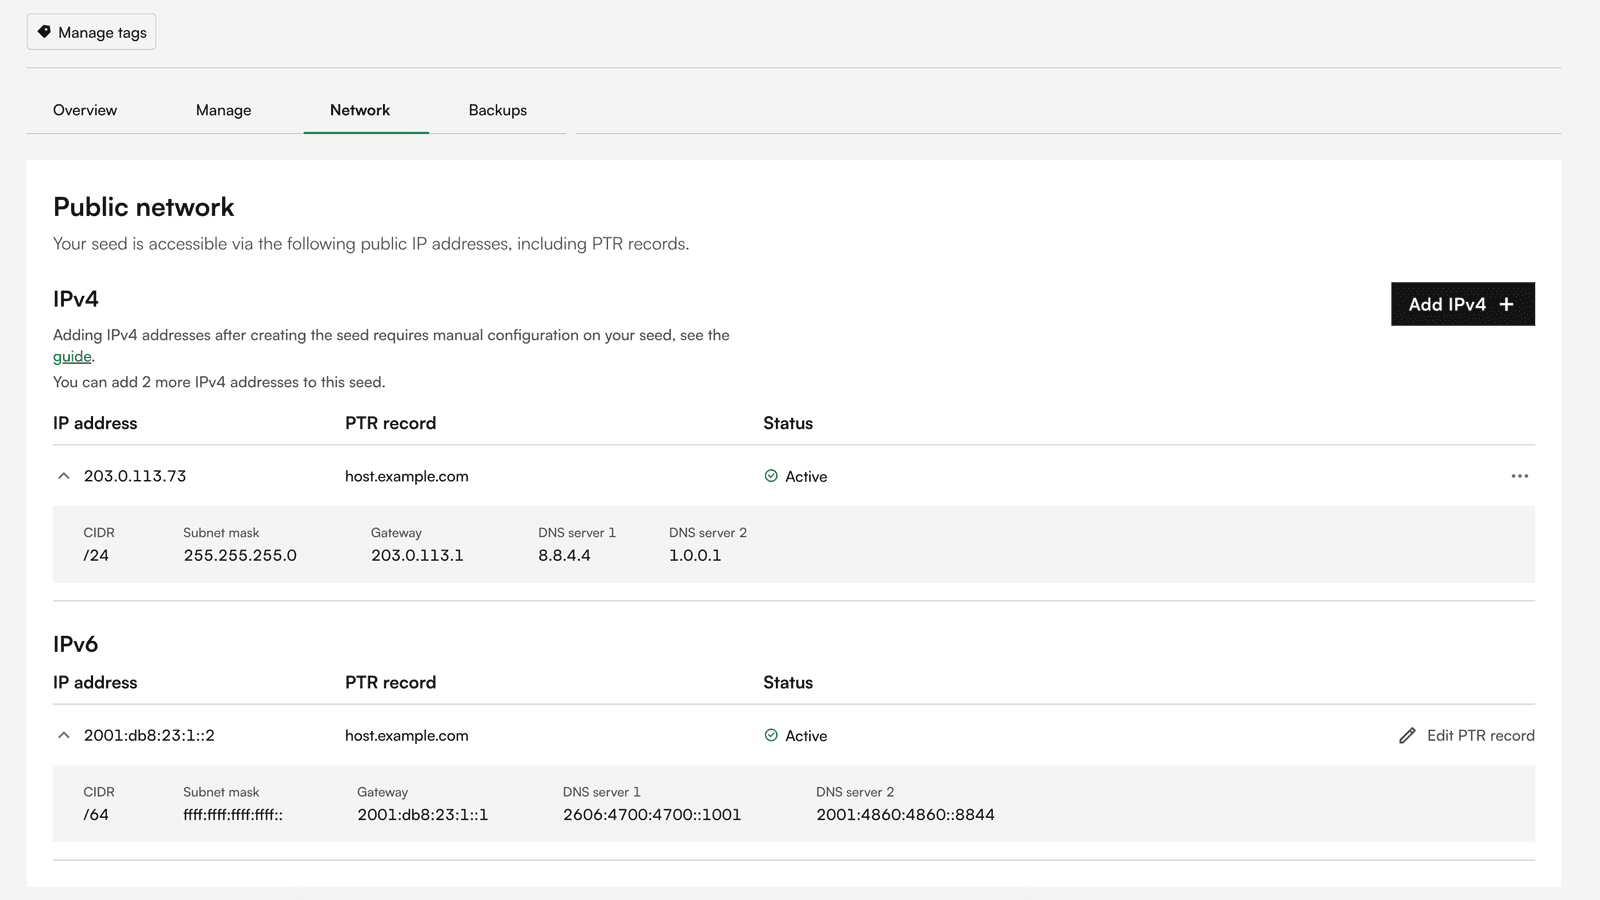
Note the values for both address families. IPv4 and IPv6 have their own gateways and their own DNS servers, each listed in its own row. With IPv6 the entire /64 is yours, so you may assign further addresses within it freely. With IPv4 only the listed addresses work.
Mount the ISO
Open the Manage tab in the seed detail view. The Mount ISO section holds the ISO catalog. Choose Mount from the menu at the end of the row.
The first time, a notice tells you the seed will switch to restricted mode. Confirm with Mount ISO. The mounted ISO then sits highlighted above the list, marked Mounted.
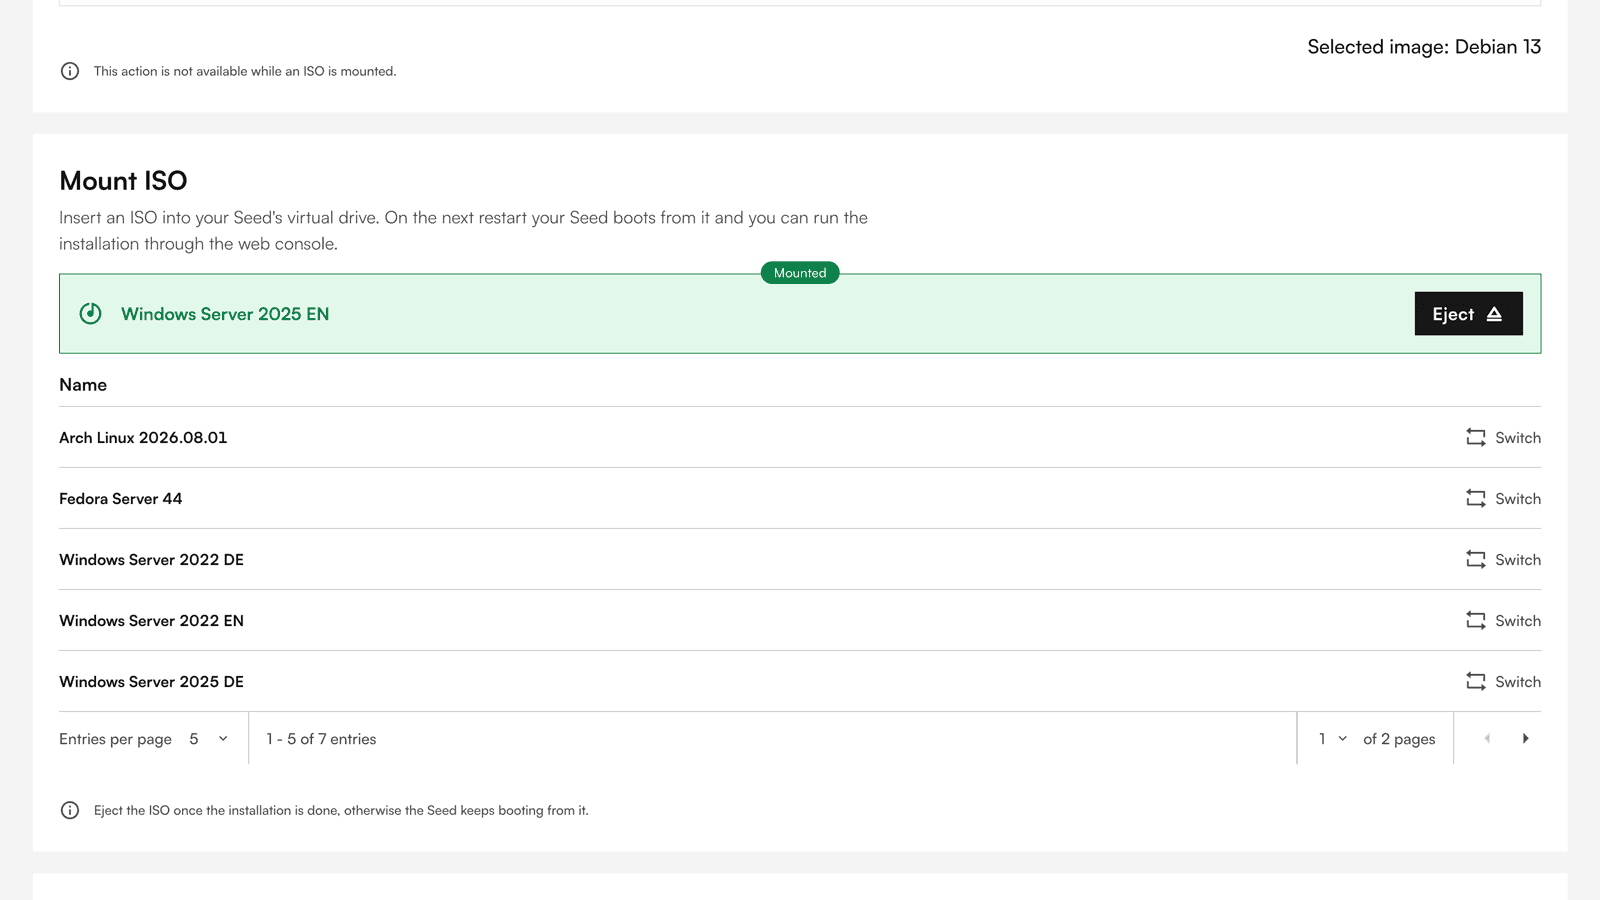
Two things regularly come as a surprise here:
- The seed does not restart on its own. That is deliberate, because an automatic restart would later destroy everything when you swap media mid-installation. You trigger the restart yourself.
- From now on the seed boots from the ISO first. While a medium is mounted, it sits ahead of the disk in the boot order.
Restart and boot into the installer
Open the console first, via Start console. The seed is still running your old system, and the console only exists while it runs. It opens in its own window.
Then trigger the restart from inside the running system, so you watch the boot from the first second. On Debian or another Linux, Send CtrlAltDel in the top right of the console does it. Other systems you restart through their own restart function, a Windows for instance from the Start menu. If the system stays silent, or the seed is powered off, use Actions › Restart or Start in the panel.
Now for the moment where the installation most often fails:
On startup the Windows installer shows "Press any key to boot from CD or DVD" and waits about five seconds. Press a key during that window. Otherwise the seed starts your old system, and it looks as though mounting the ISO did not work.
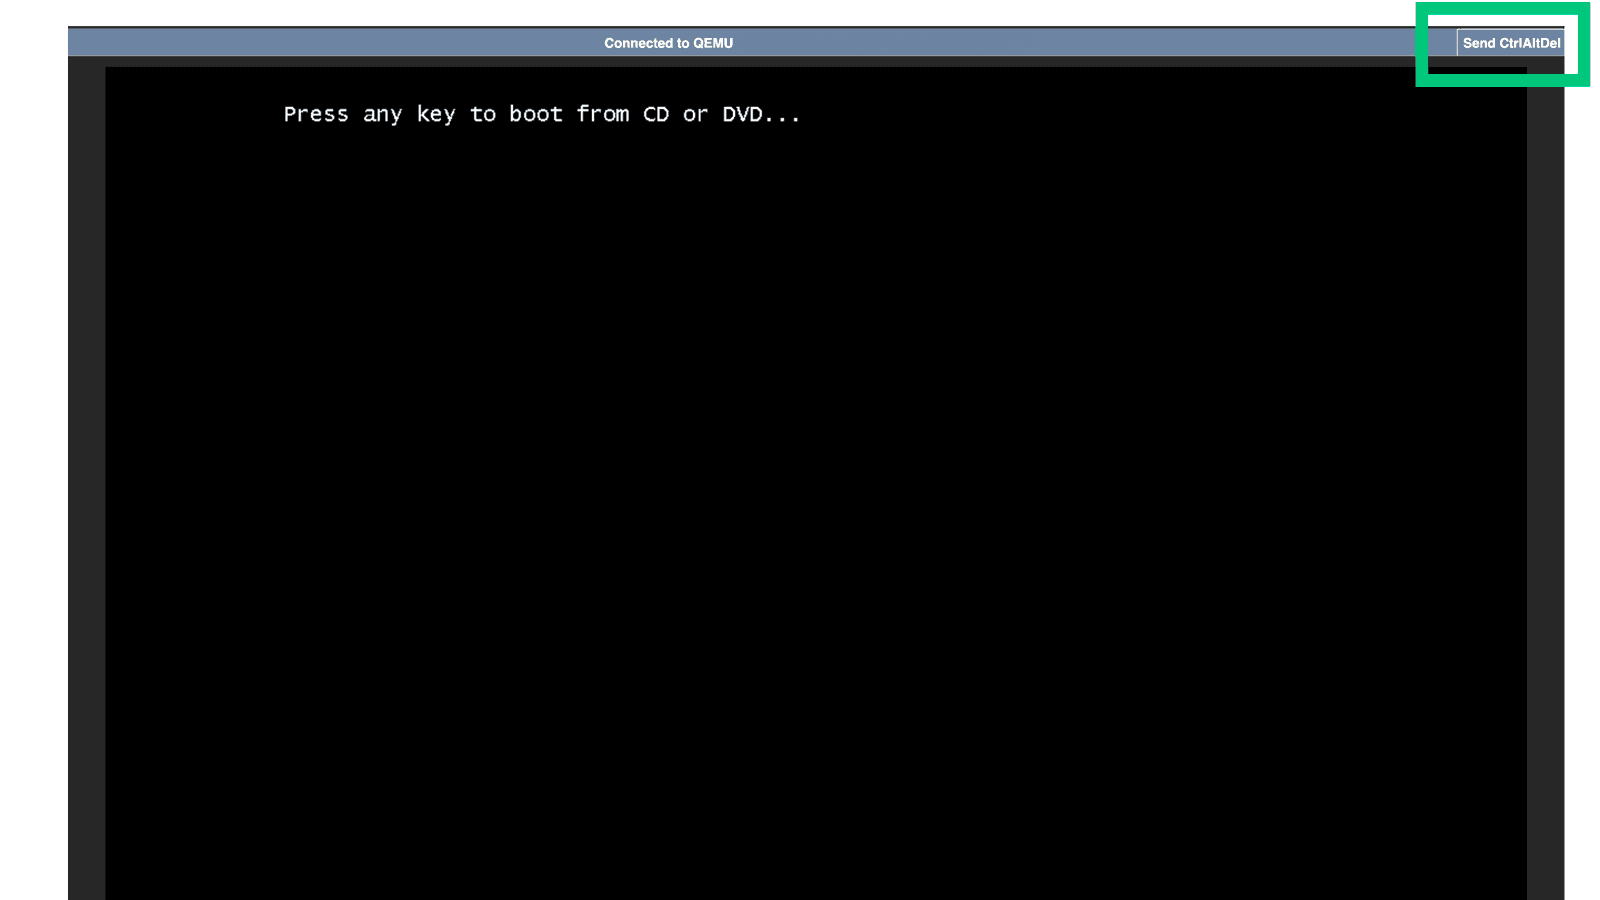
If you miss the moment, nothing is broken: restart again, keep the console window open and press a key when the prompt appears.
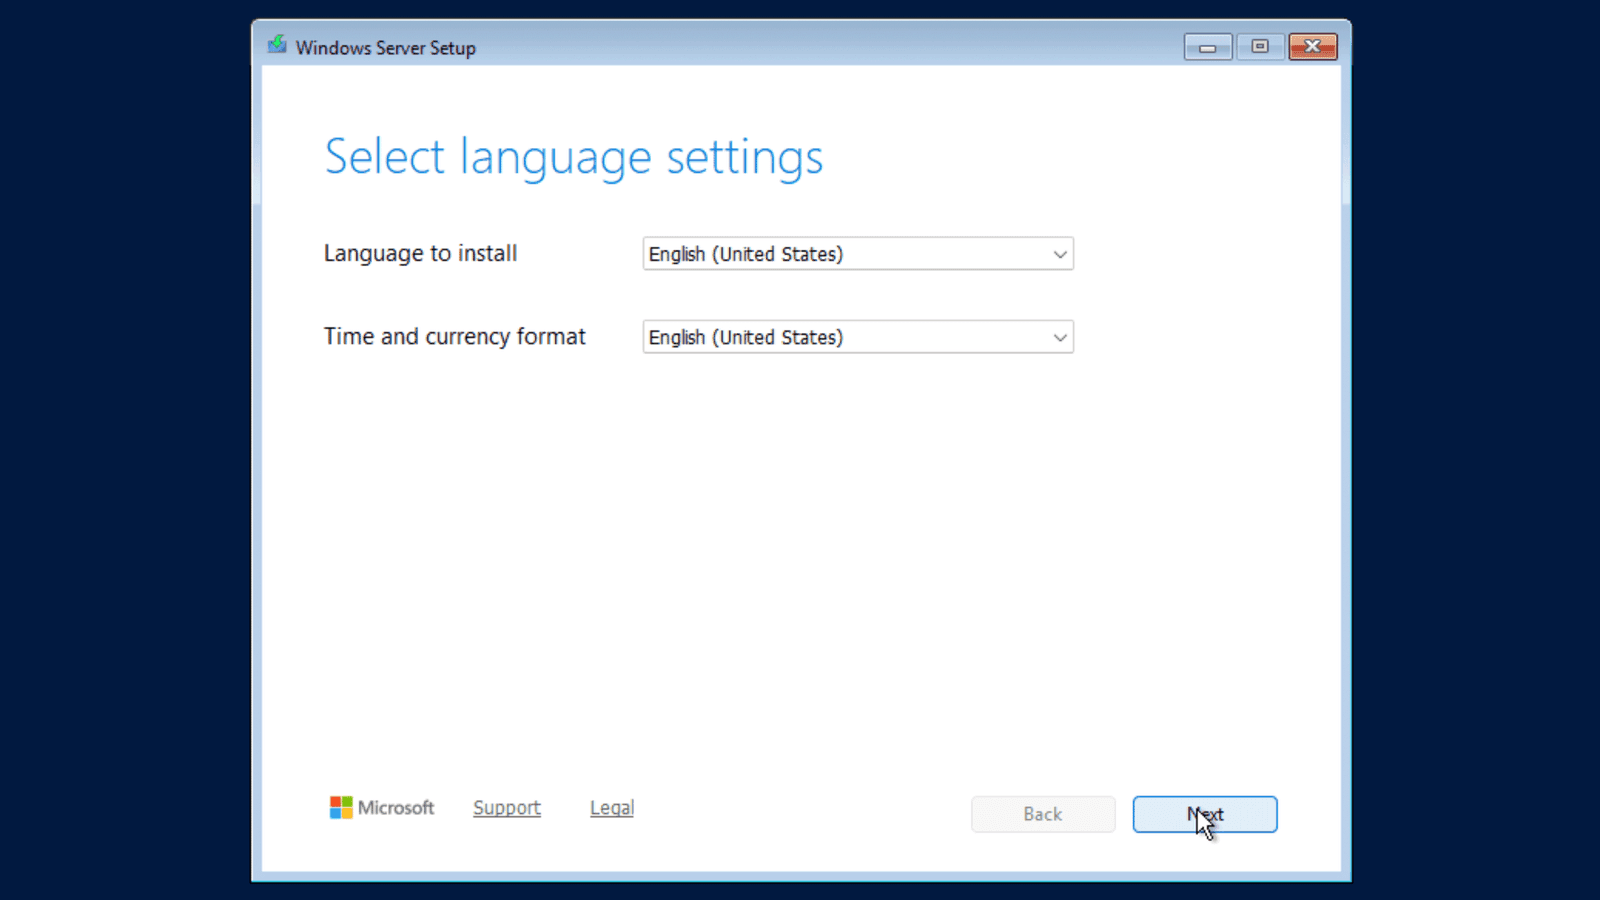
Setup first asks for language, time format and keyboard layout. What you pick here determines how your keystrokes arrive in the console. Choose the layout of your actual keyboard, otherwise you will mistype every password from here on.
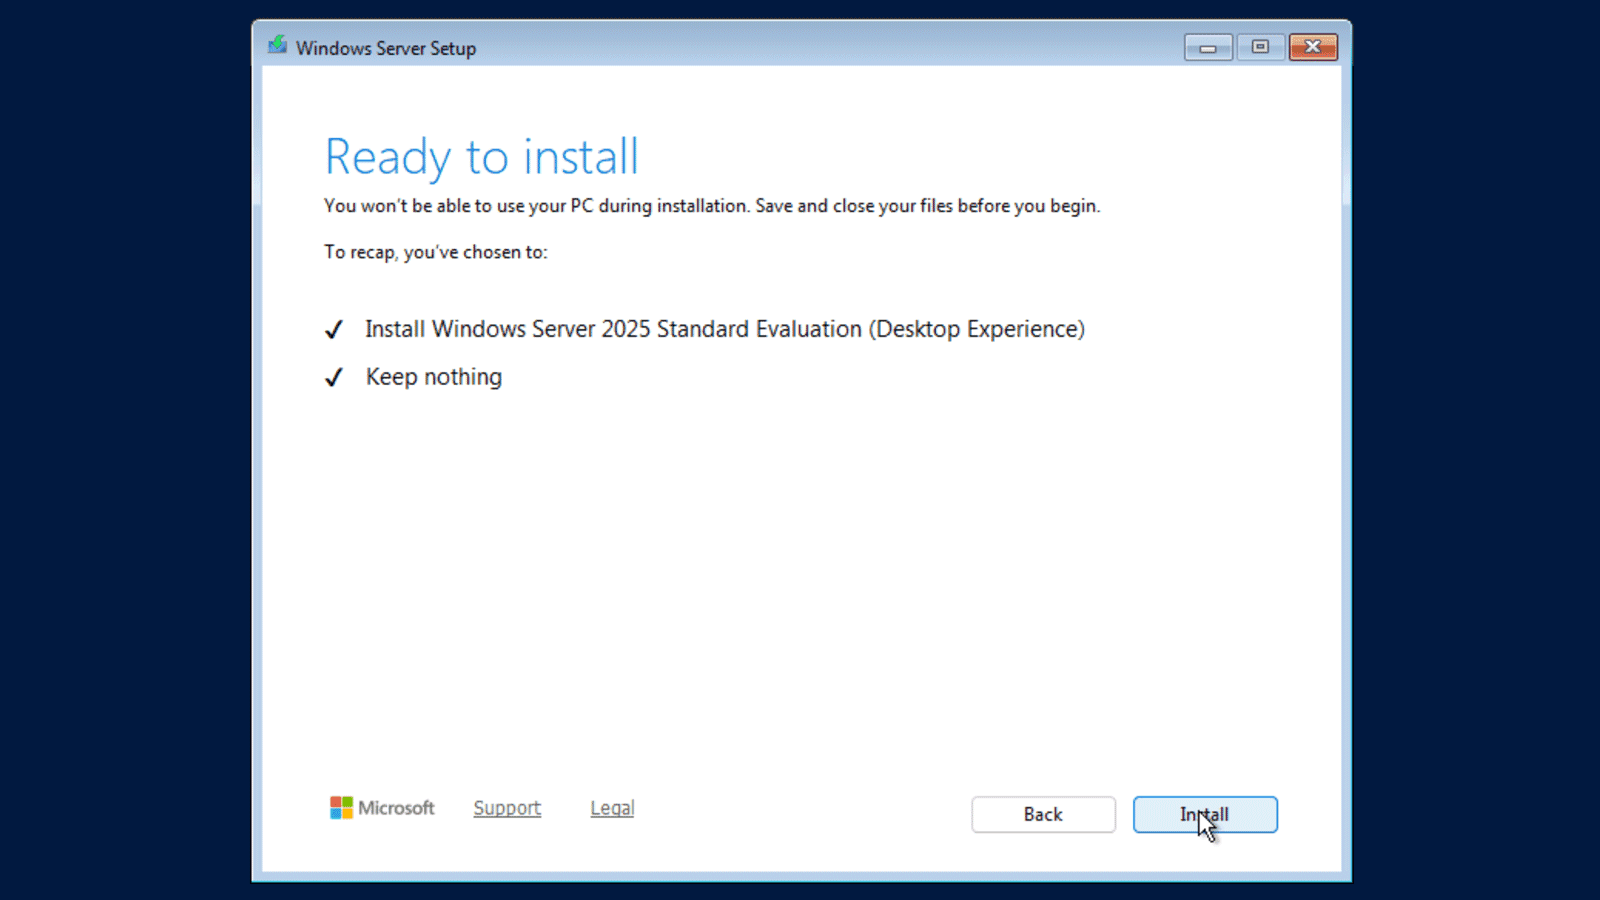
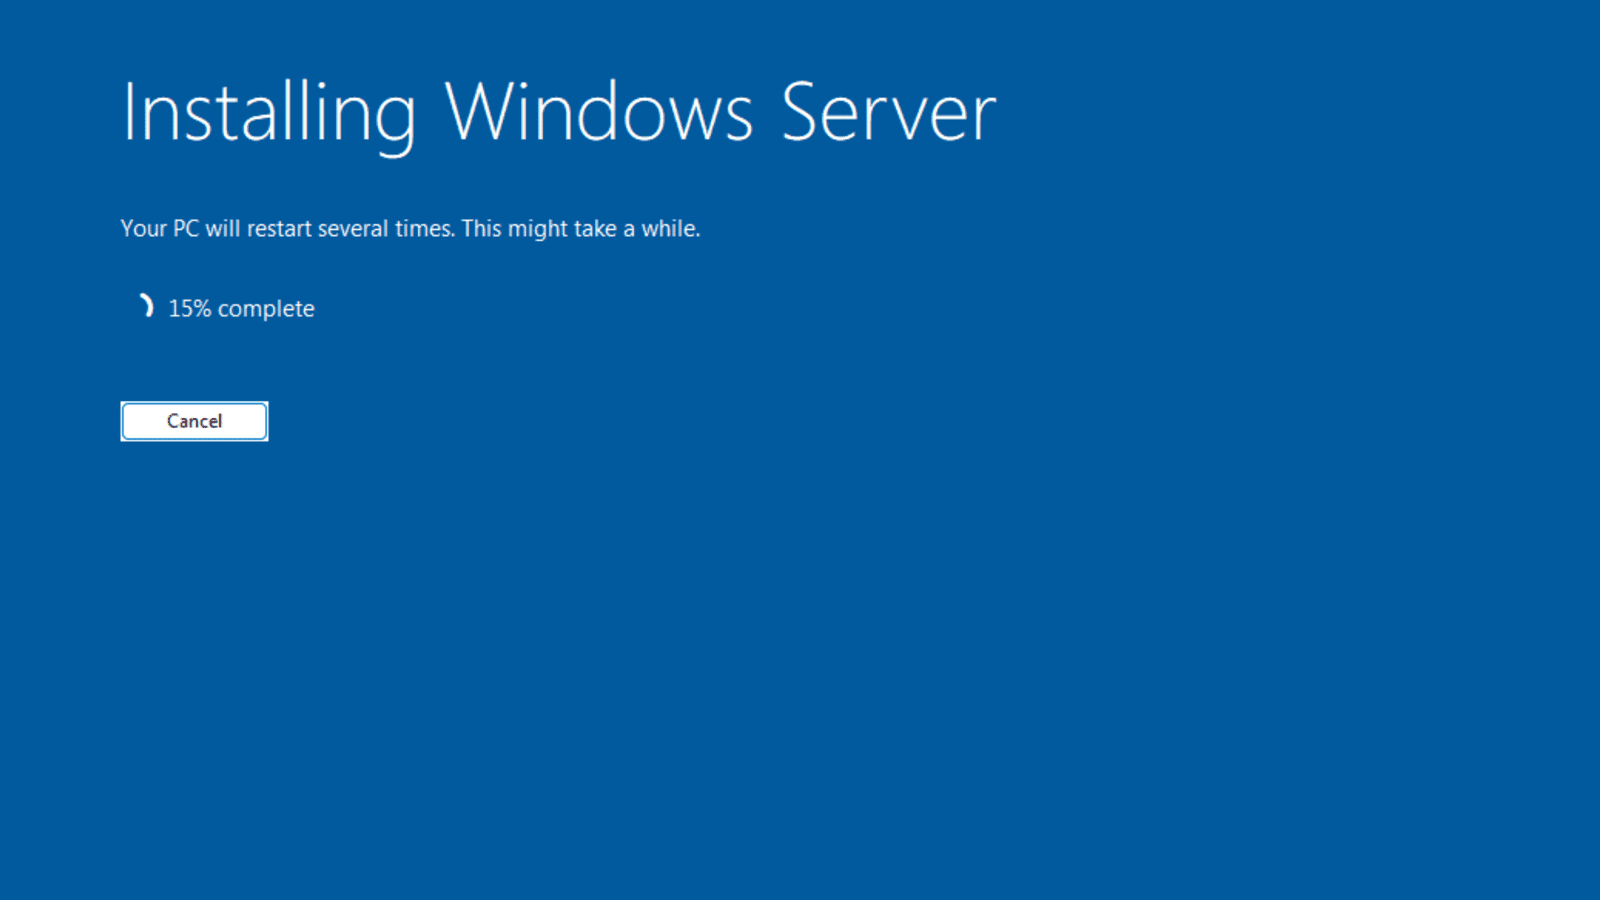
The tabs below show every step of Setup, in the order it comes.
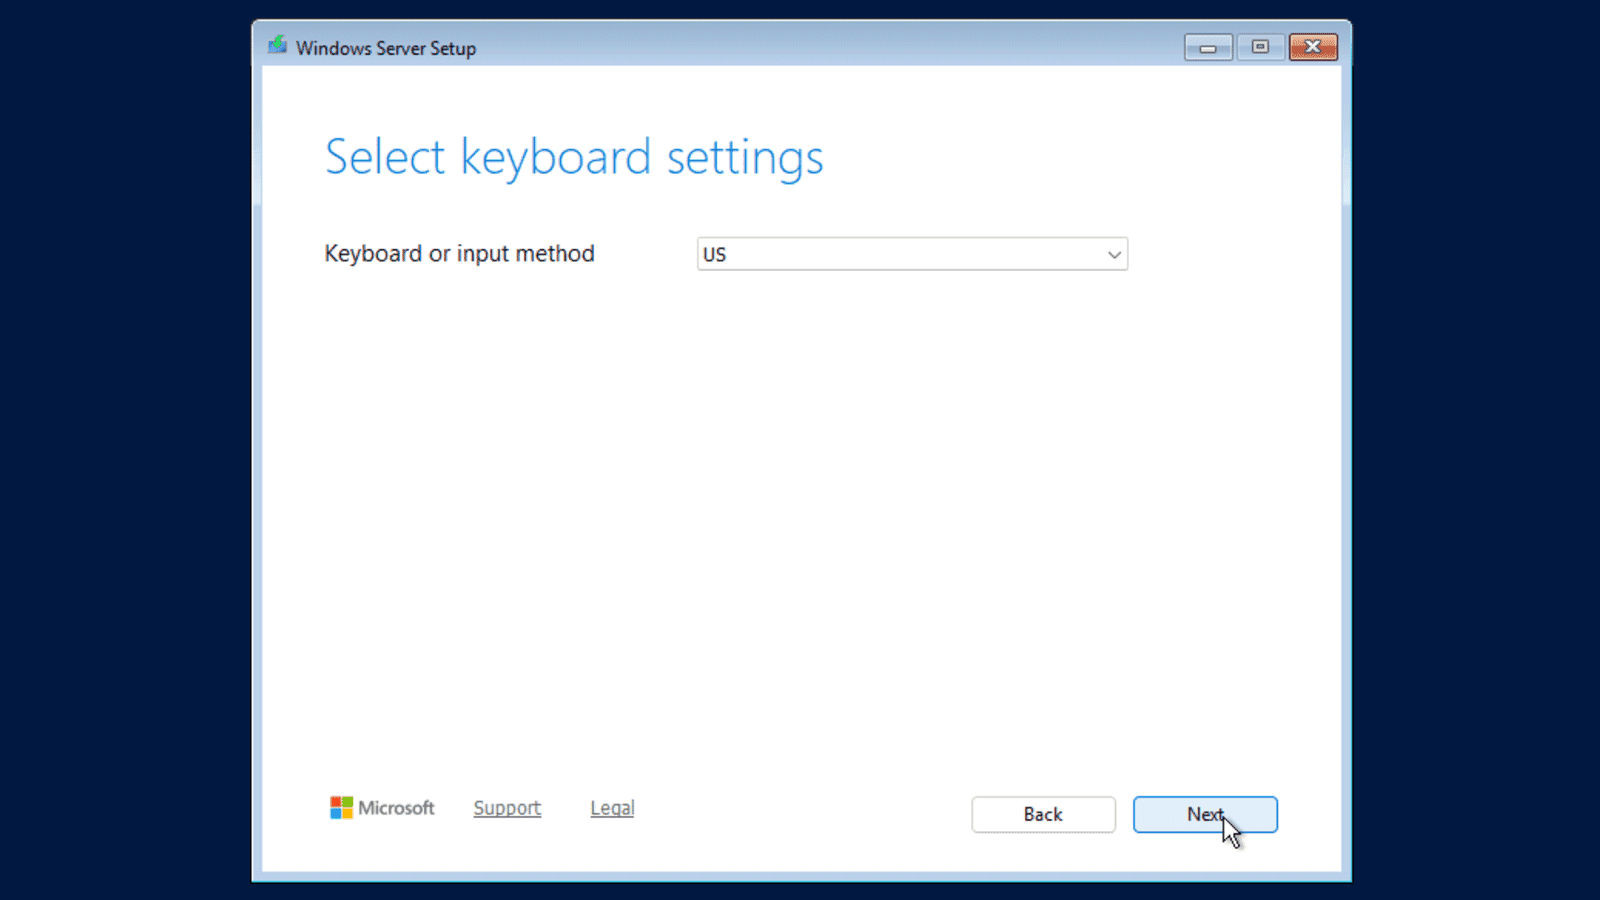
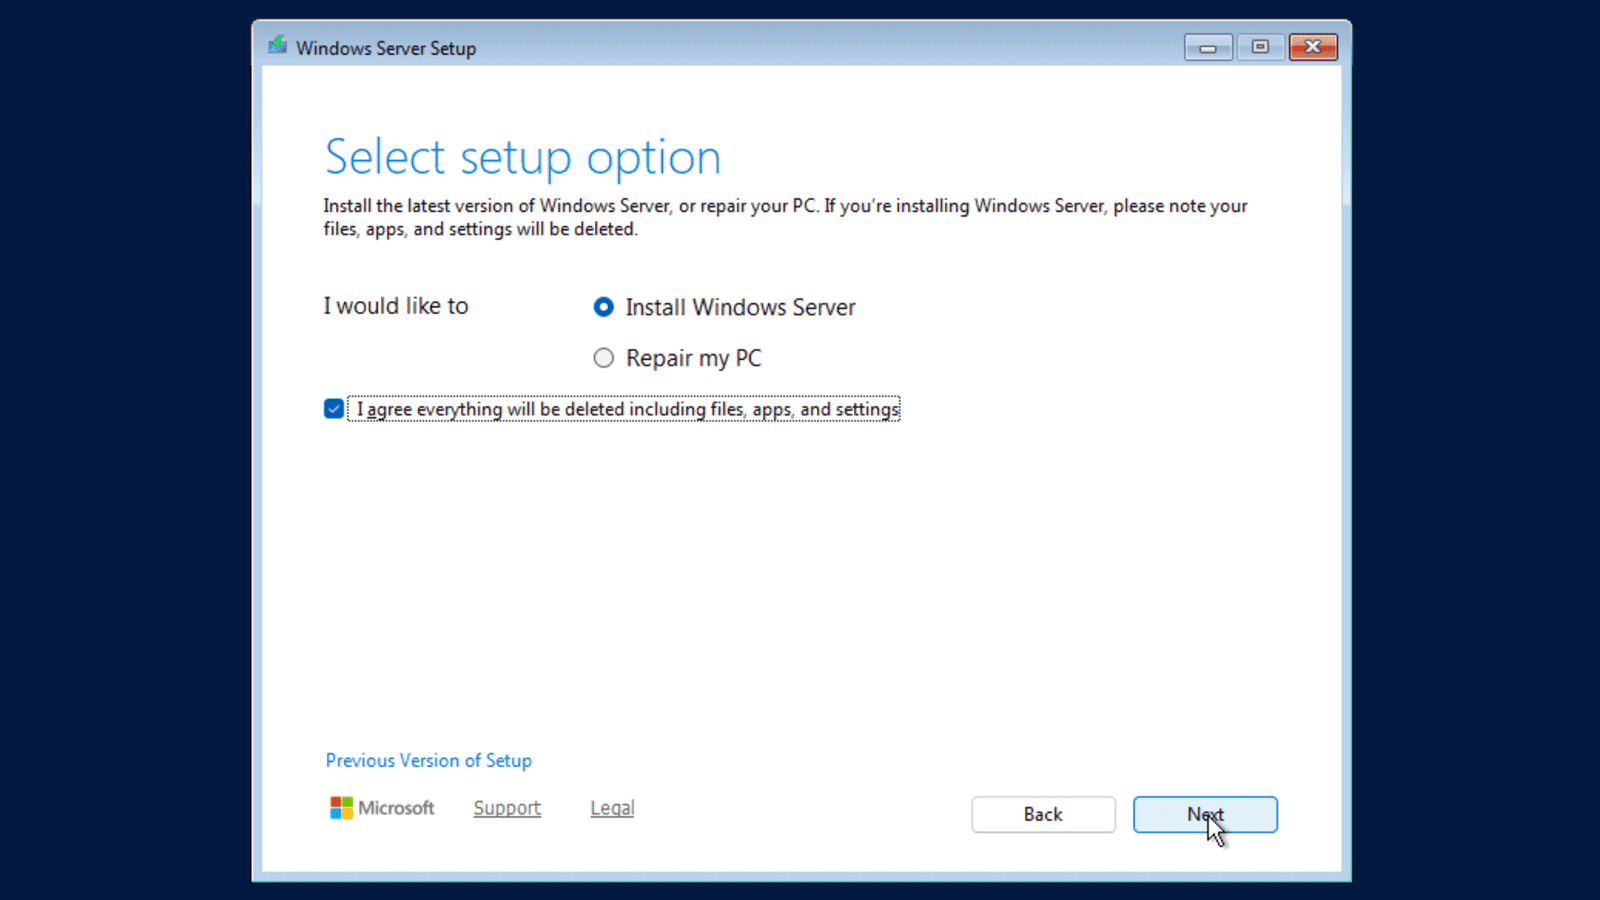
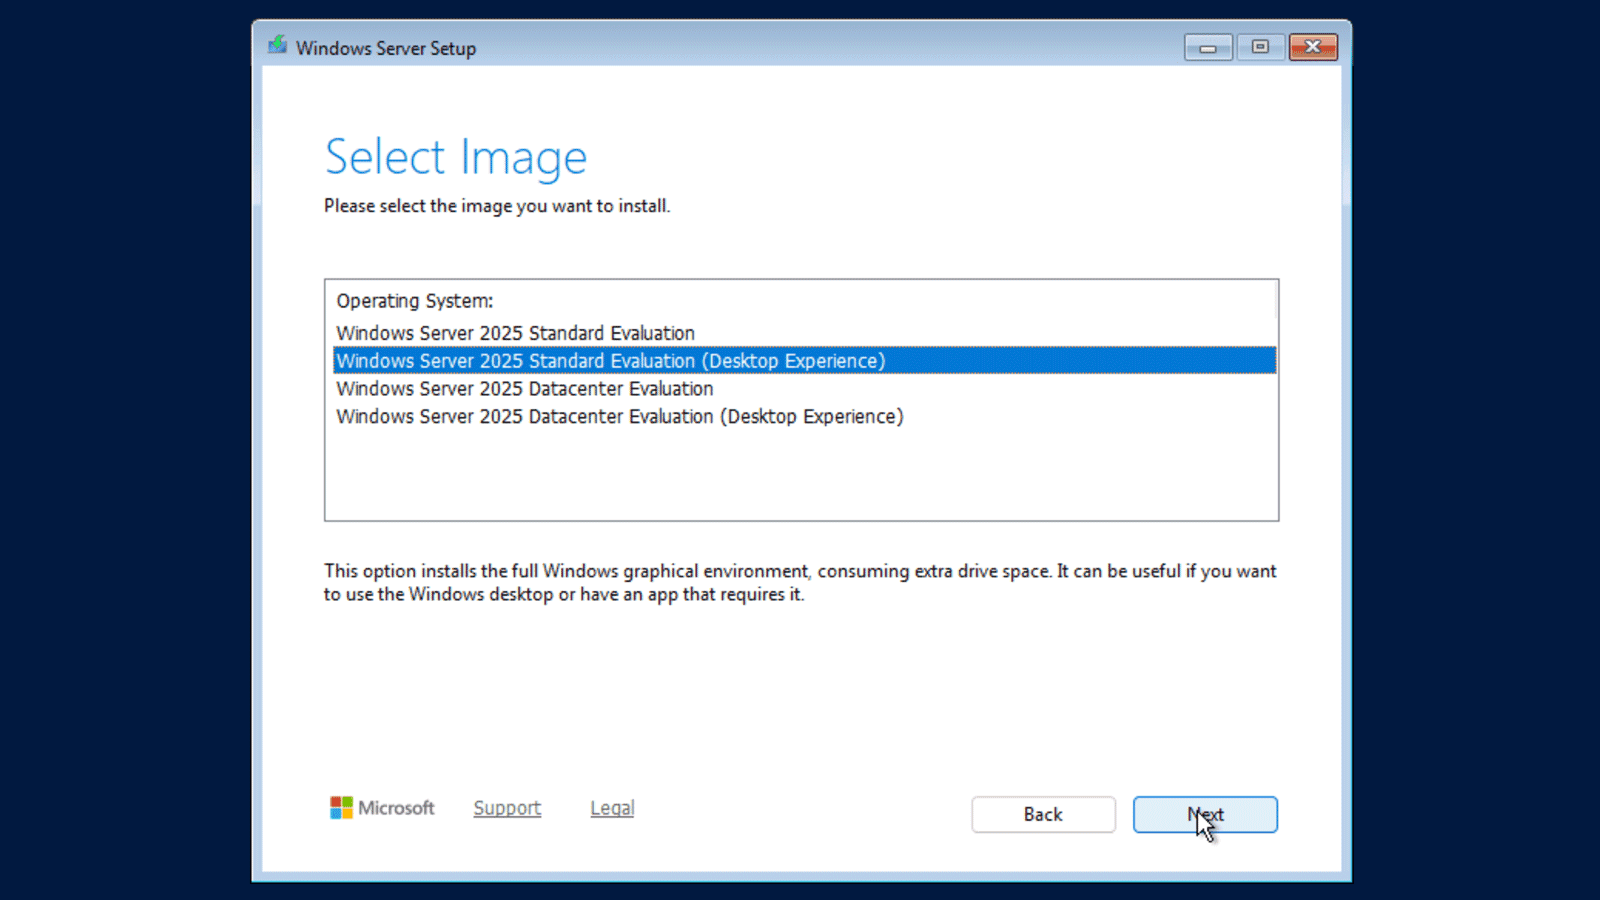
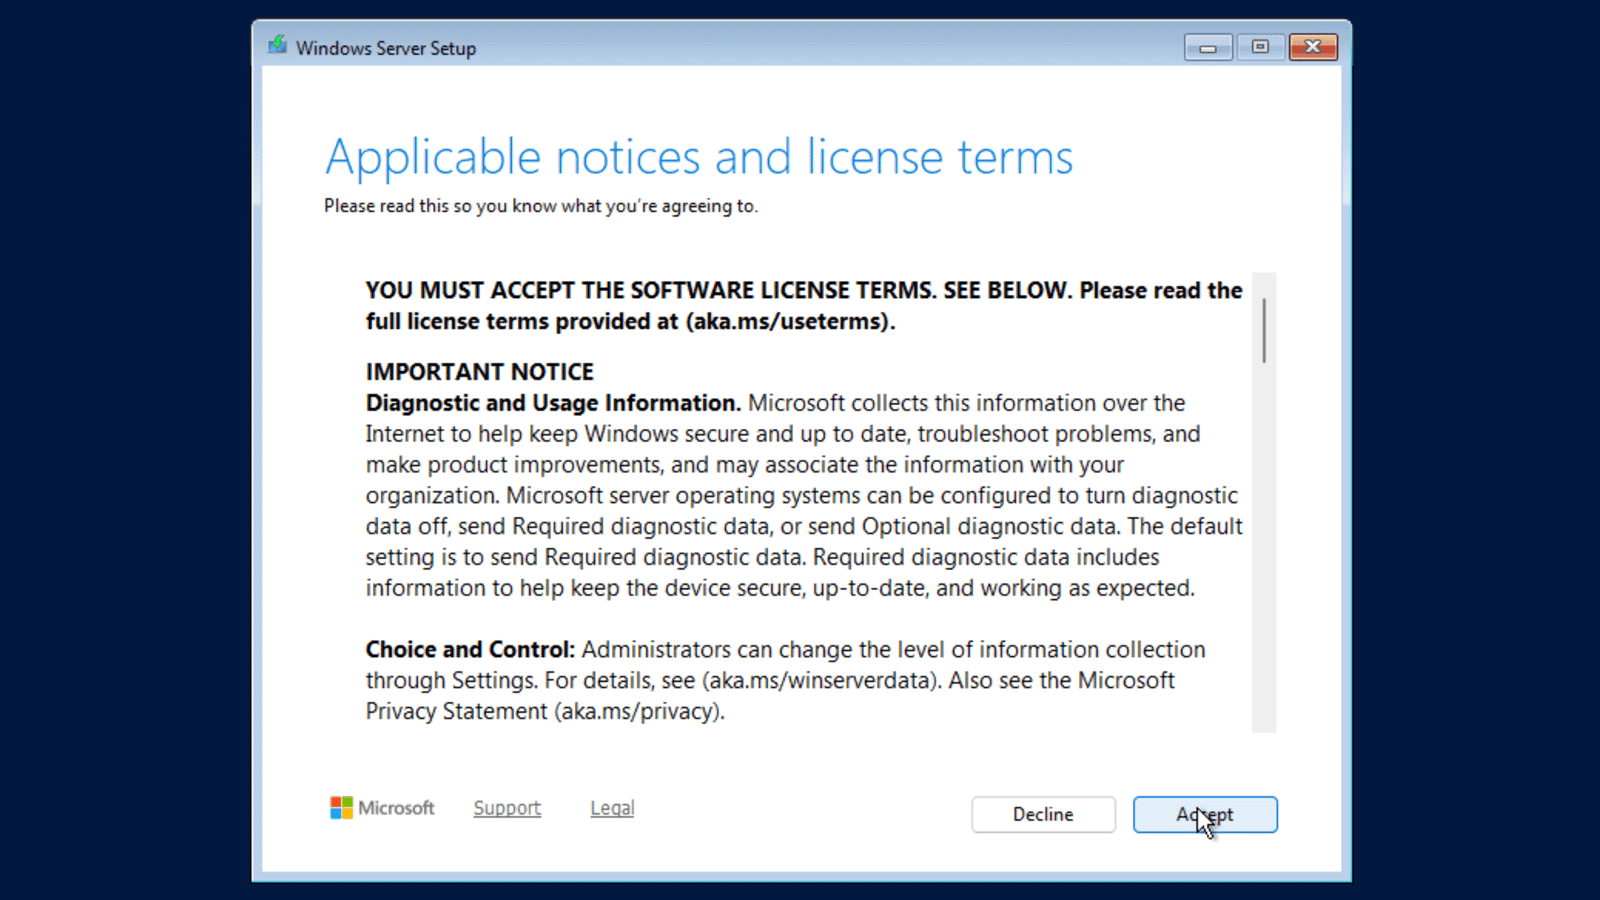
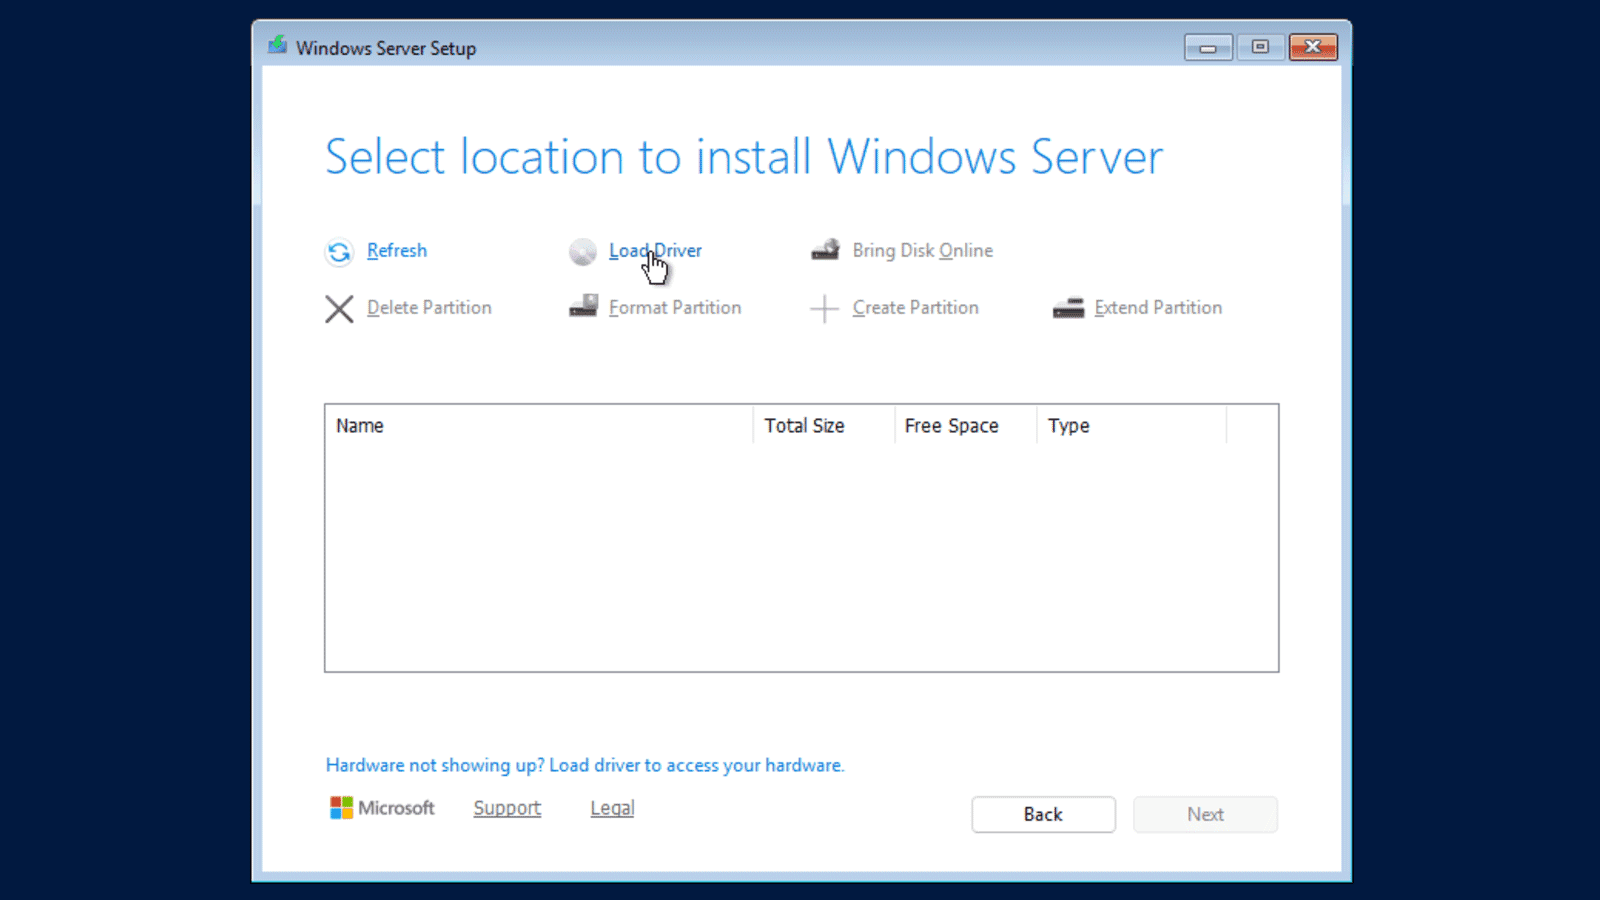
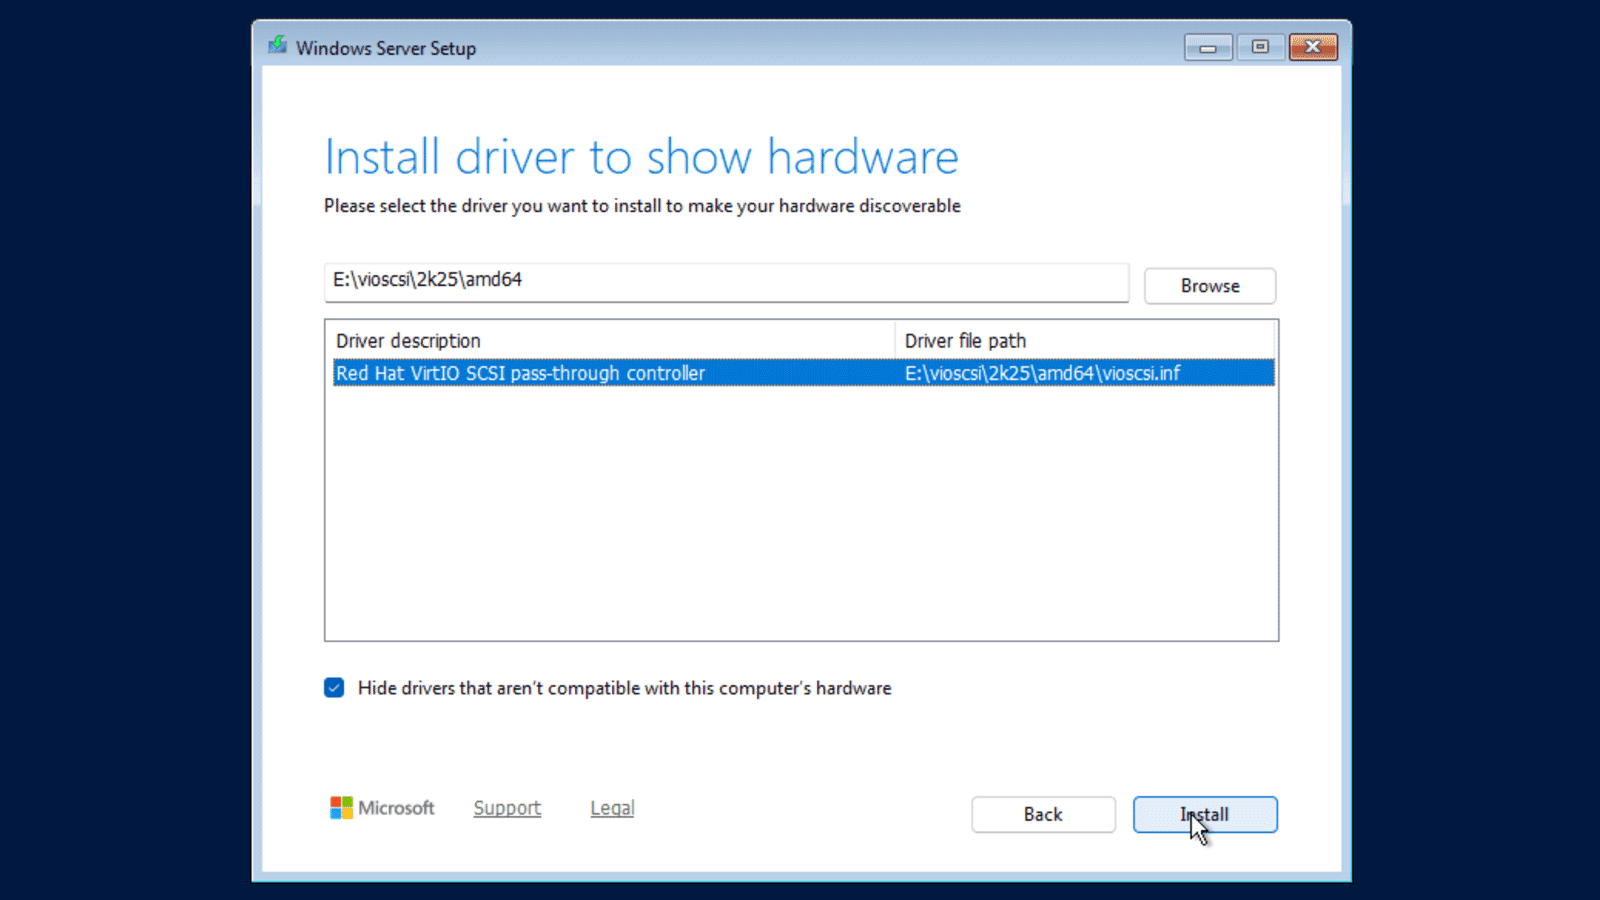
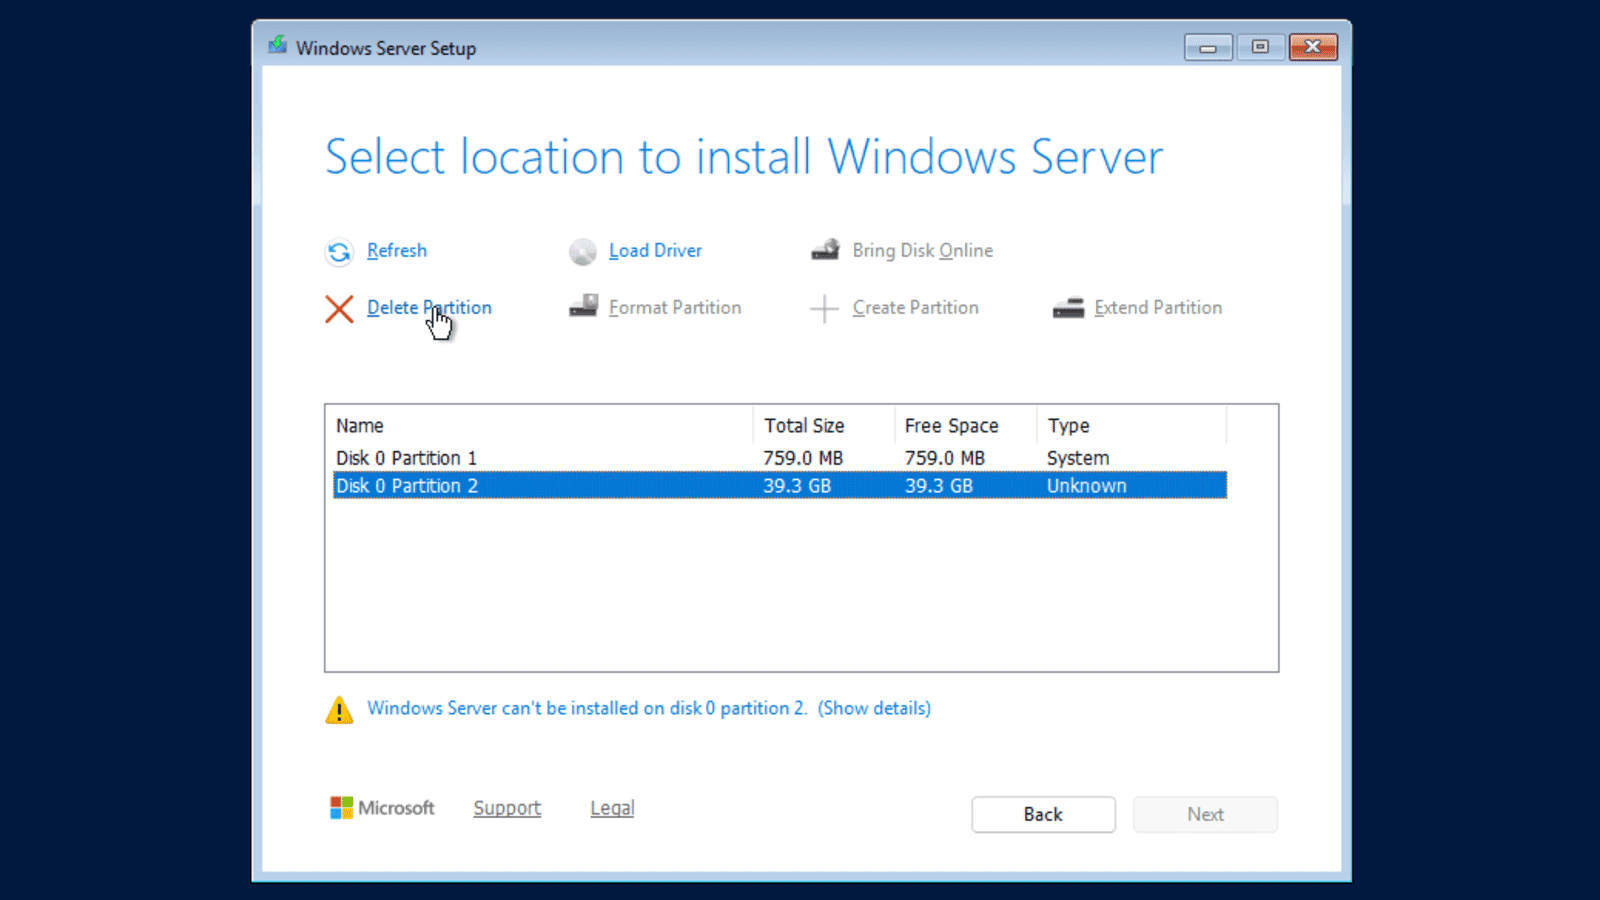
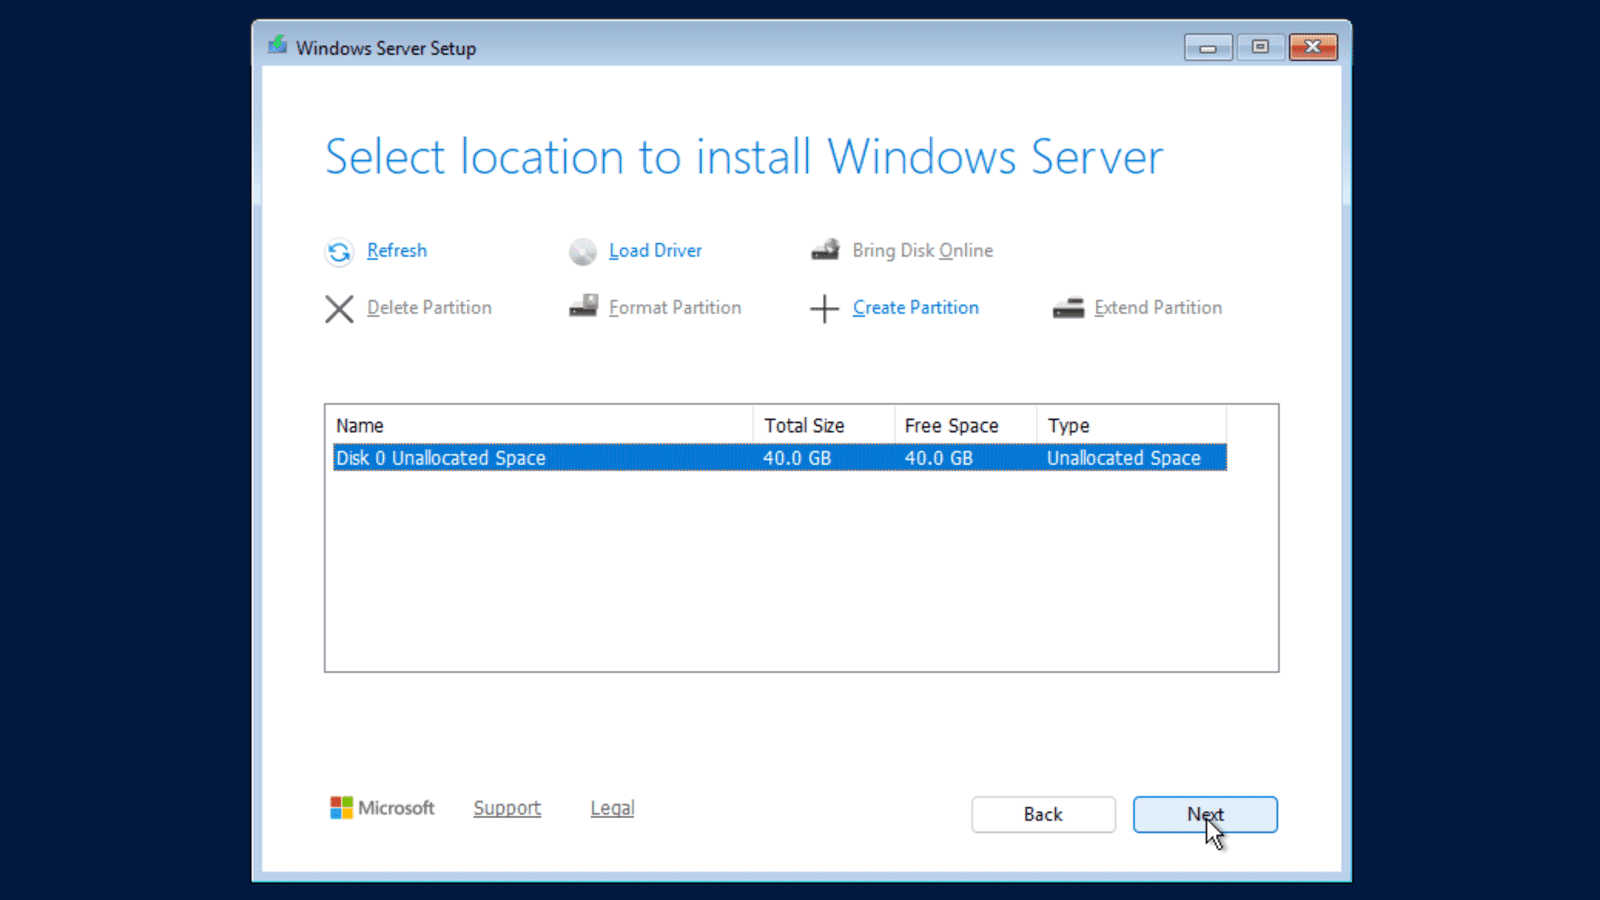
Making the disk visible: the driver triple jump
Work through Setup until the disk selection screen. Windows shows no disk there. That is not a fault: your seed's disk hangs off a VirtIO SCSI controller, and Windows ships no driver for it. The driver is on the Windows VirtIO ISO in the catalog.
Leave Setup where it is and switch to the panel:
- Mount Windows VirtIO. In the Manage tab, in the Mount ISO section, click Switch in the Windows VirtIO row. The media change takes effect while the machine is running, without a restart. Setup carries on undisturbed.
- Load the driver. Back in the console, click Load Driver, then Browse, and open the
vioscsifolder on the CD drive, usuallyE:, sinceD:holds the cloud-init medium cidata. Inside it, pick the subfolder for your Windows version and thenamd64, which for Windows Server 2025 meansvioscsi\2k25\amd64. Setup lists the Red Hat VirtIO SCSI pass-through controller; Install loads it. The disk list fills up. - Switch back to the Windows ISO. Return to the panel and click Switch in the row of your Windows ISO. This is the step that is easiest to forget, and the most important one: Setup reads from the medium throughout the entire installation. Continue with the driver ISO in the drive and it will fail. Then click Refresh in the console, select the disk and carry on.
The network stays dead during Setup, because its driver is missing too. That is irrelevant for the installation.
Remove the old partitioning
Setup now shows the disk, but with the partitions of your old system. It refuses to install onto them: Windows Server can't be installed on disk 0 partition 2. The Type column usually reads Unknown for those partitions, because Windows cannot make sense of the previous system's file system.
Select each existing partition and click Delete Partition until only Disk 0 Unallocated Space is left in the list. Pick that entry and click Next; Windows creates the partitions it needs by itself. From here on, the data of your old system is gone for good.
Finish the installation
Setup recaps your choices once more, and Install starts the installation. Windows restarts itself several times along the way; the mounted ISO does not get in the way, the installer correctly falls through to the disk. At the end you set the Administrator password. Choose it carefully and store it safely, because the cloud cannot reset it.
At the sign-in screen Windows asks for Ctrl+Alt+Del. Your own operating system intercepts that combination, so reach for Send CtrlAltDel in the console again.
Install network drivers and guest tools
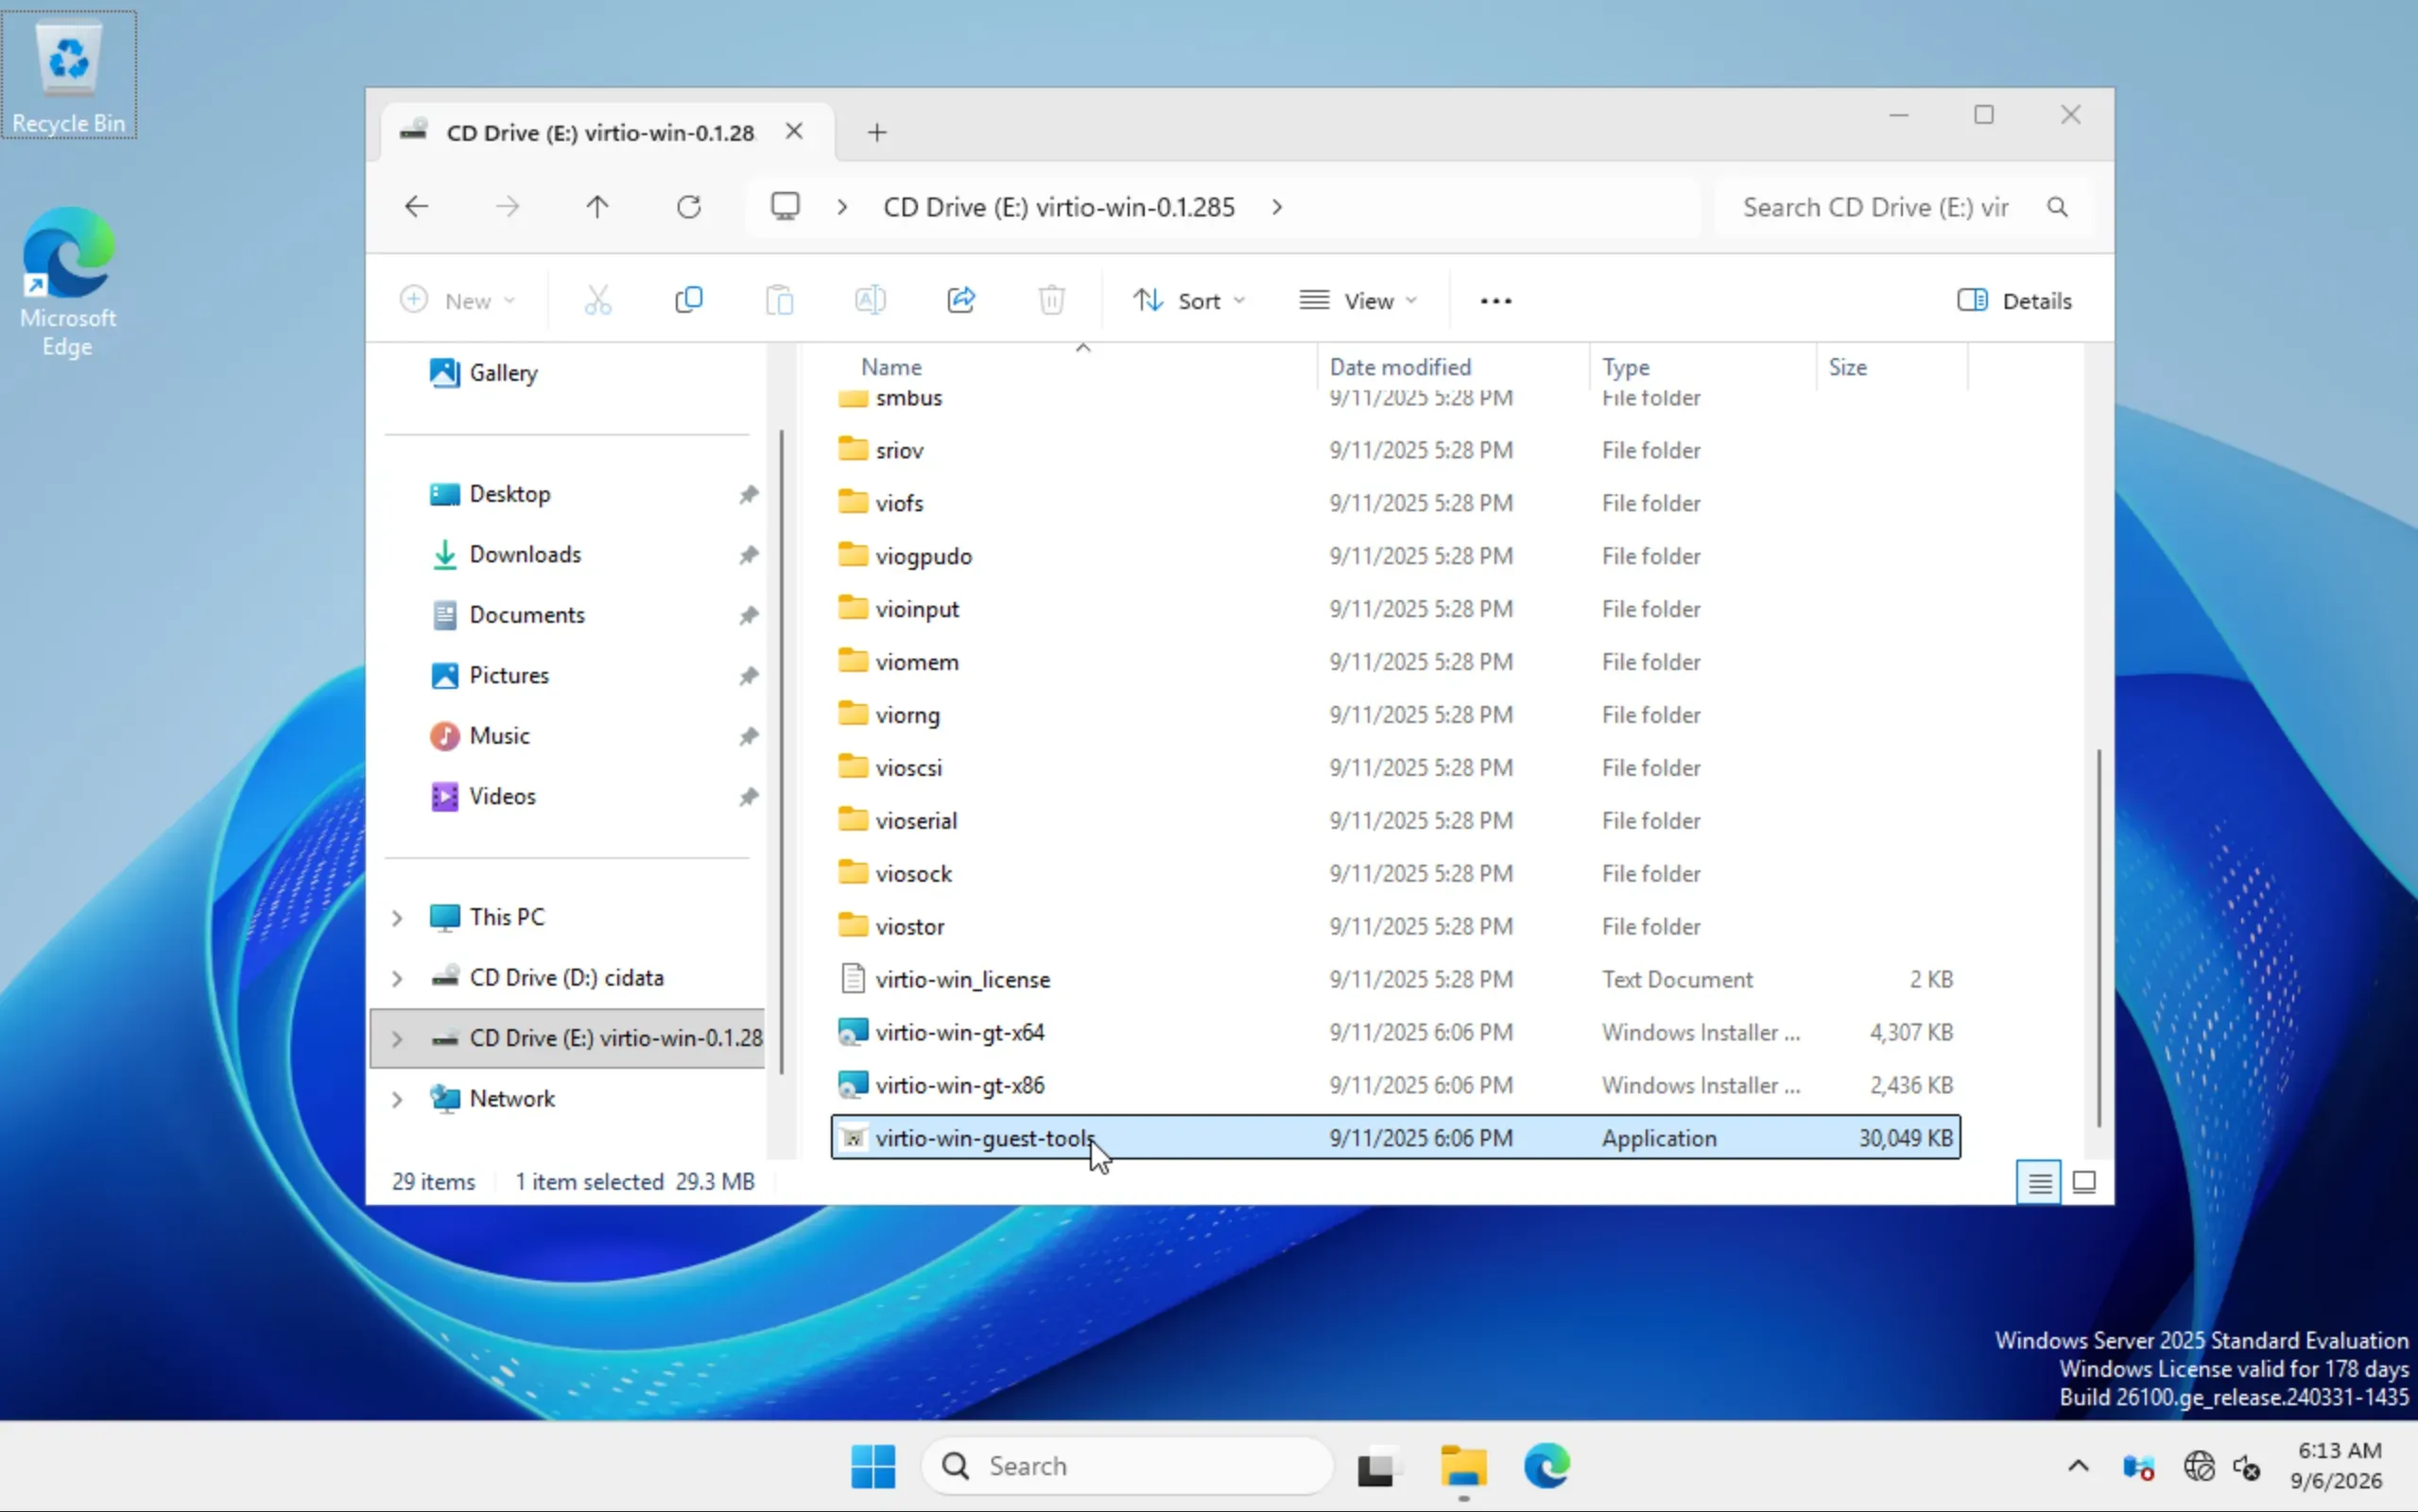
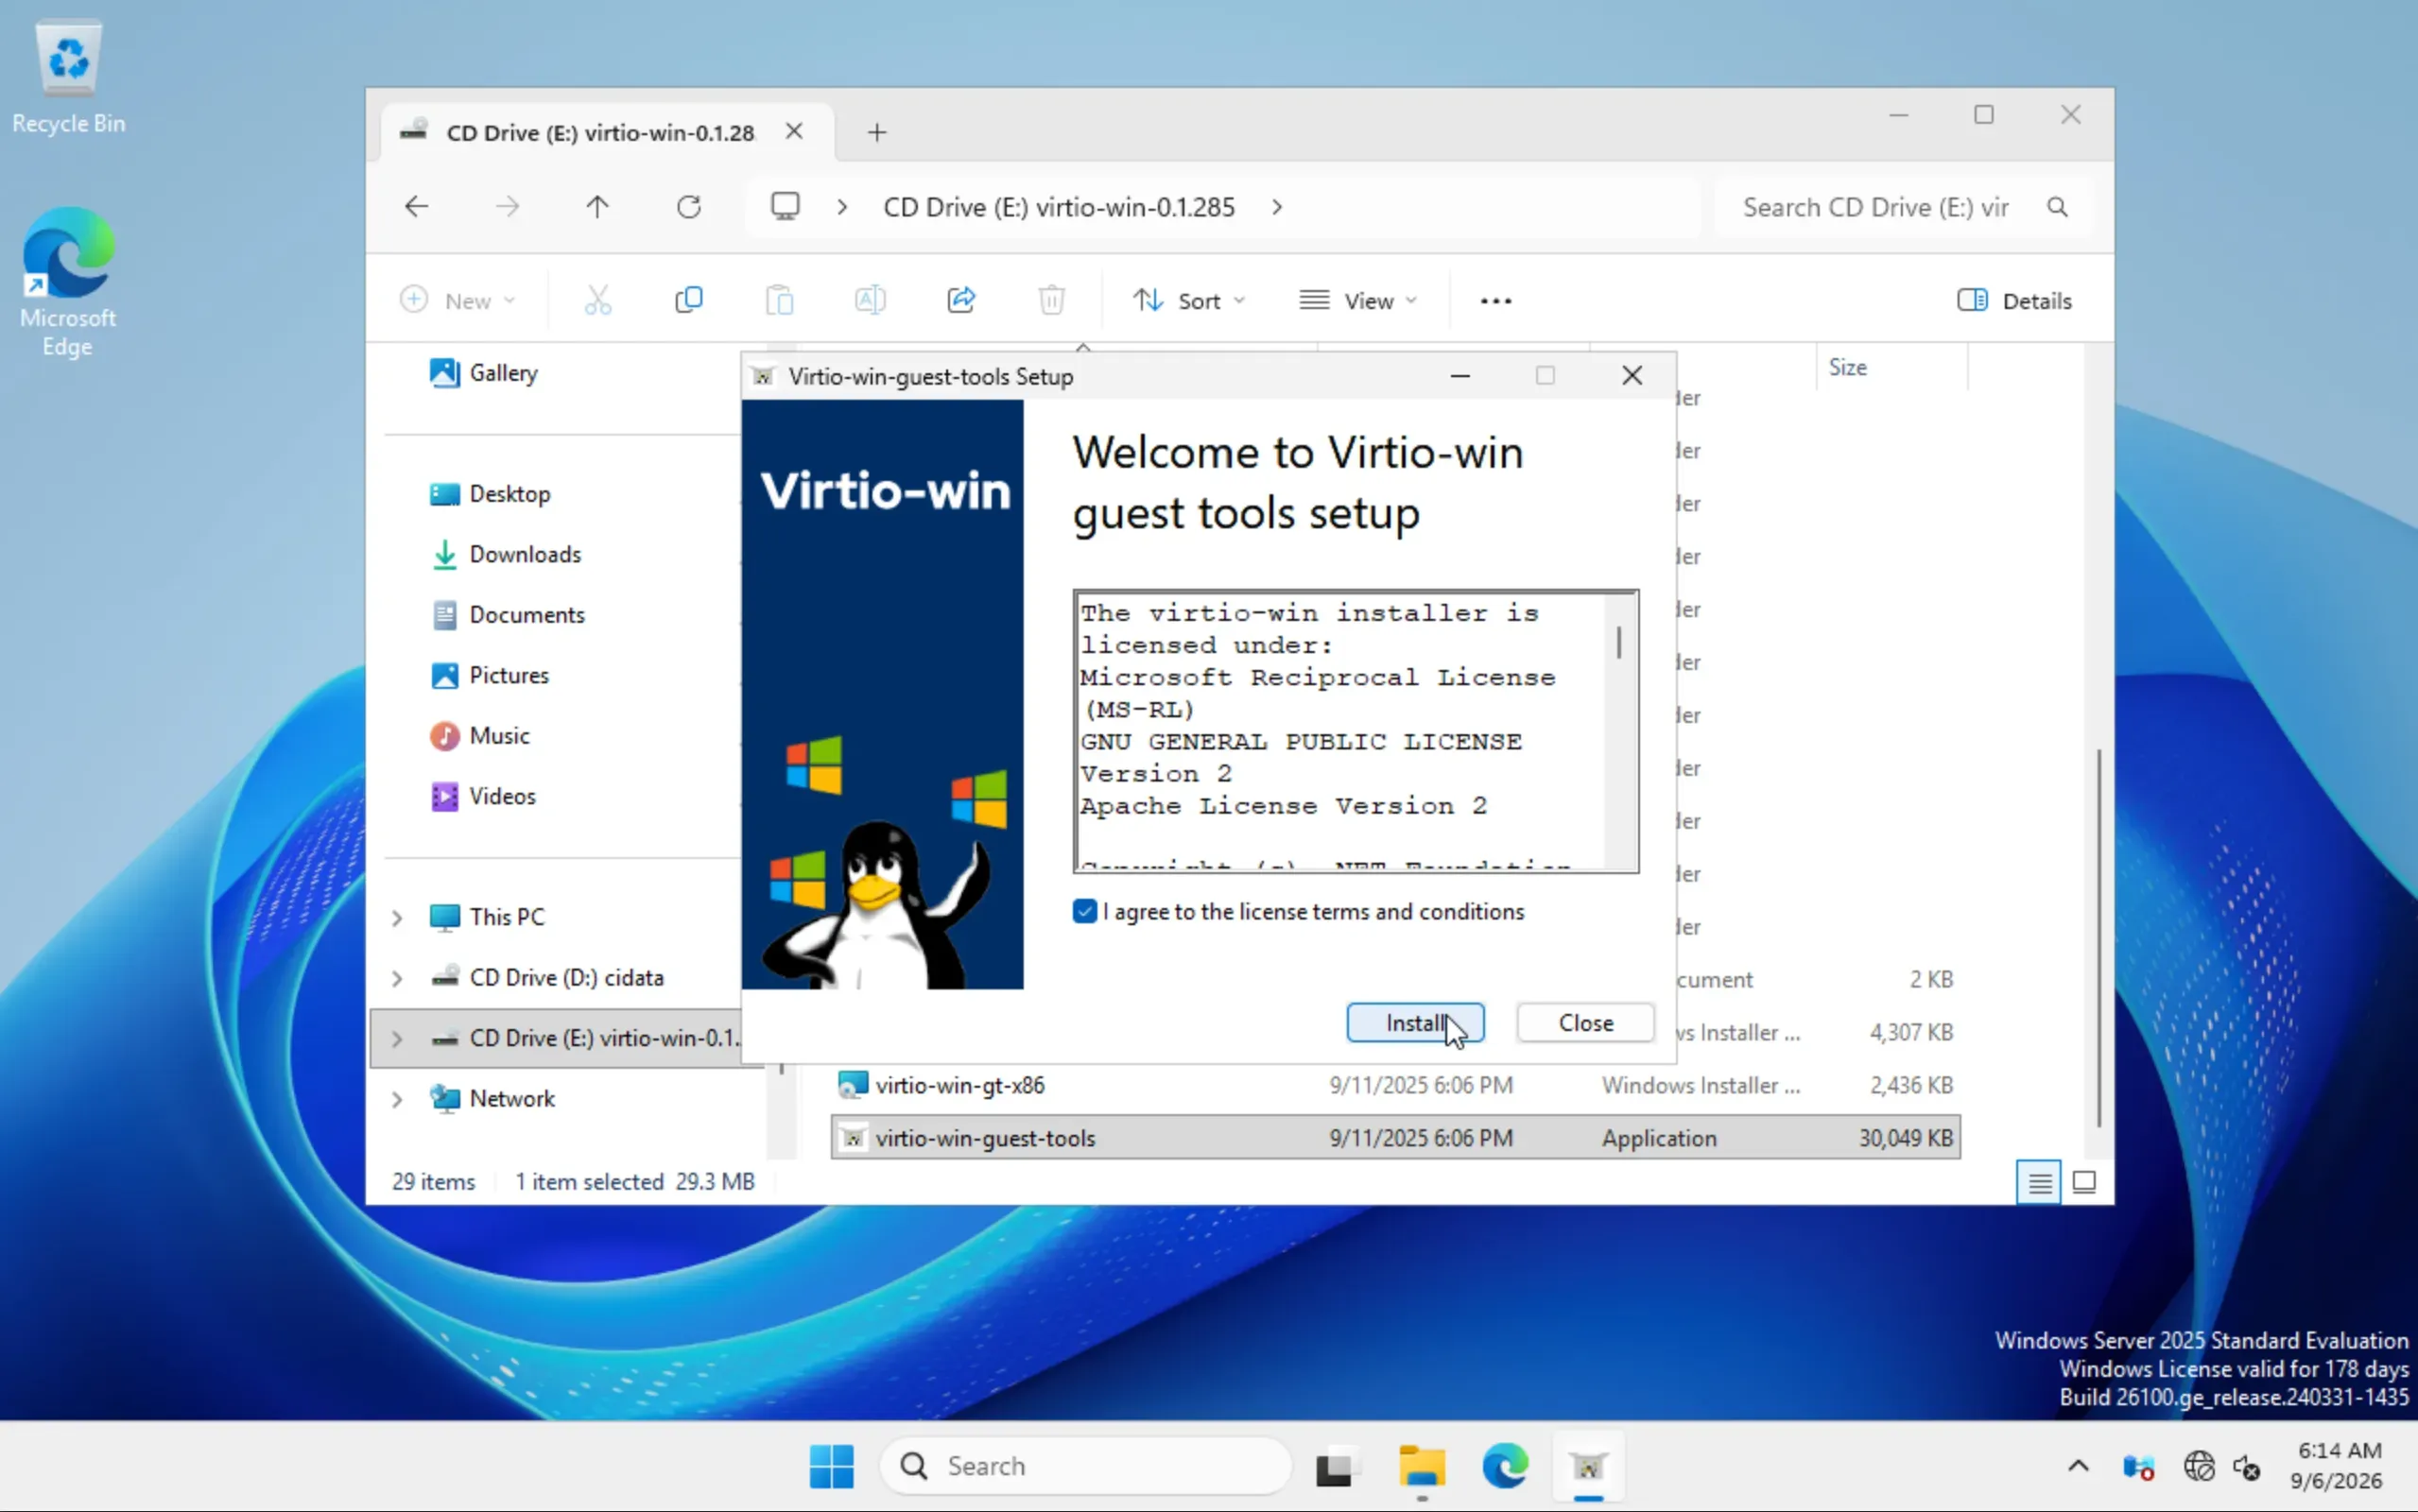
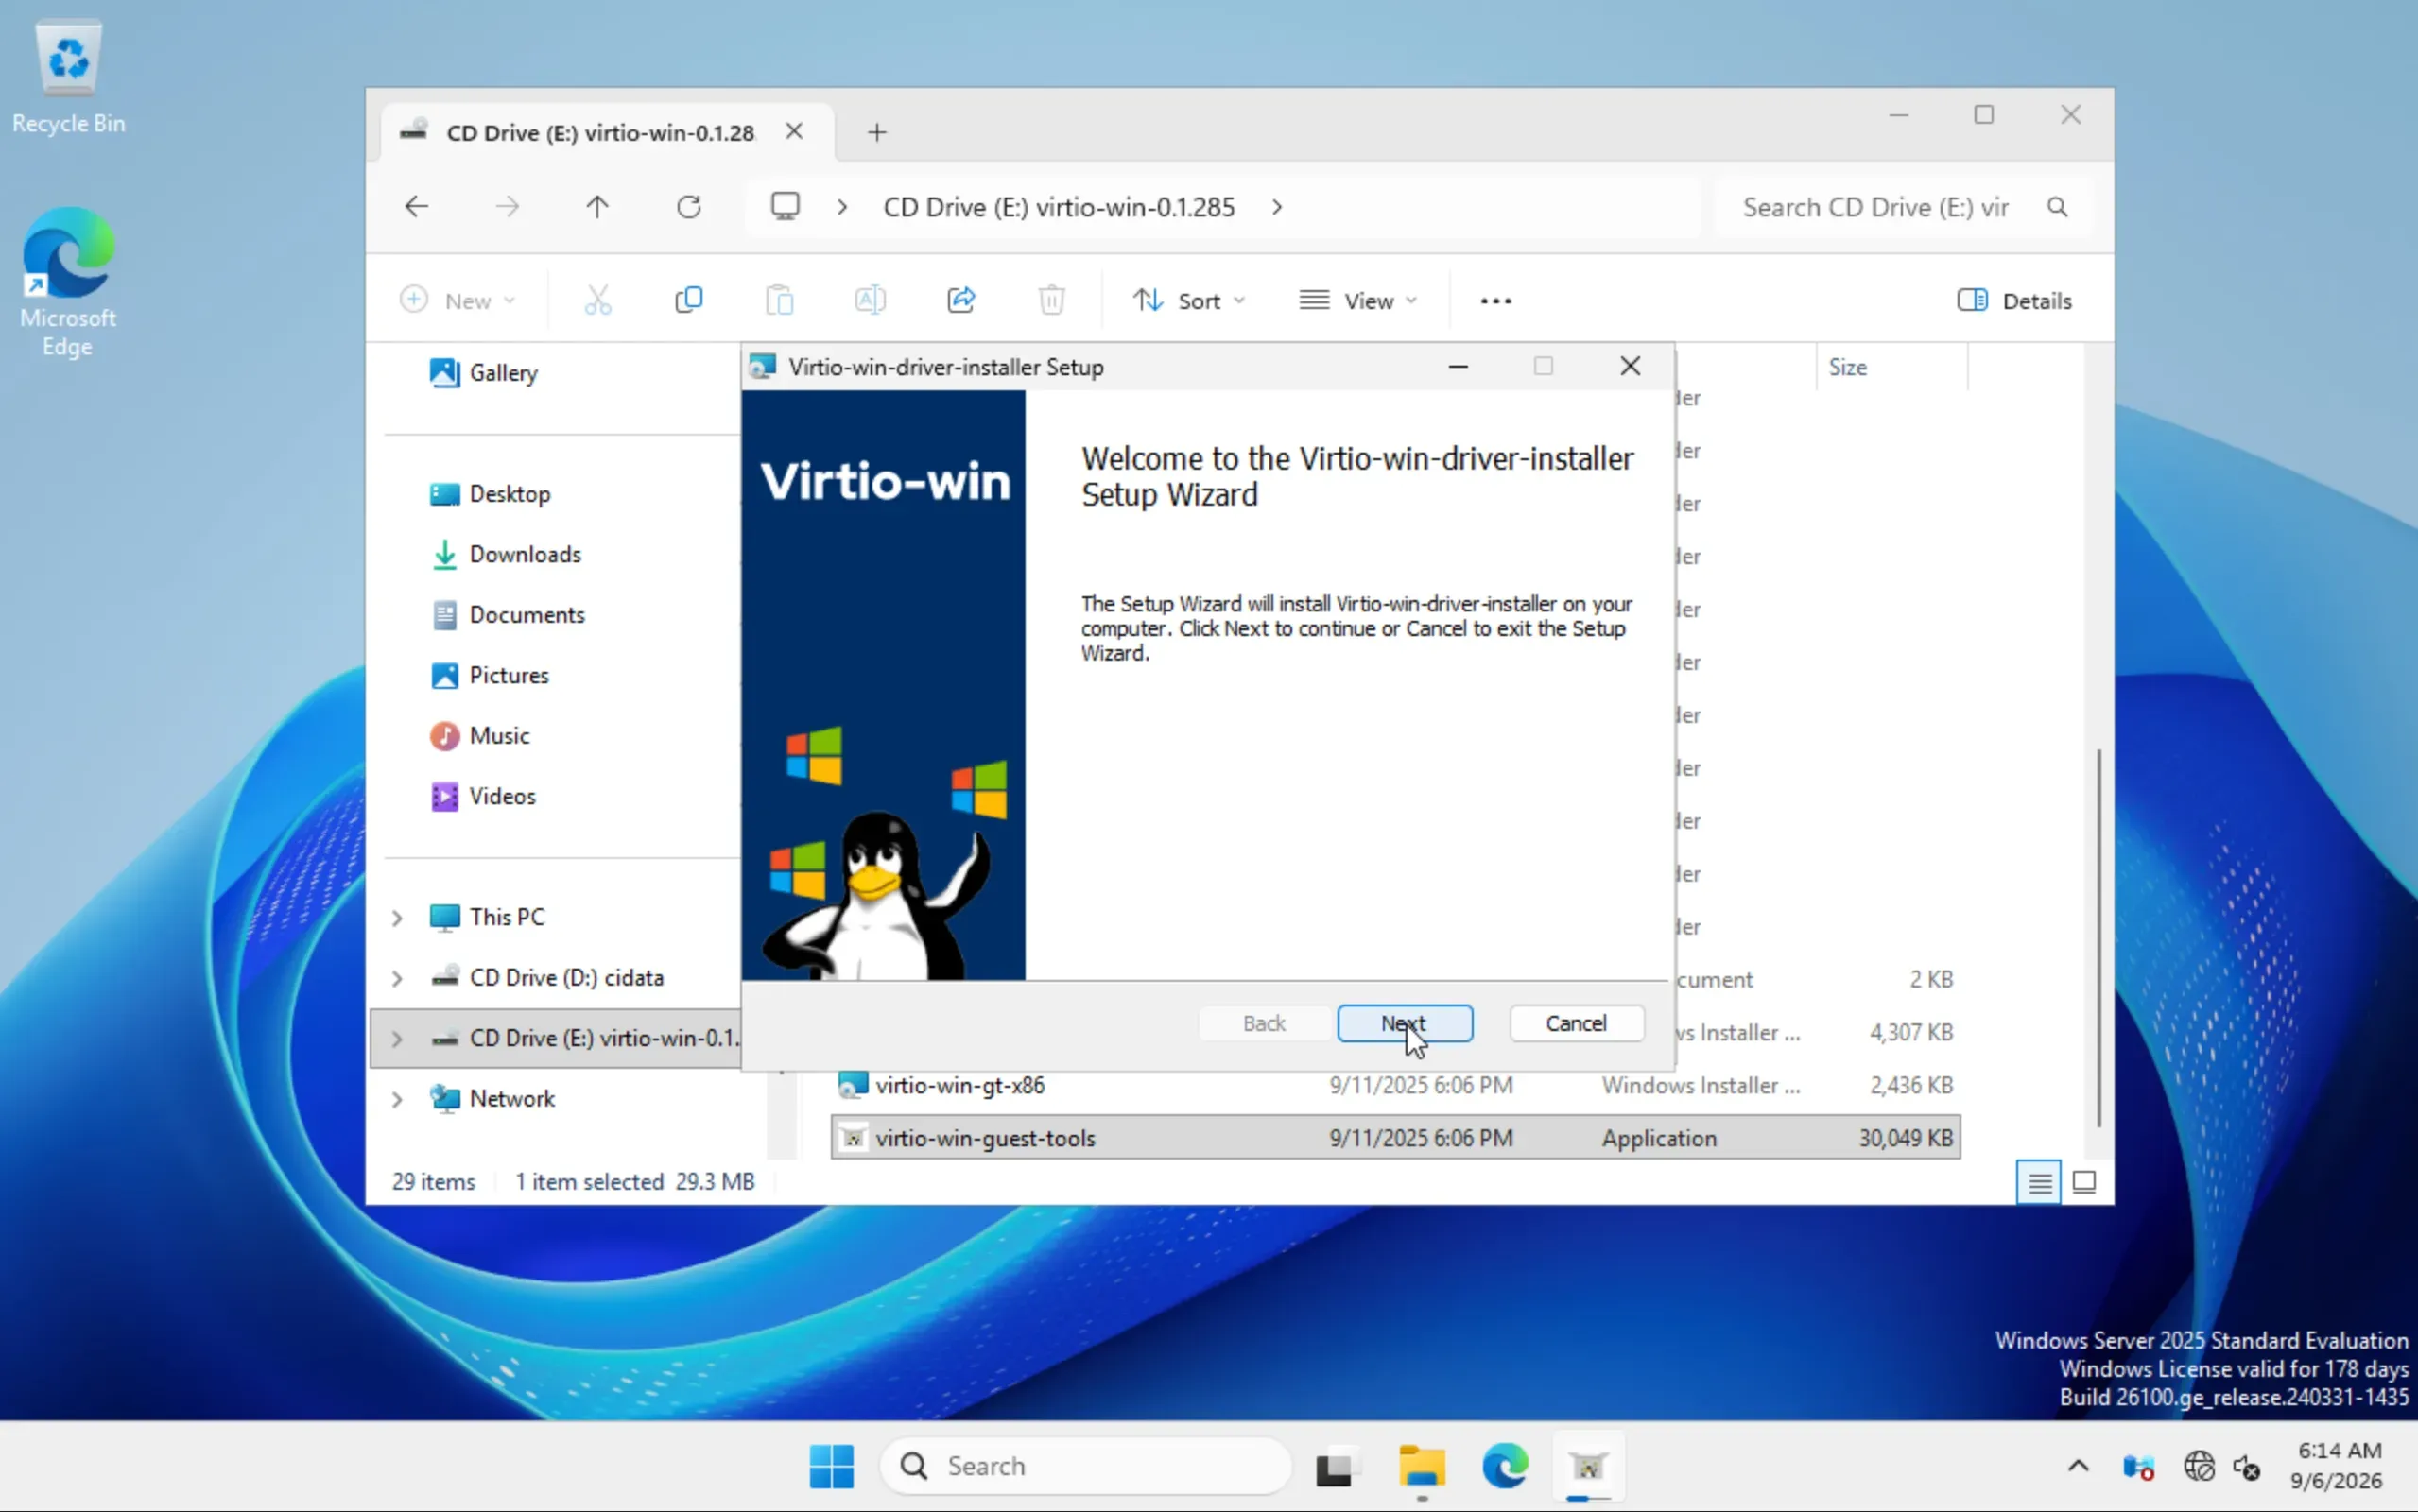
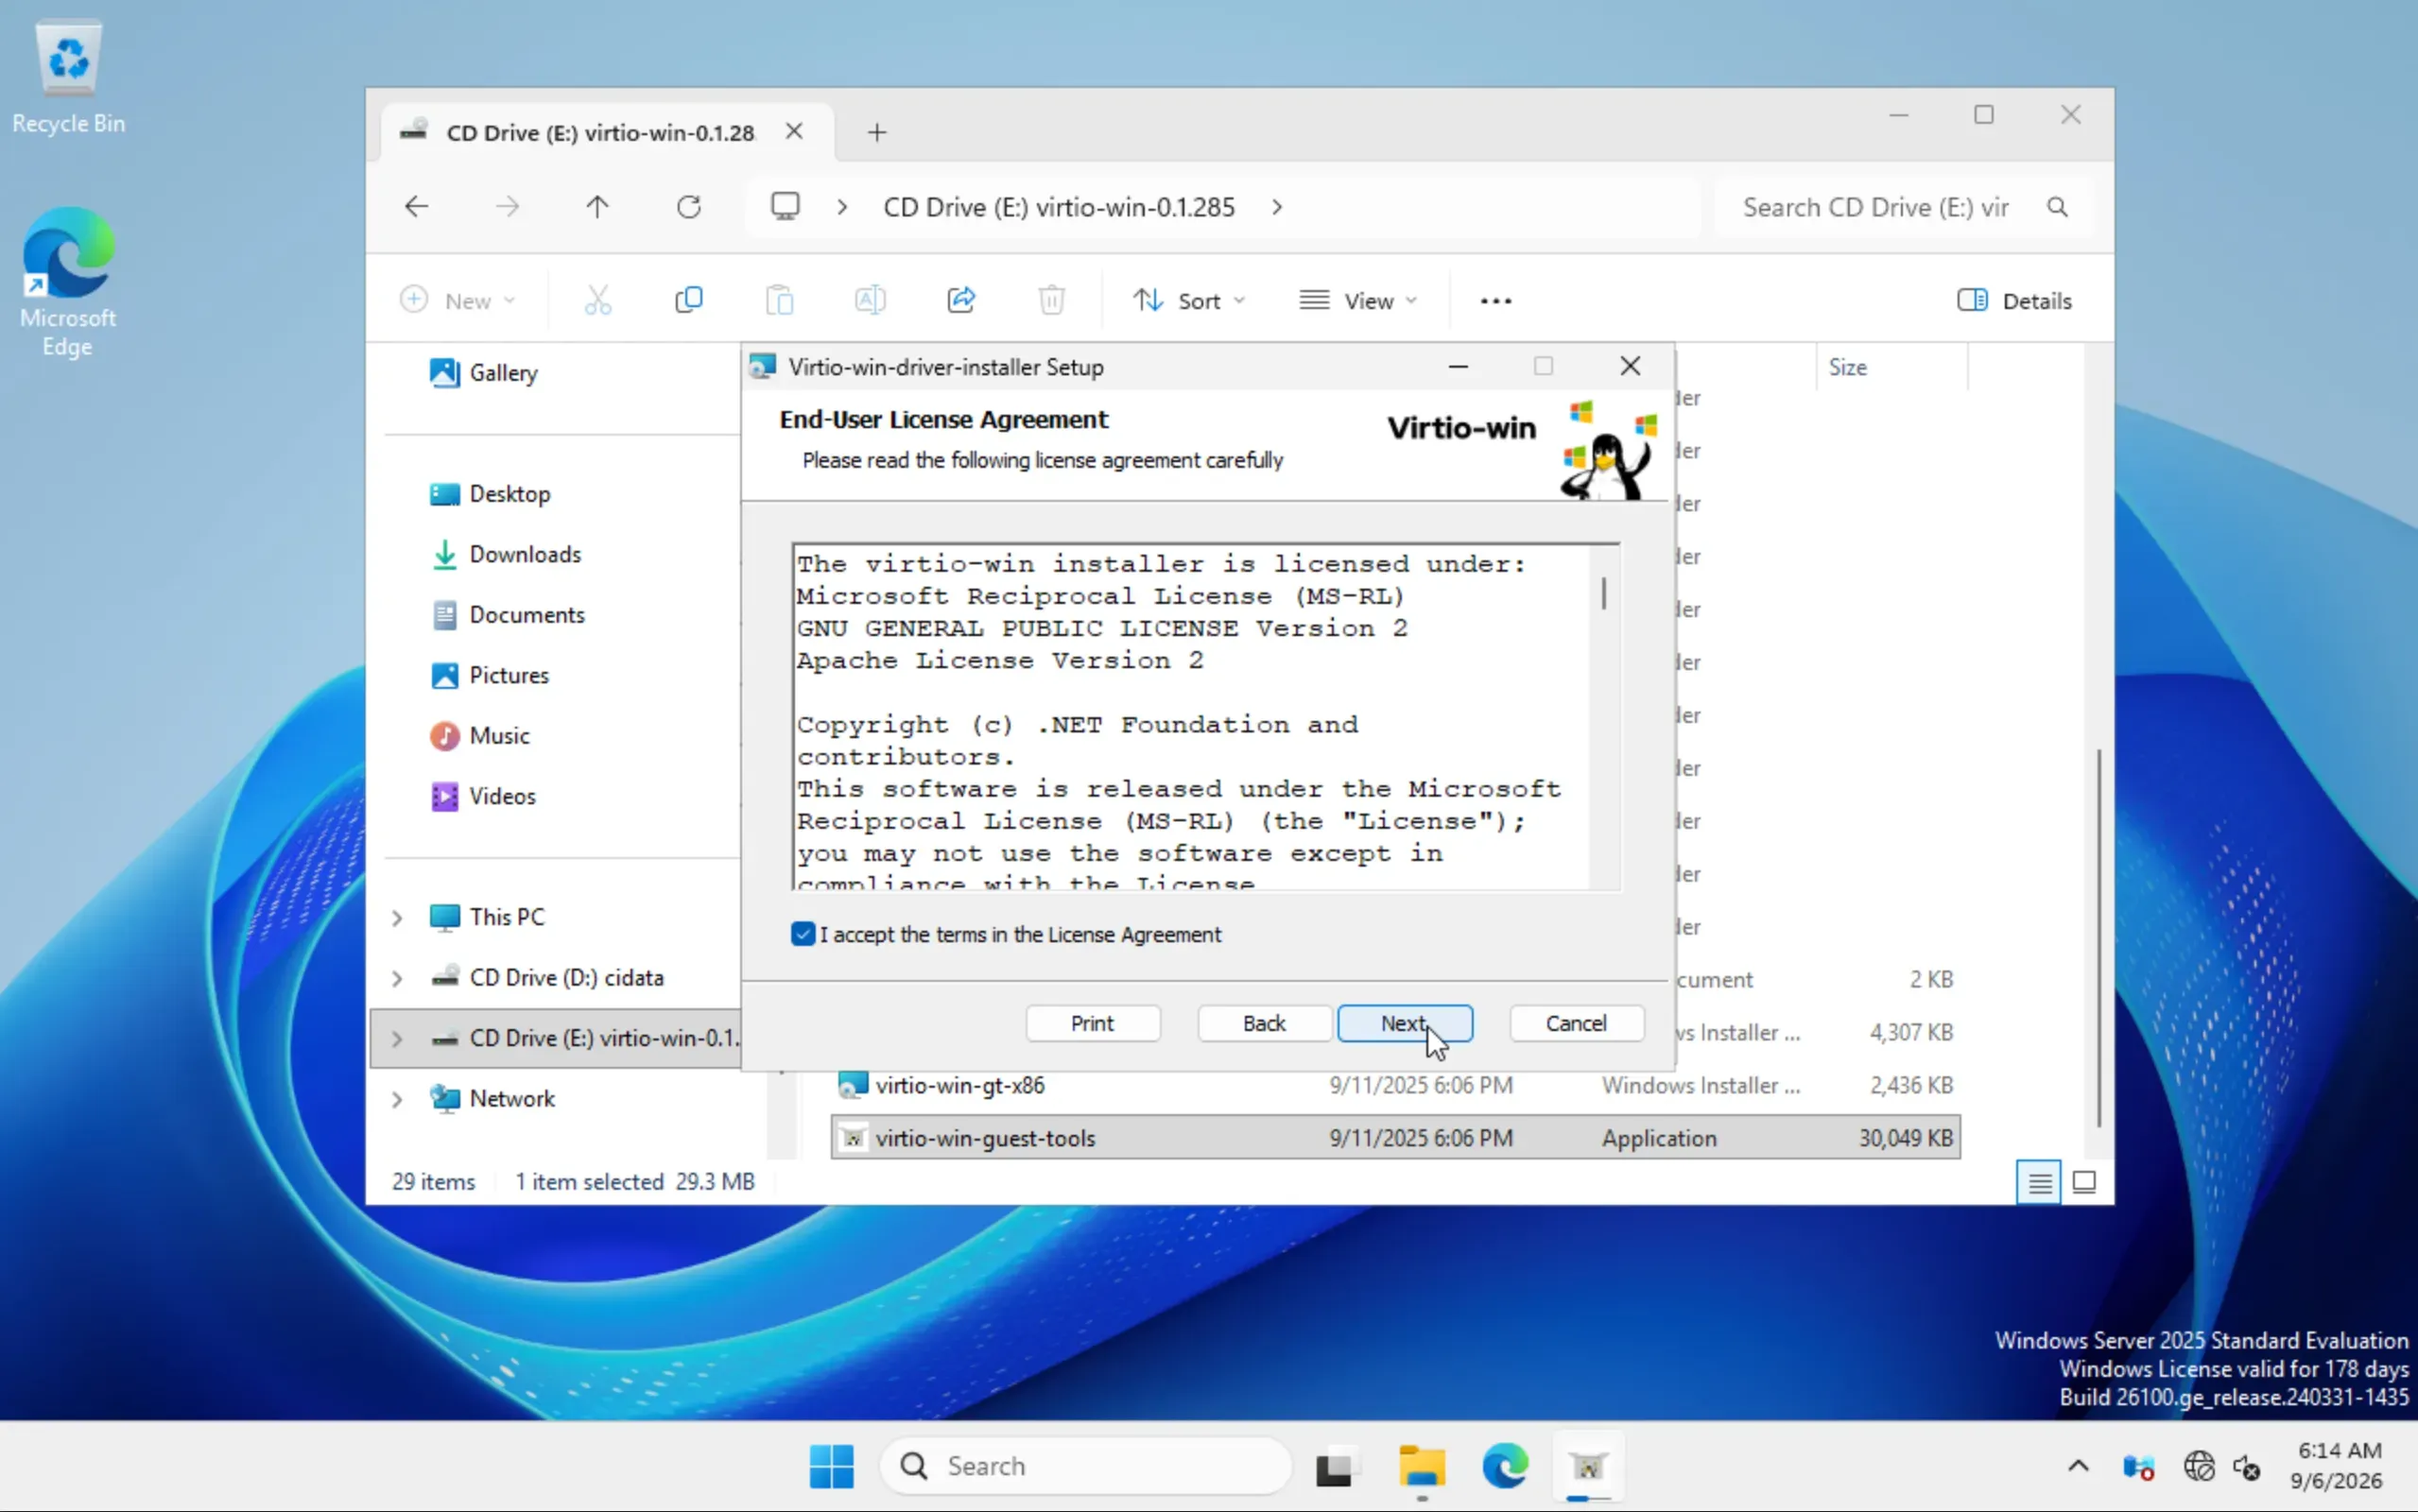
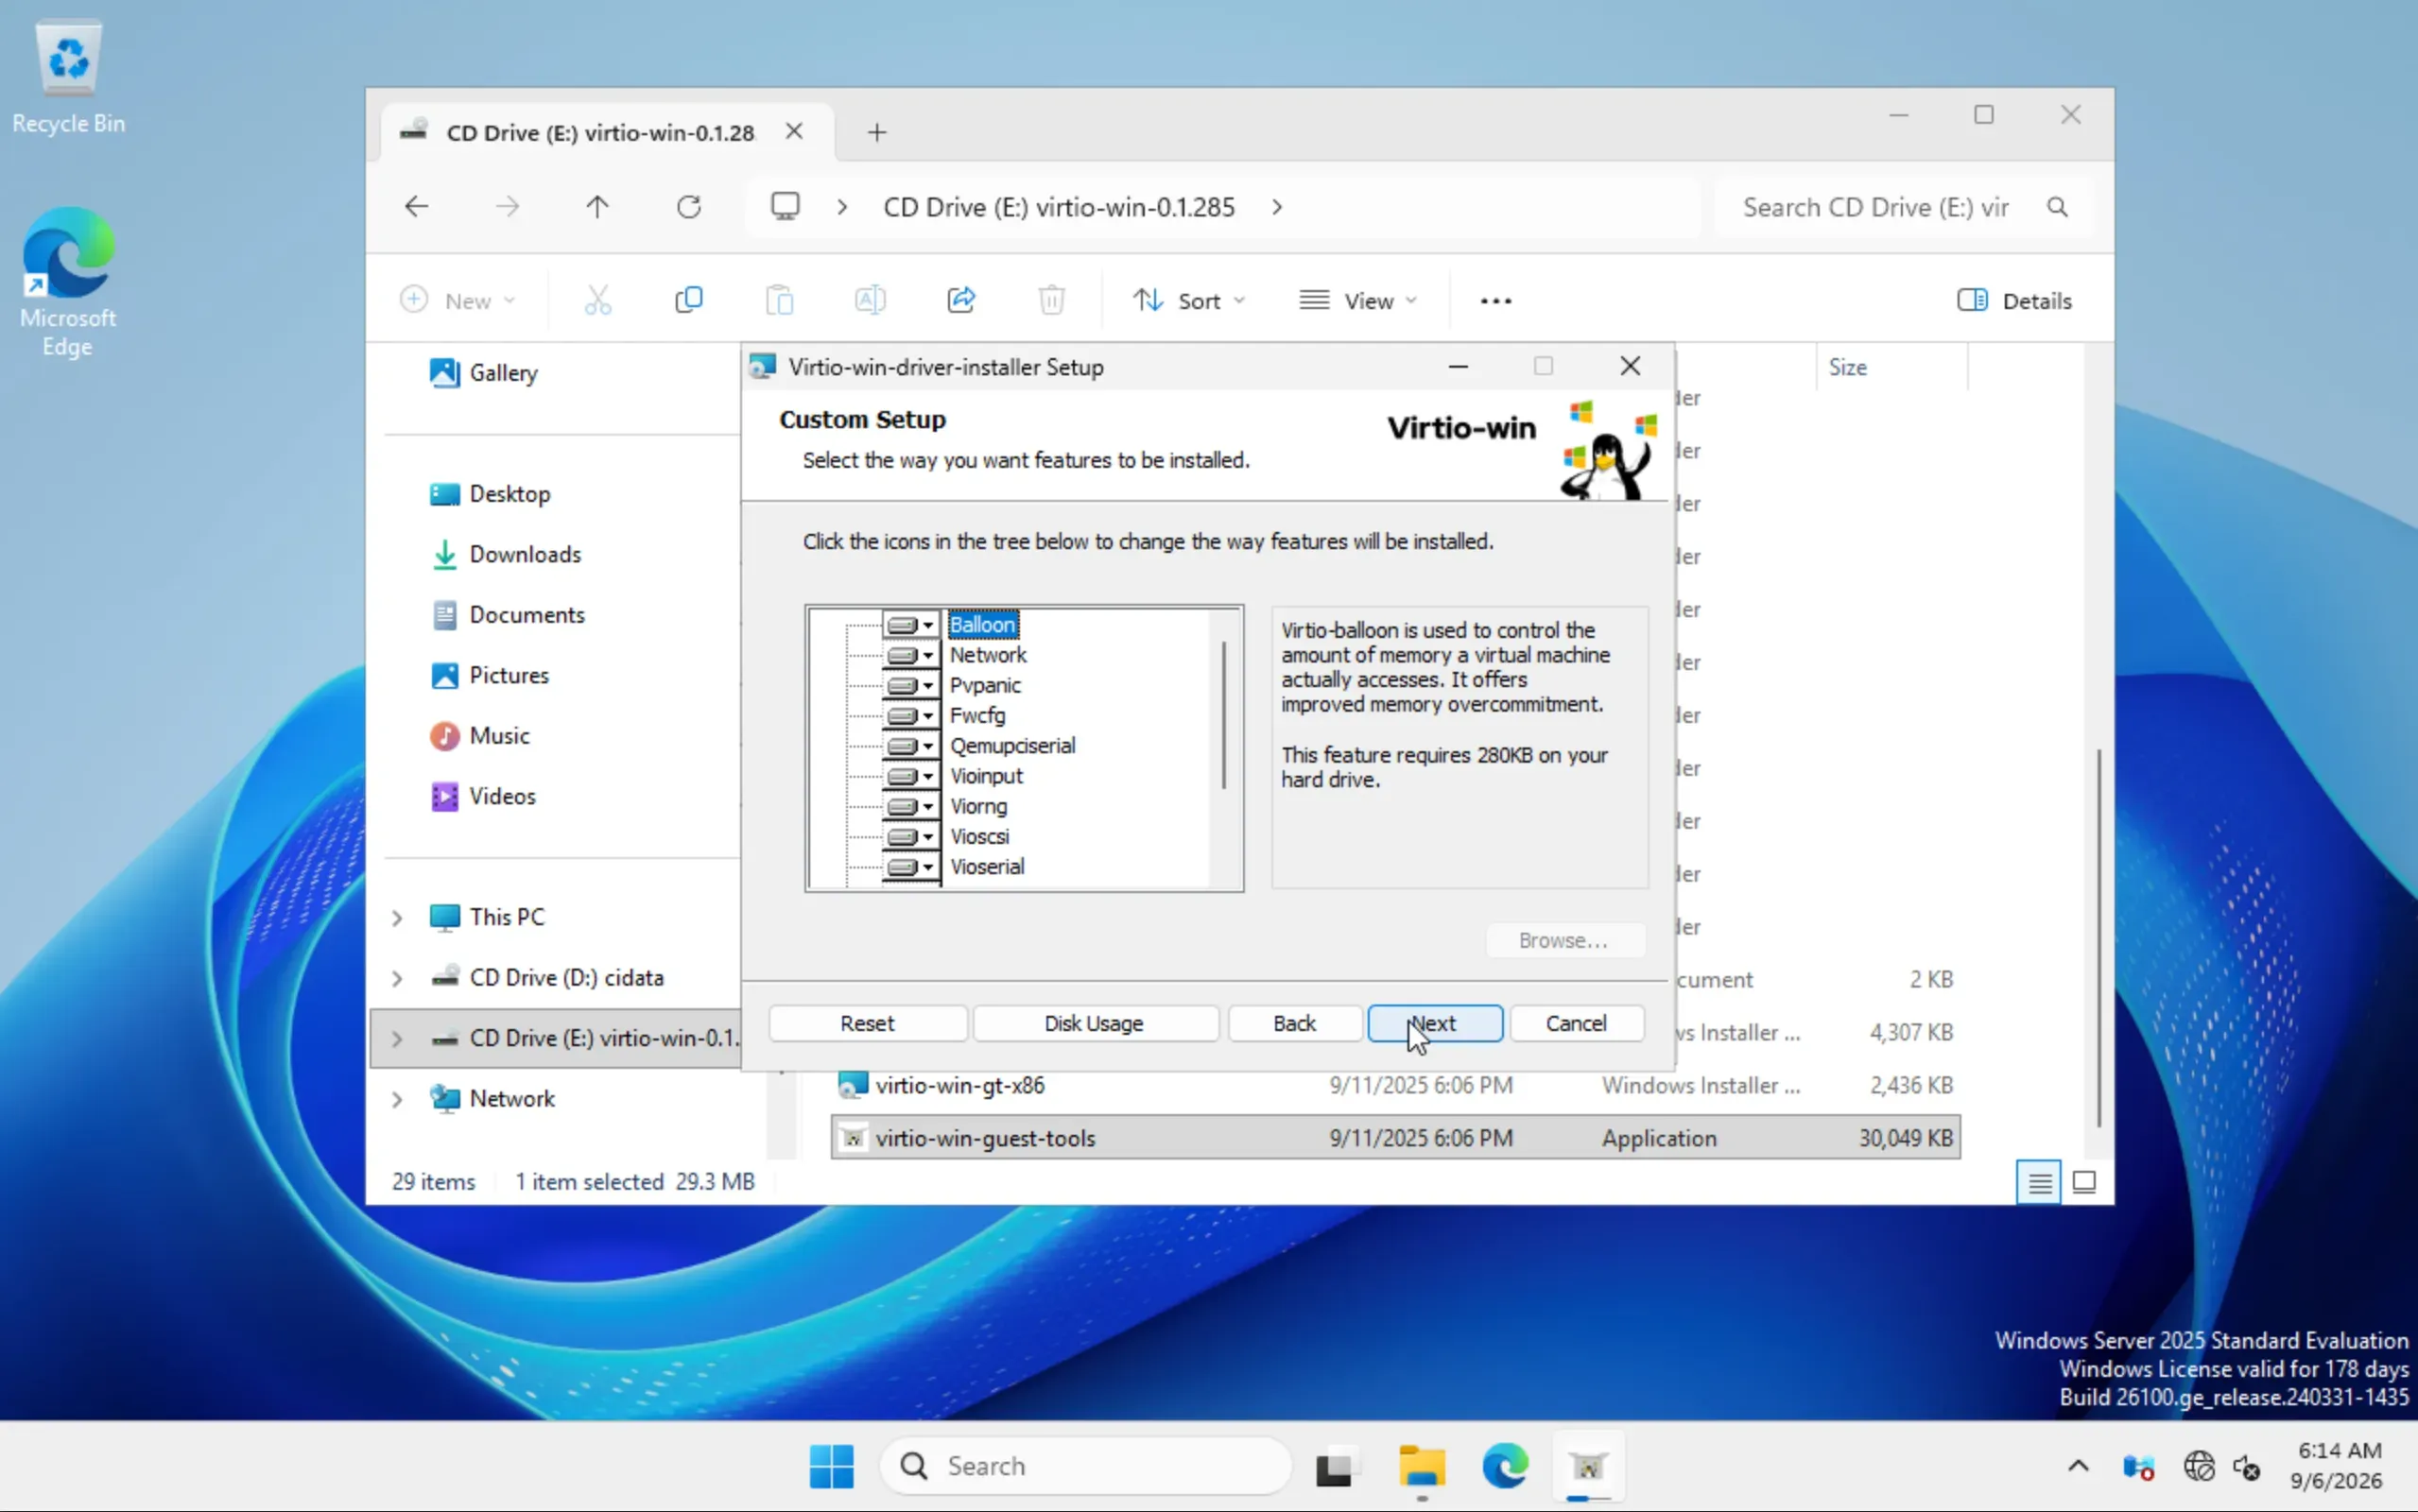
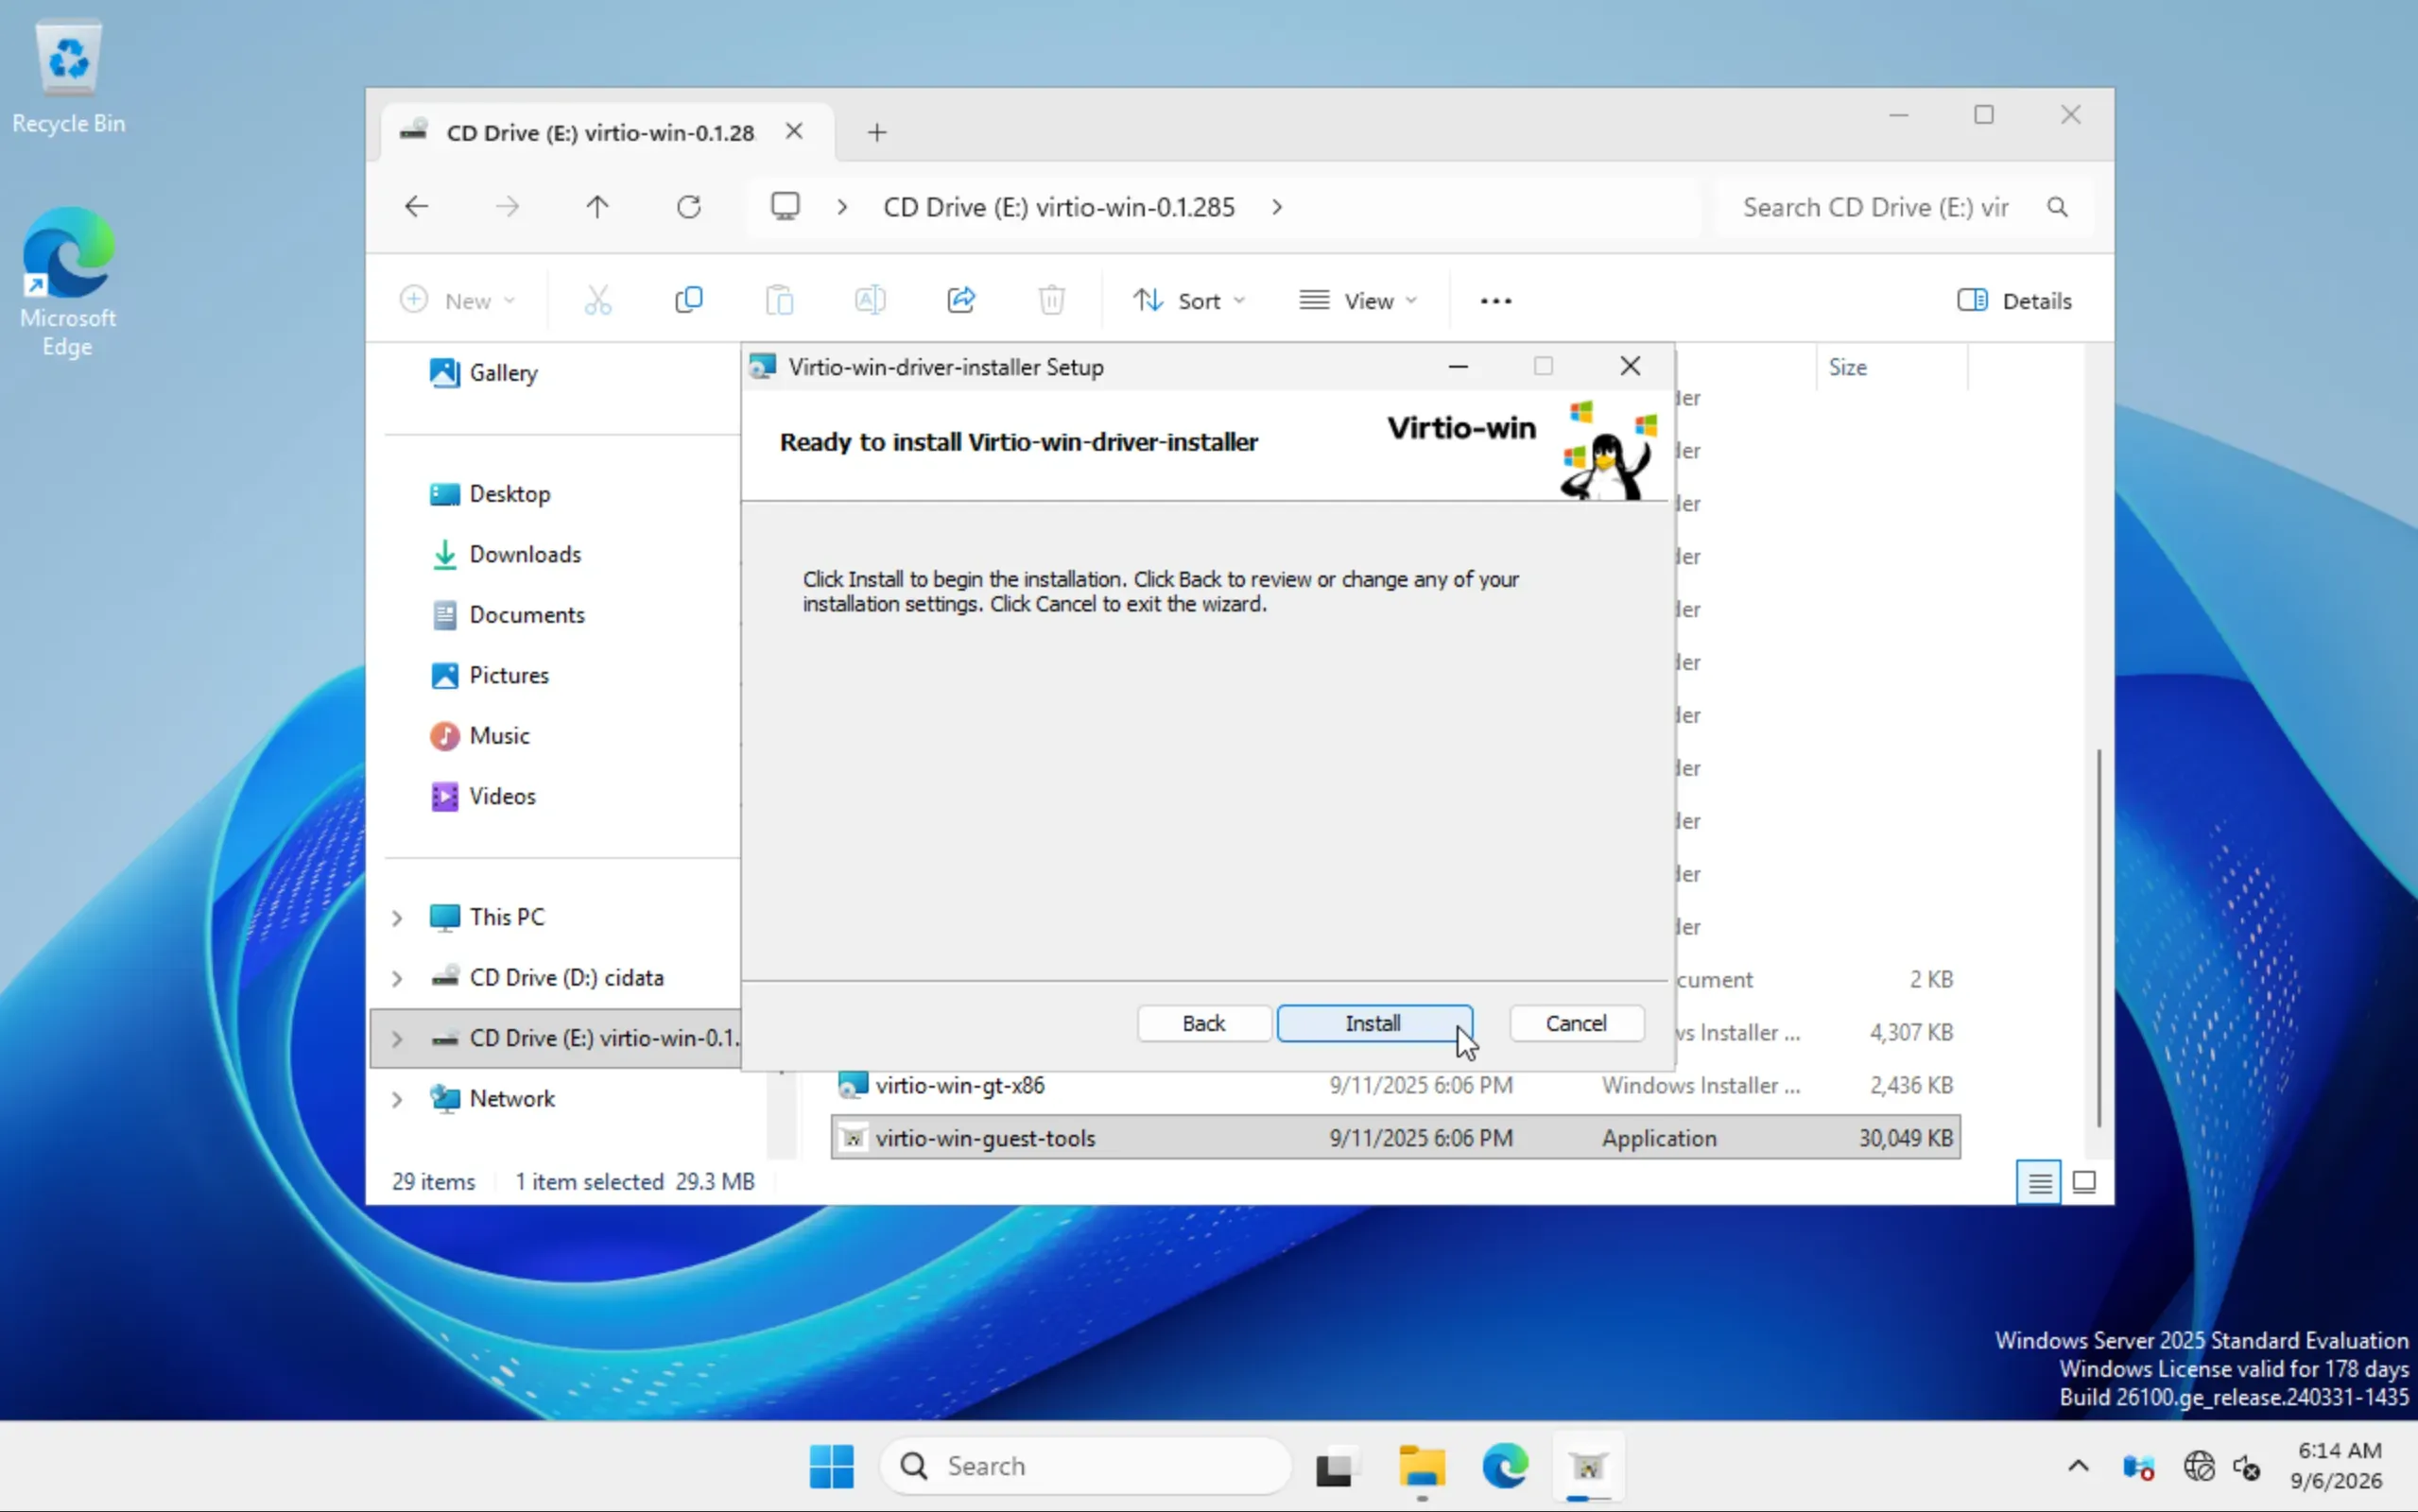
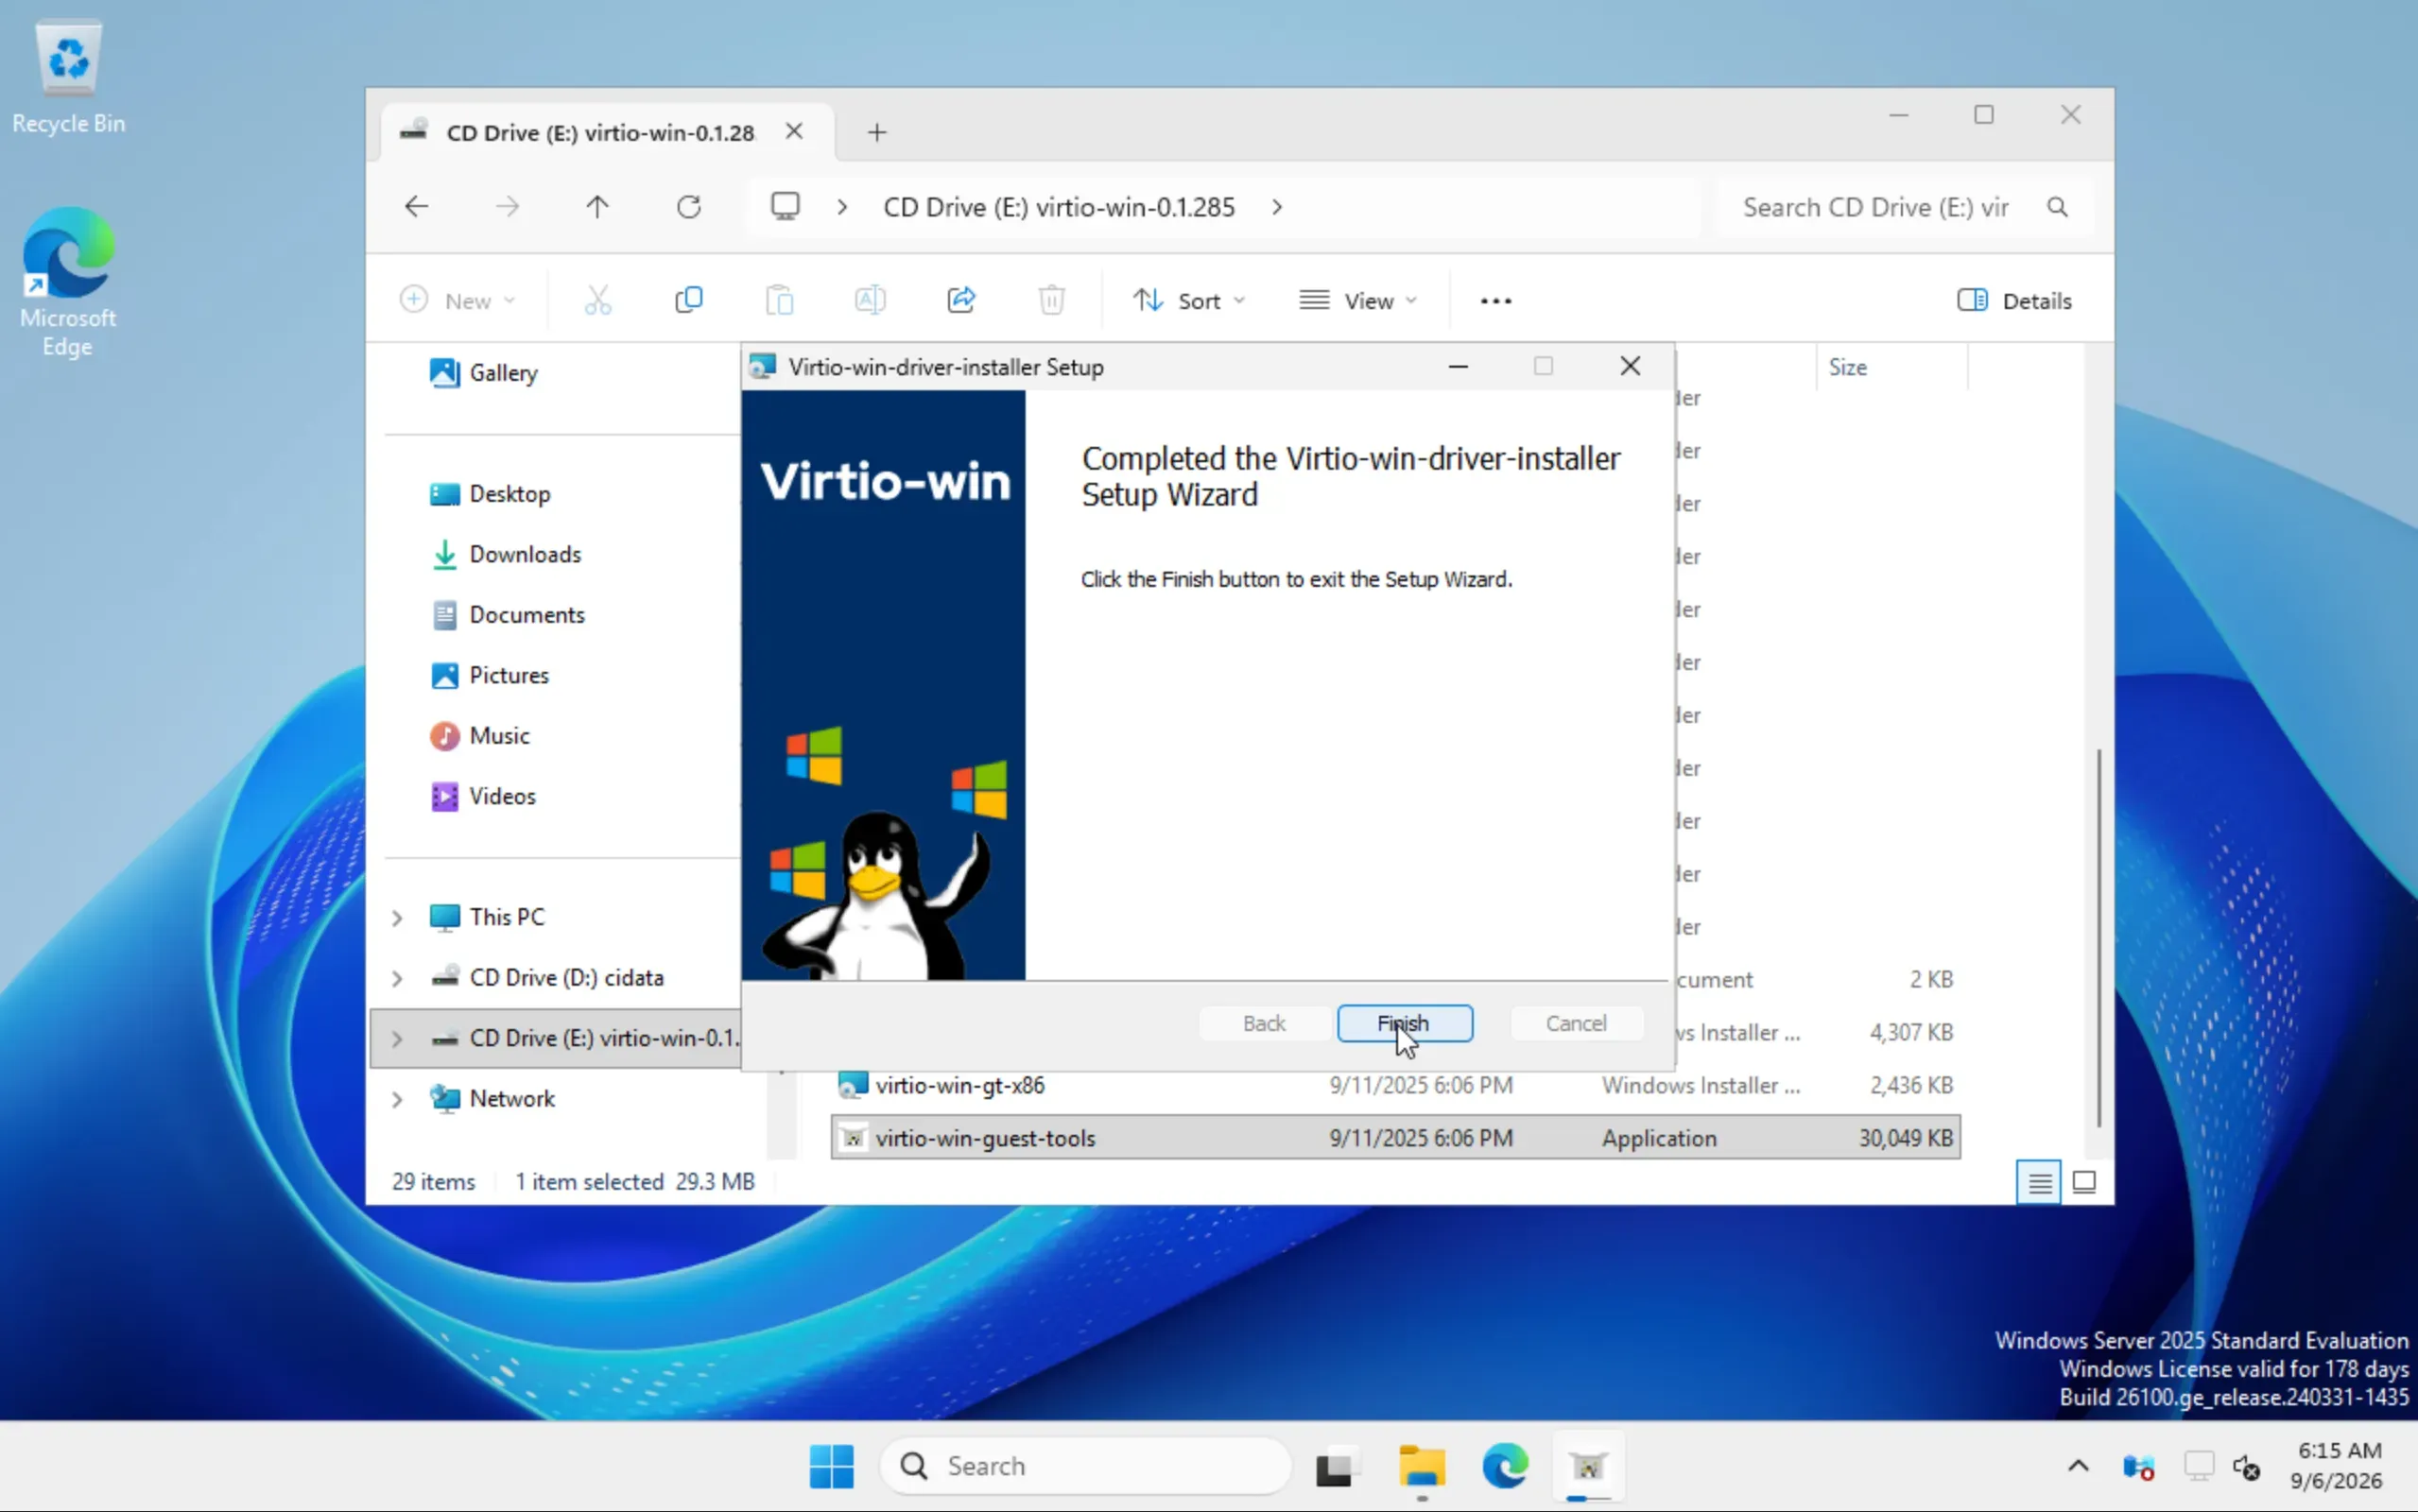
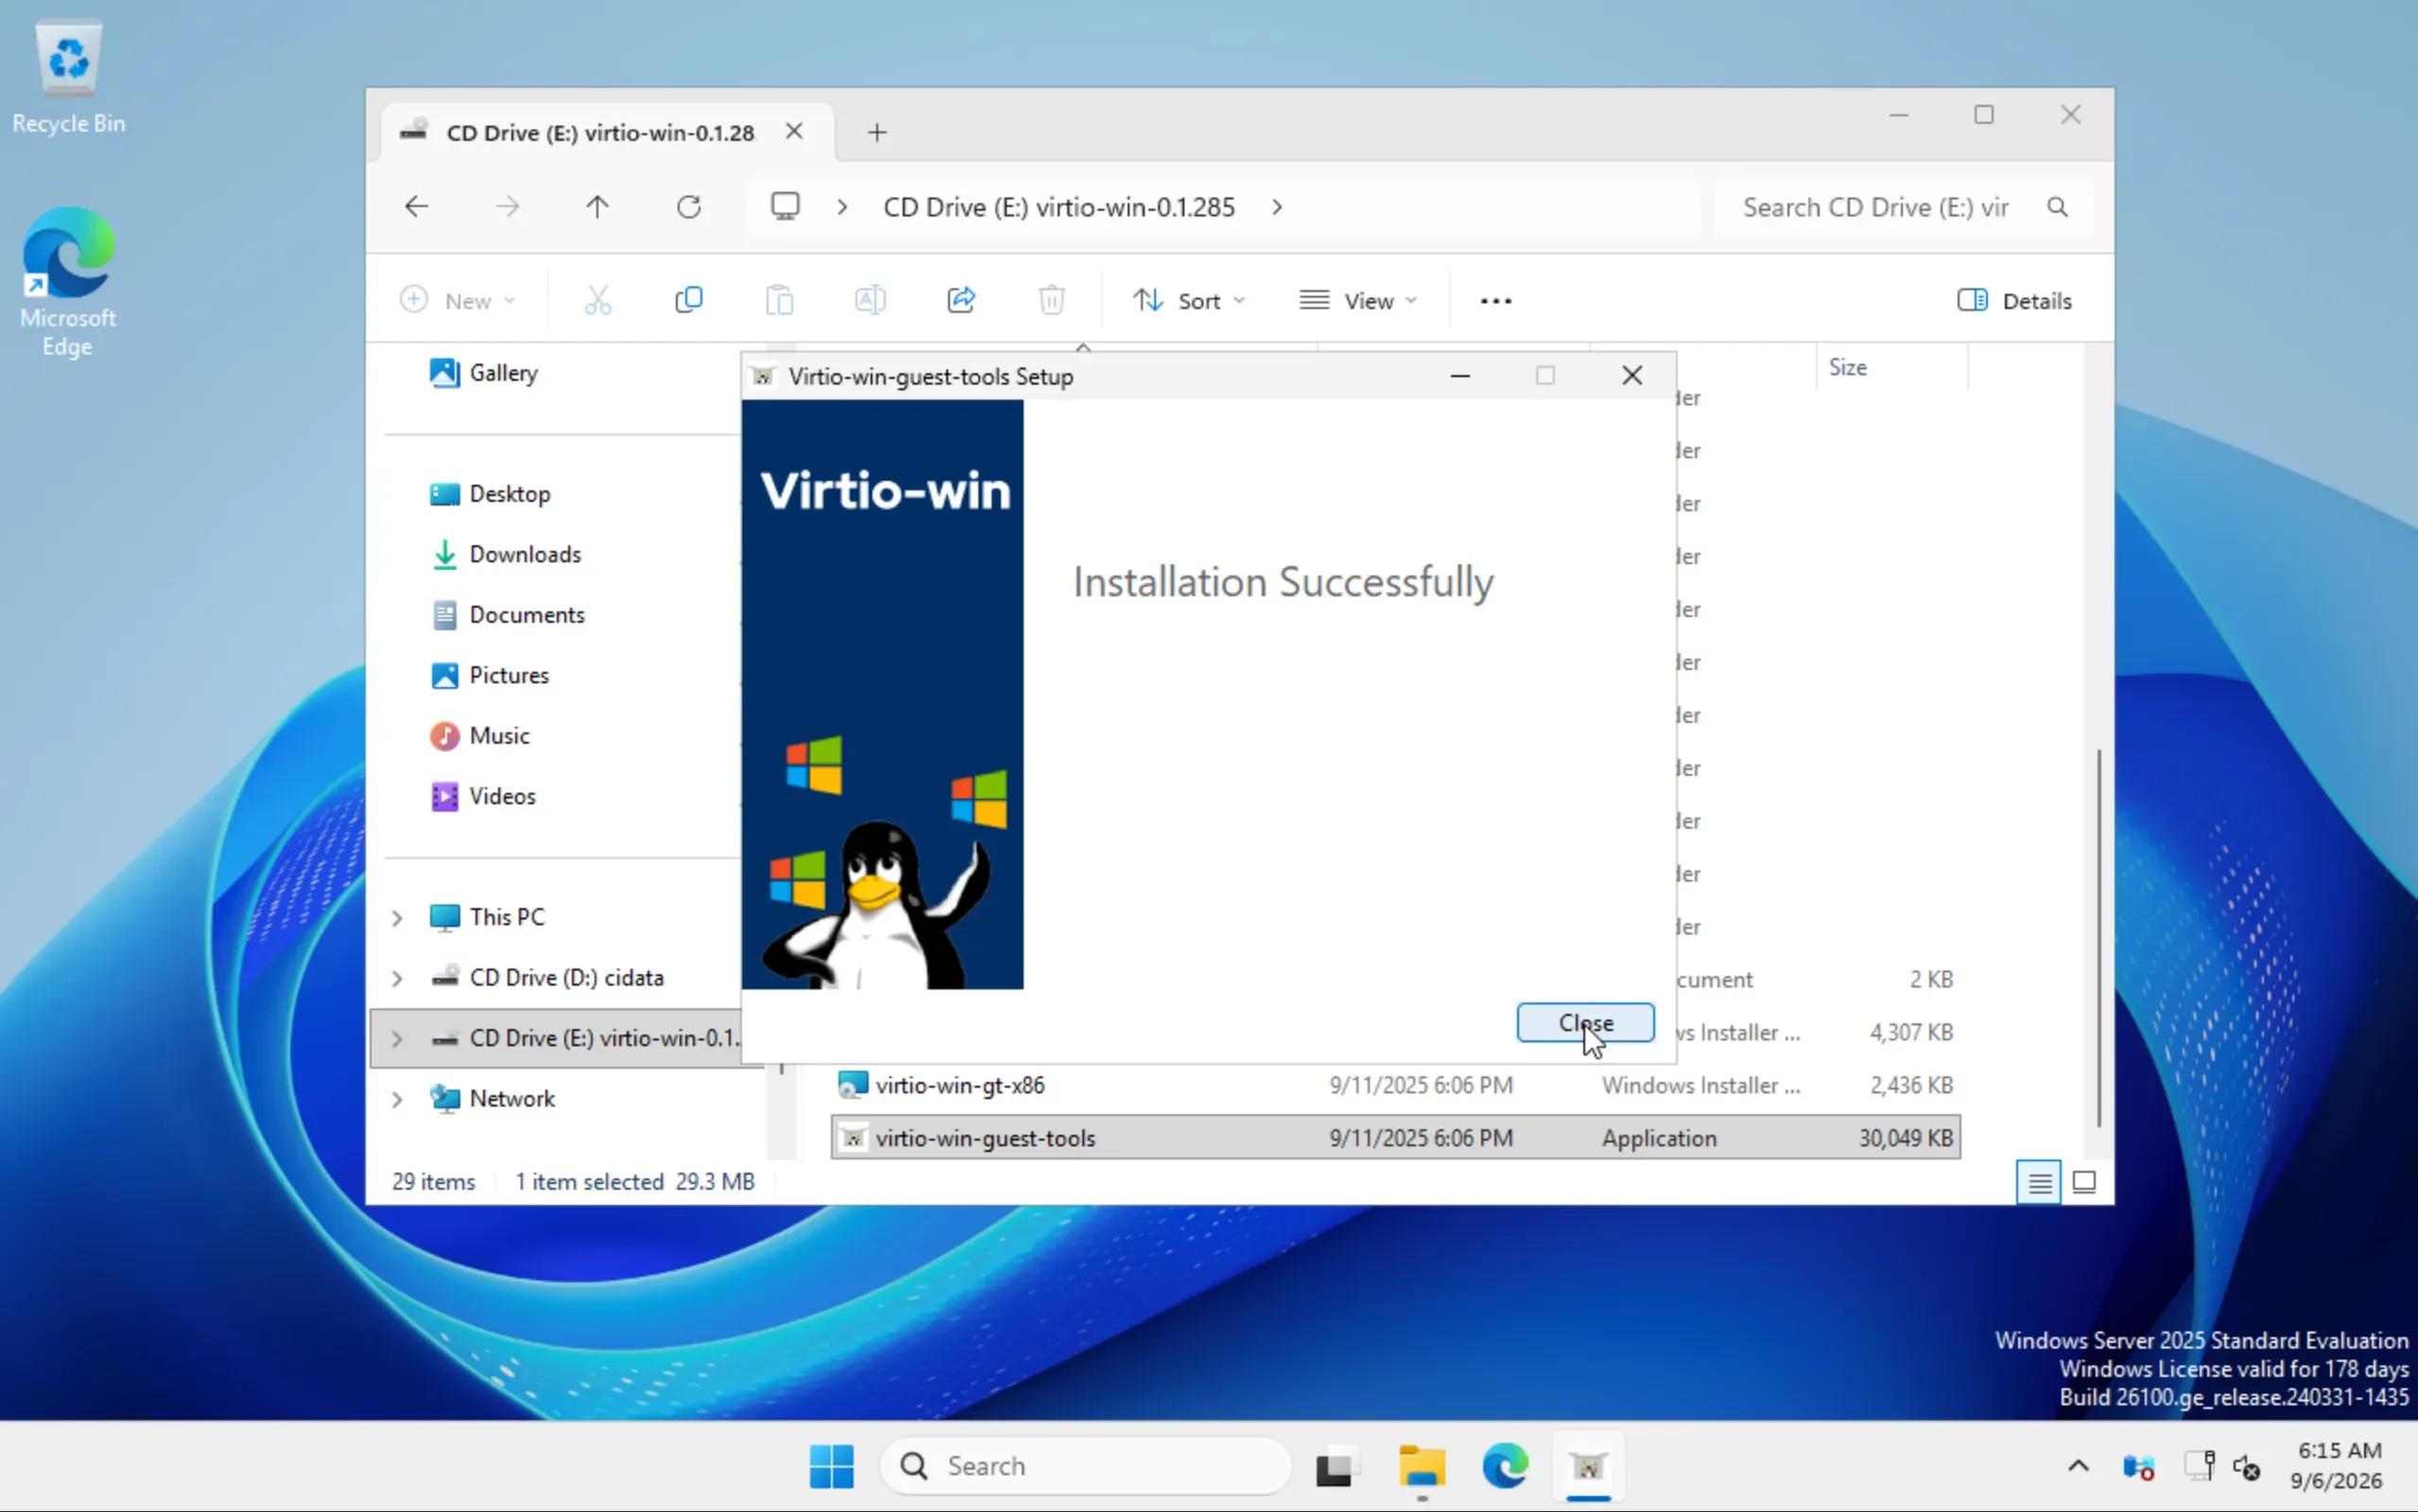
After signing in, Windows still has no network adapter. Mount Windows VirtIO again (Switch) and run virtio-win-guest-tools.exe from the CD drive in Explorer. The package installs the NetKVM network driver, the balloon driver and the QEMU guest agent in one pass. The wizard runs twice: you accept the guest tools license first, then the driver installer starts as its own wizard, whose component selection you can click through unchanged. At the end the package reports Installation Successfully. After that the adapter shows up as Red Hat VirtIO Ethernet Adapter under Network Connections.
Configure the network in Windows
You type the values from the Network tab in by hand here, because the web console carries no clipboard into the guest. Keep the tab open in a second window alongside it.
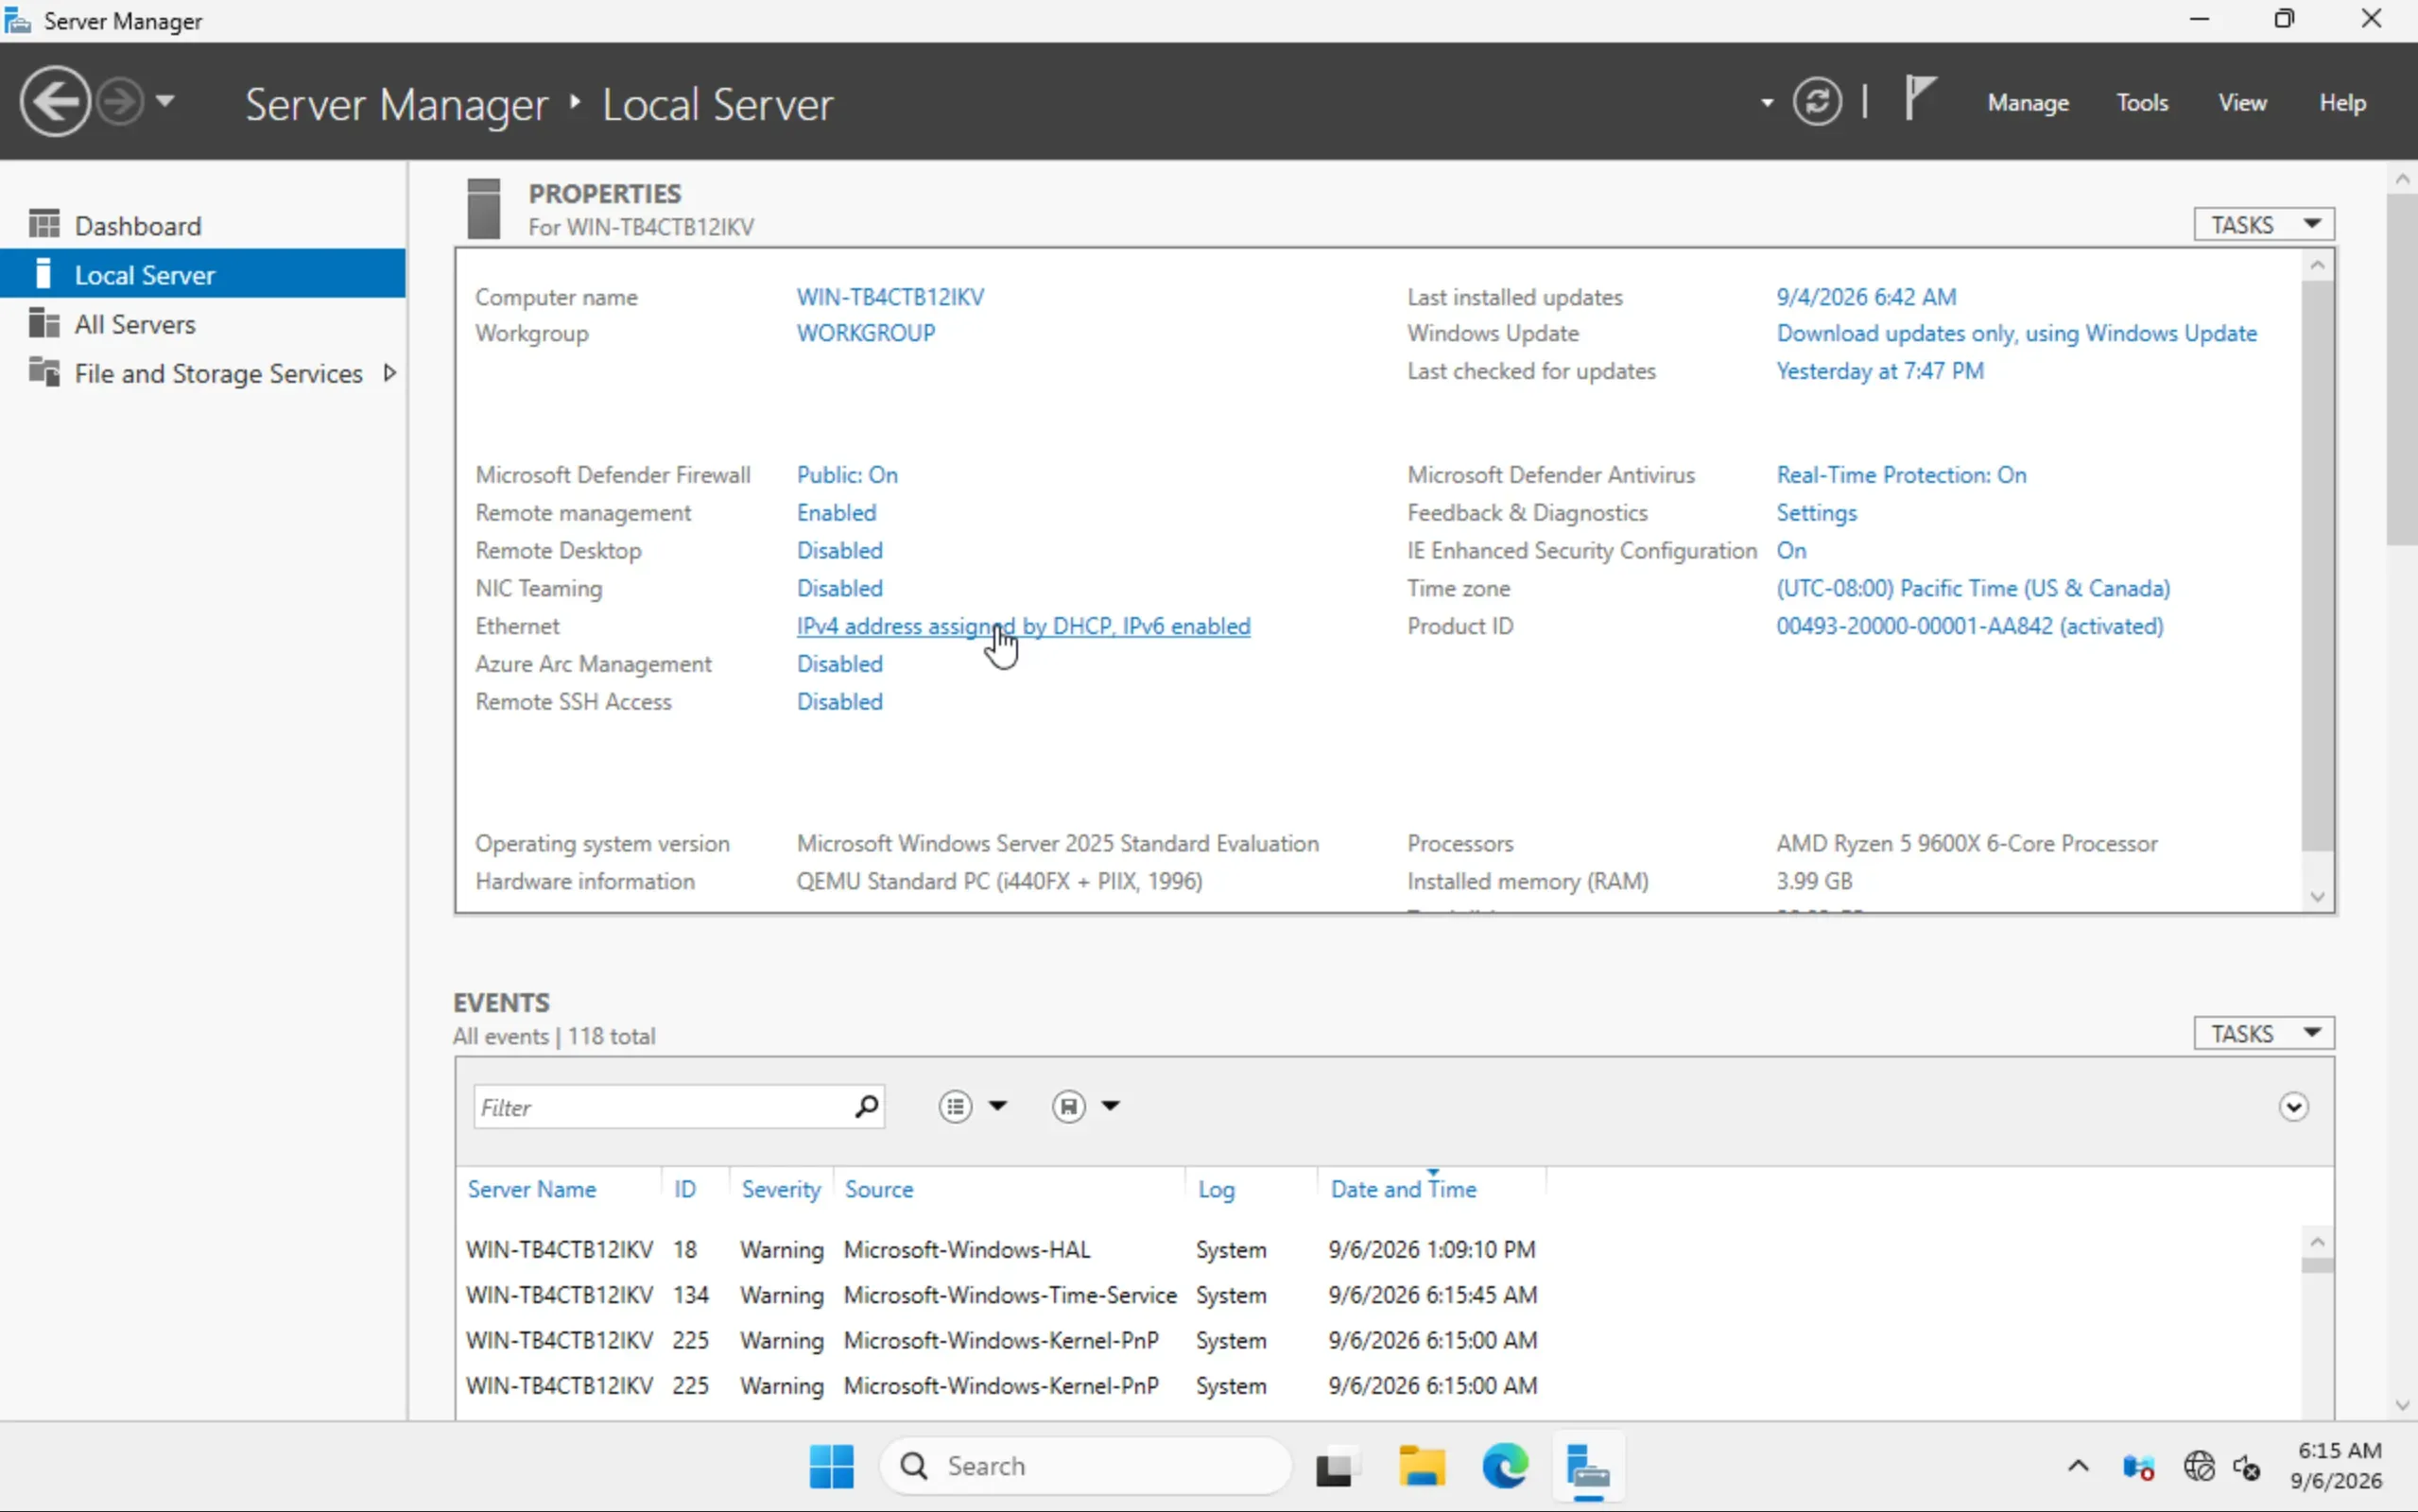
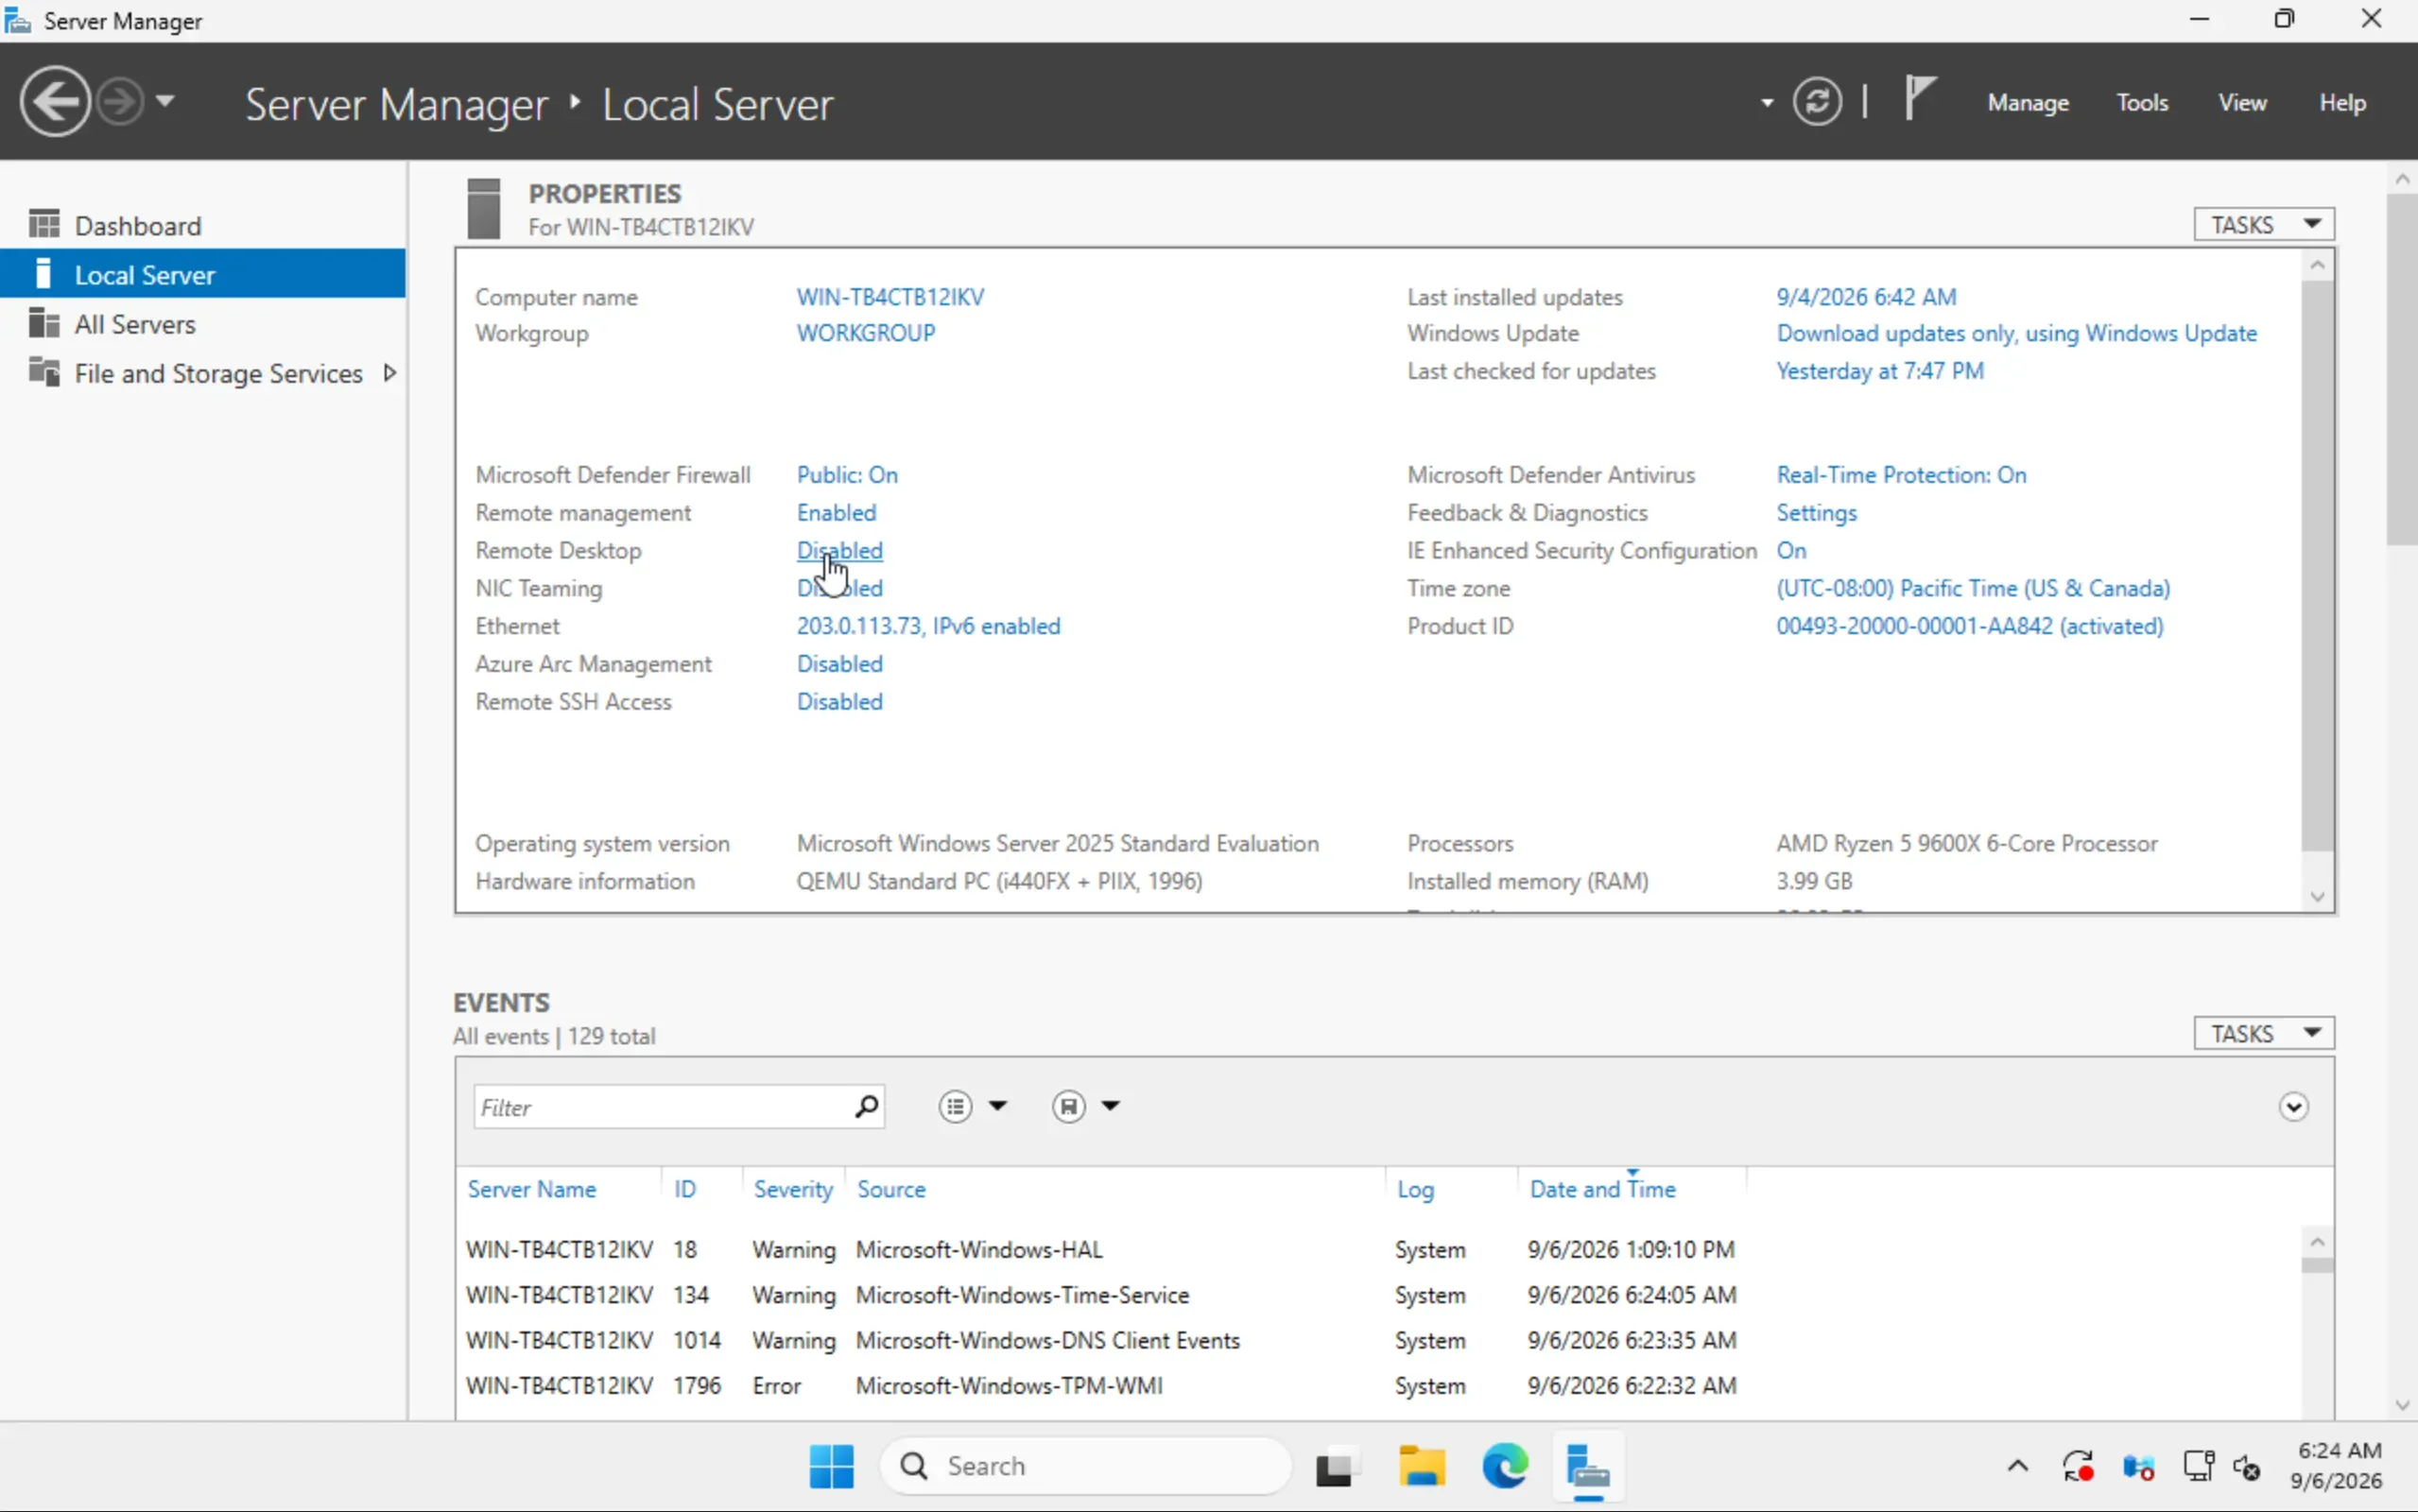
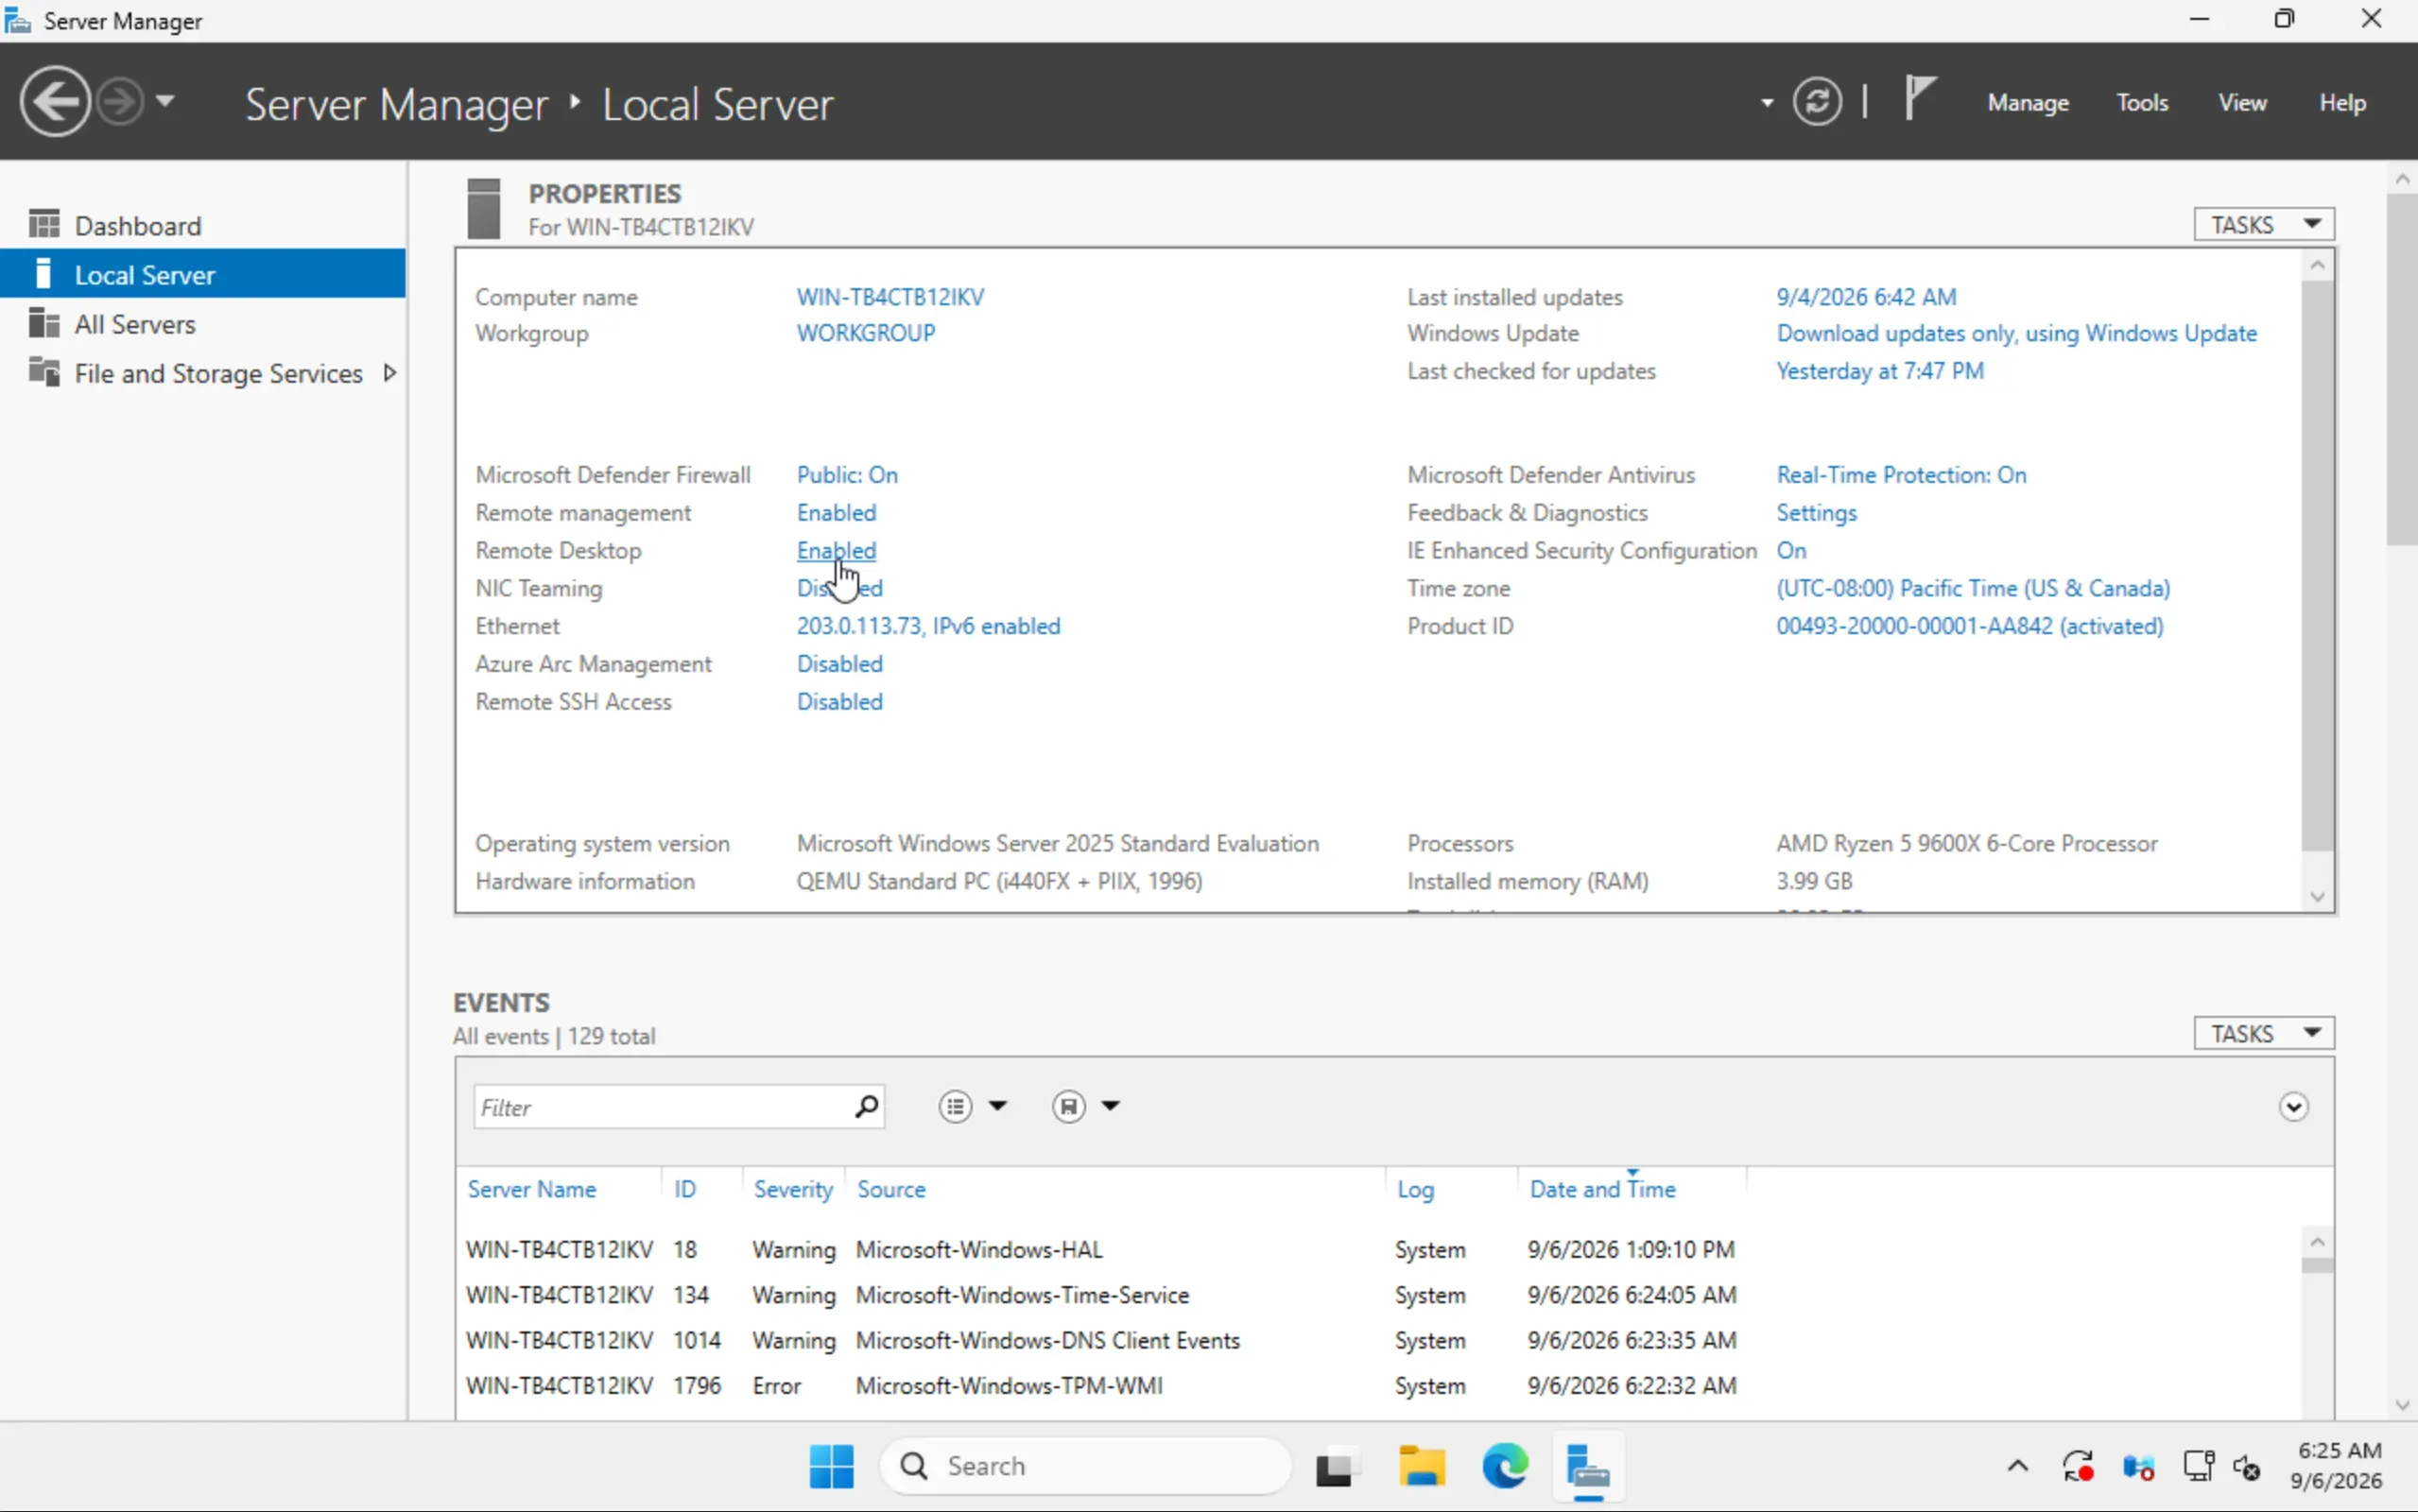
The quickest route is the classic control panel dialog, and it works entirely with the mouse. Open Server Manager from the Start menu, where it is pinned. Click Local Server on the left, then the value next to Ethernet in the properties tile. It reads IPv4 address assigned by DHCP at first, even though there is no DHCP on our network. Network Connections opens.
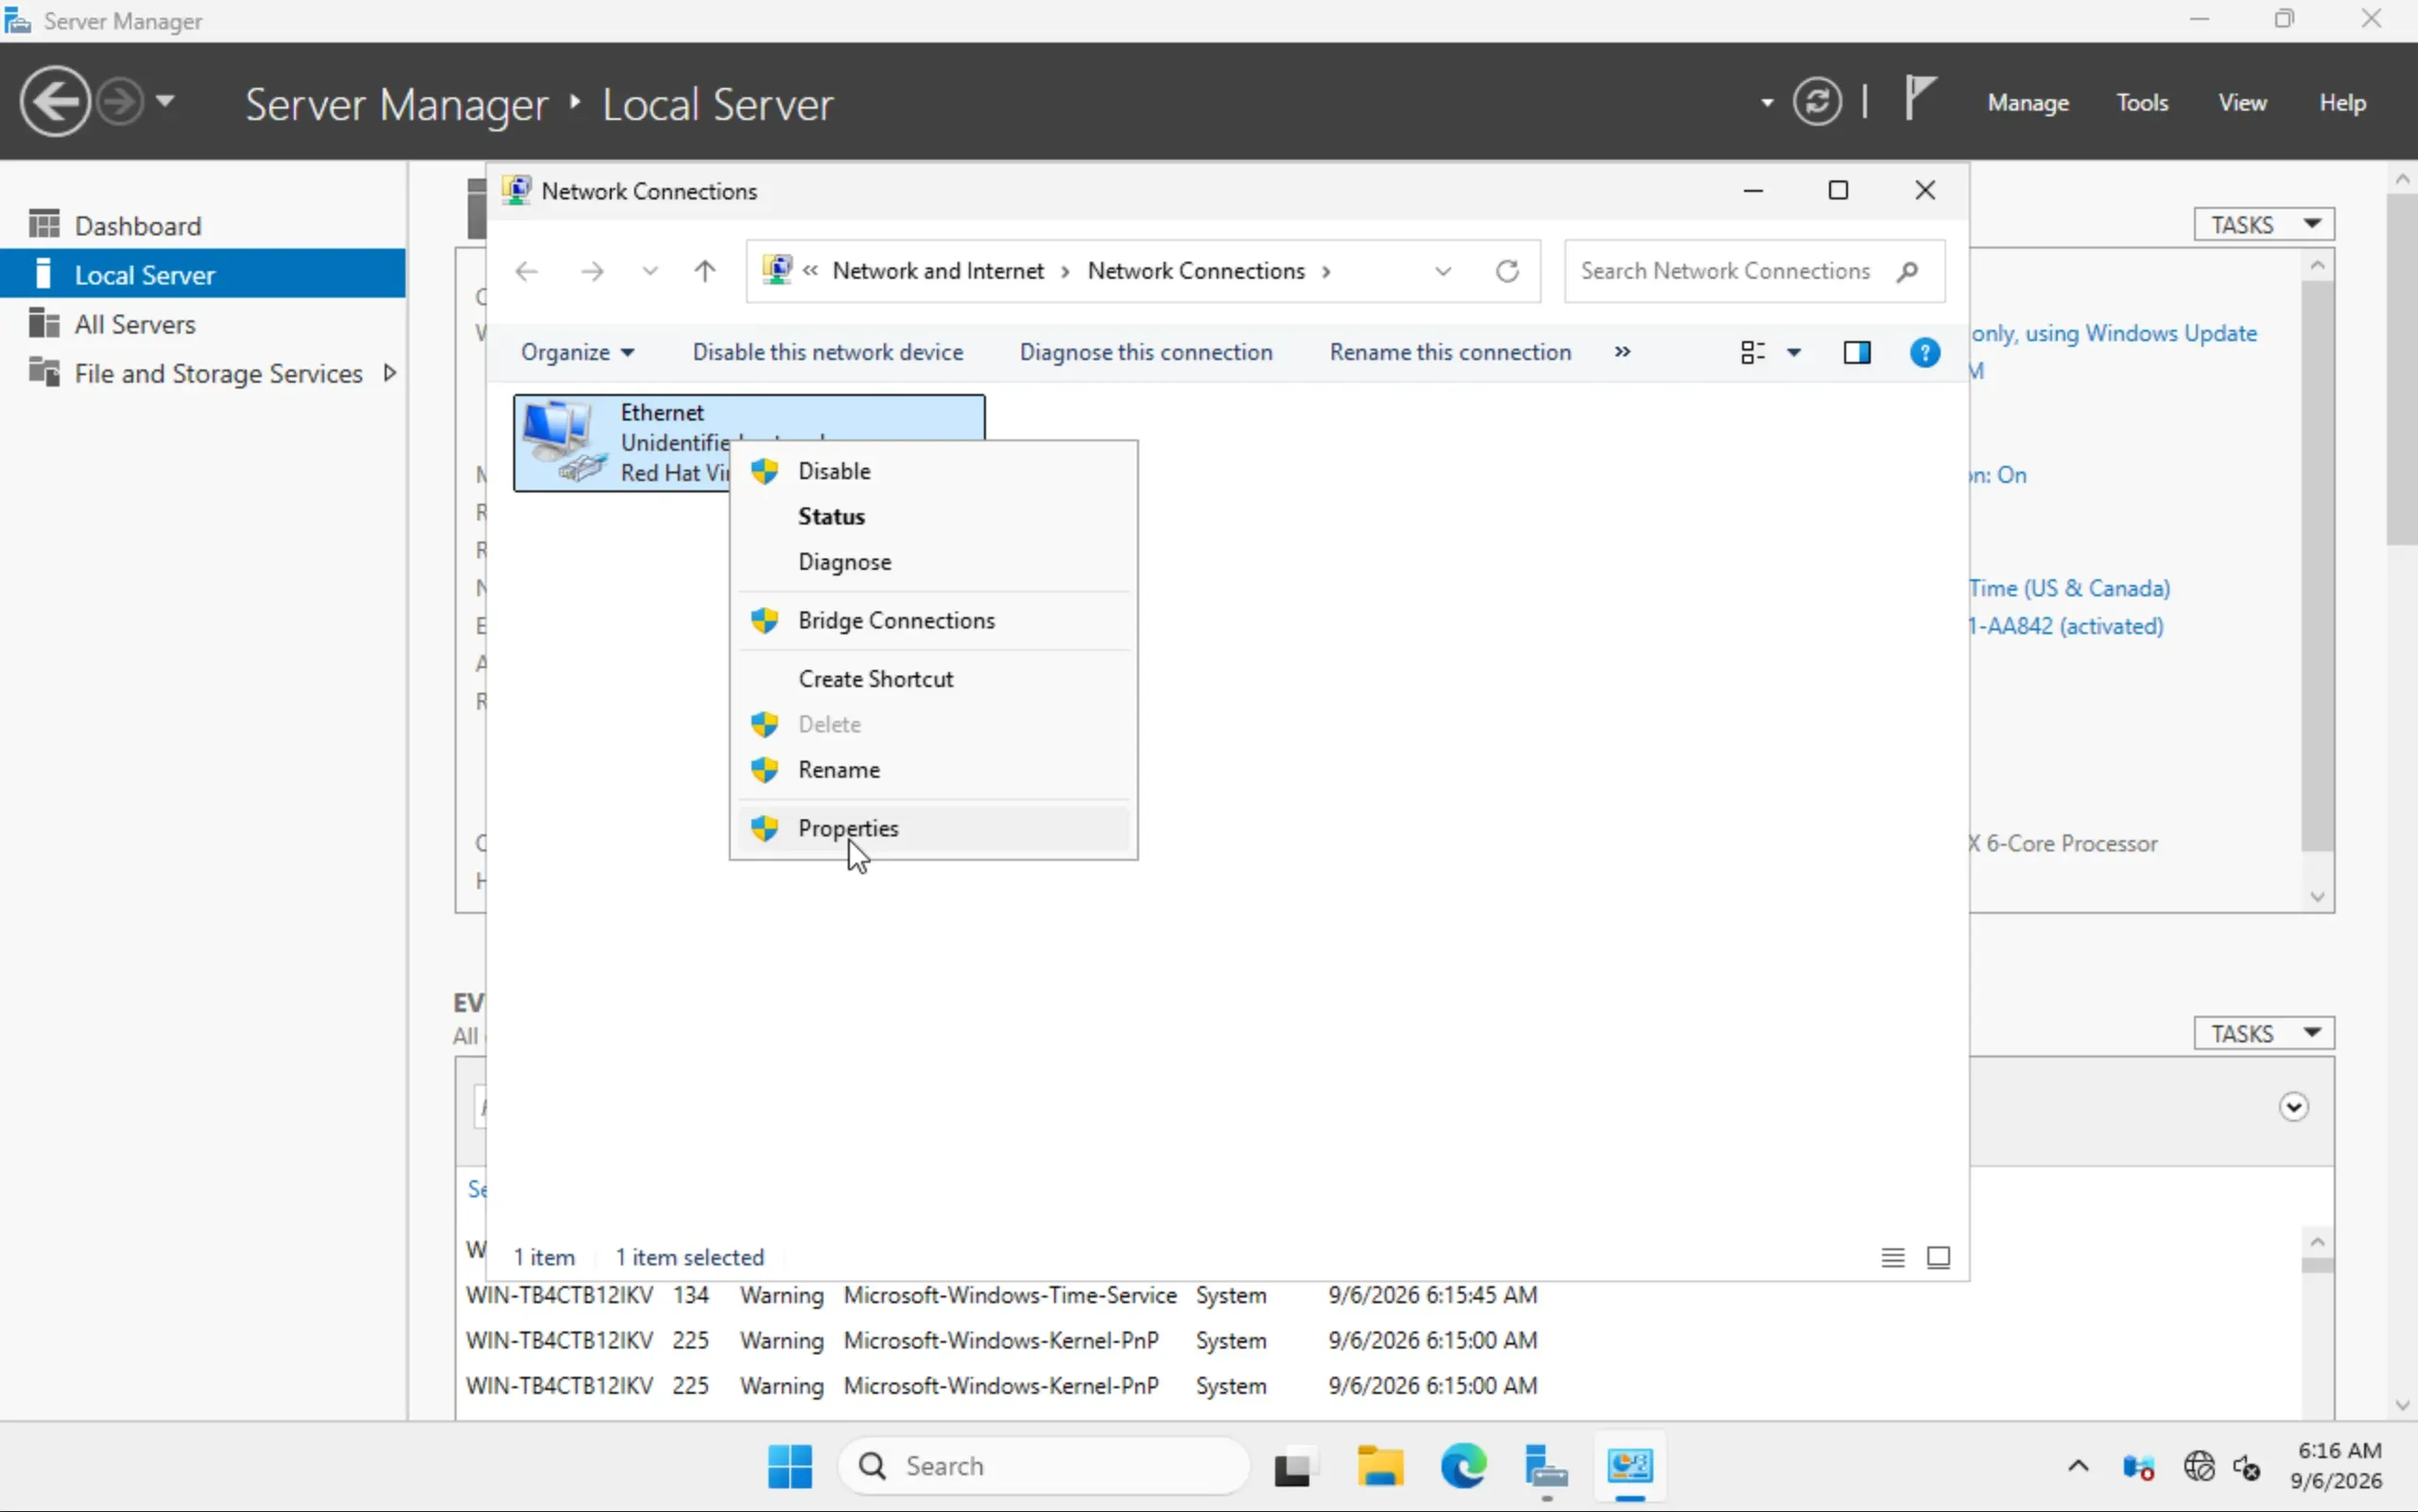
Right-click the adapter there, choose Properties, select Internet Protocol Version 4 (TCP/IPv4) in the list and click Properties again. Switch to Use the following IP address and fill in:
| Field in the dialog | Value from the Network tab |
|---|---|
| IP address | IP address |
| Subnet mask | Subnet mask |
| Default gateway | Gateway |
| Preferred DNS server | DNS server 1 |
| Alternate DNS server | DNS server 2 |
The dialog wants the mask in dotted notation rather than the prefix length, which is why the Network tab lists it too.
Do the same for IPv6 via Internet Protocol Version 6 (TCP/IPv6): the IPv6 address, 64 as the Subnet prefix length, and the IPv6 gateway from the second row of the Network tab. OK applies the configuration right away, no restart needed.
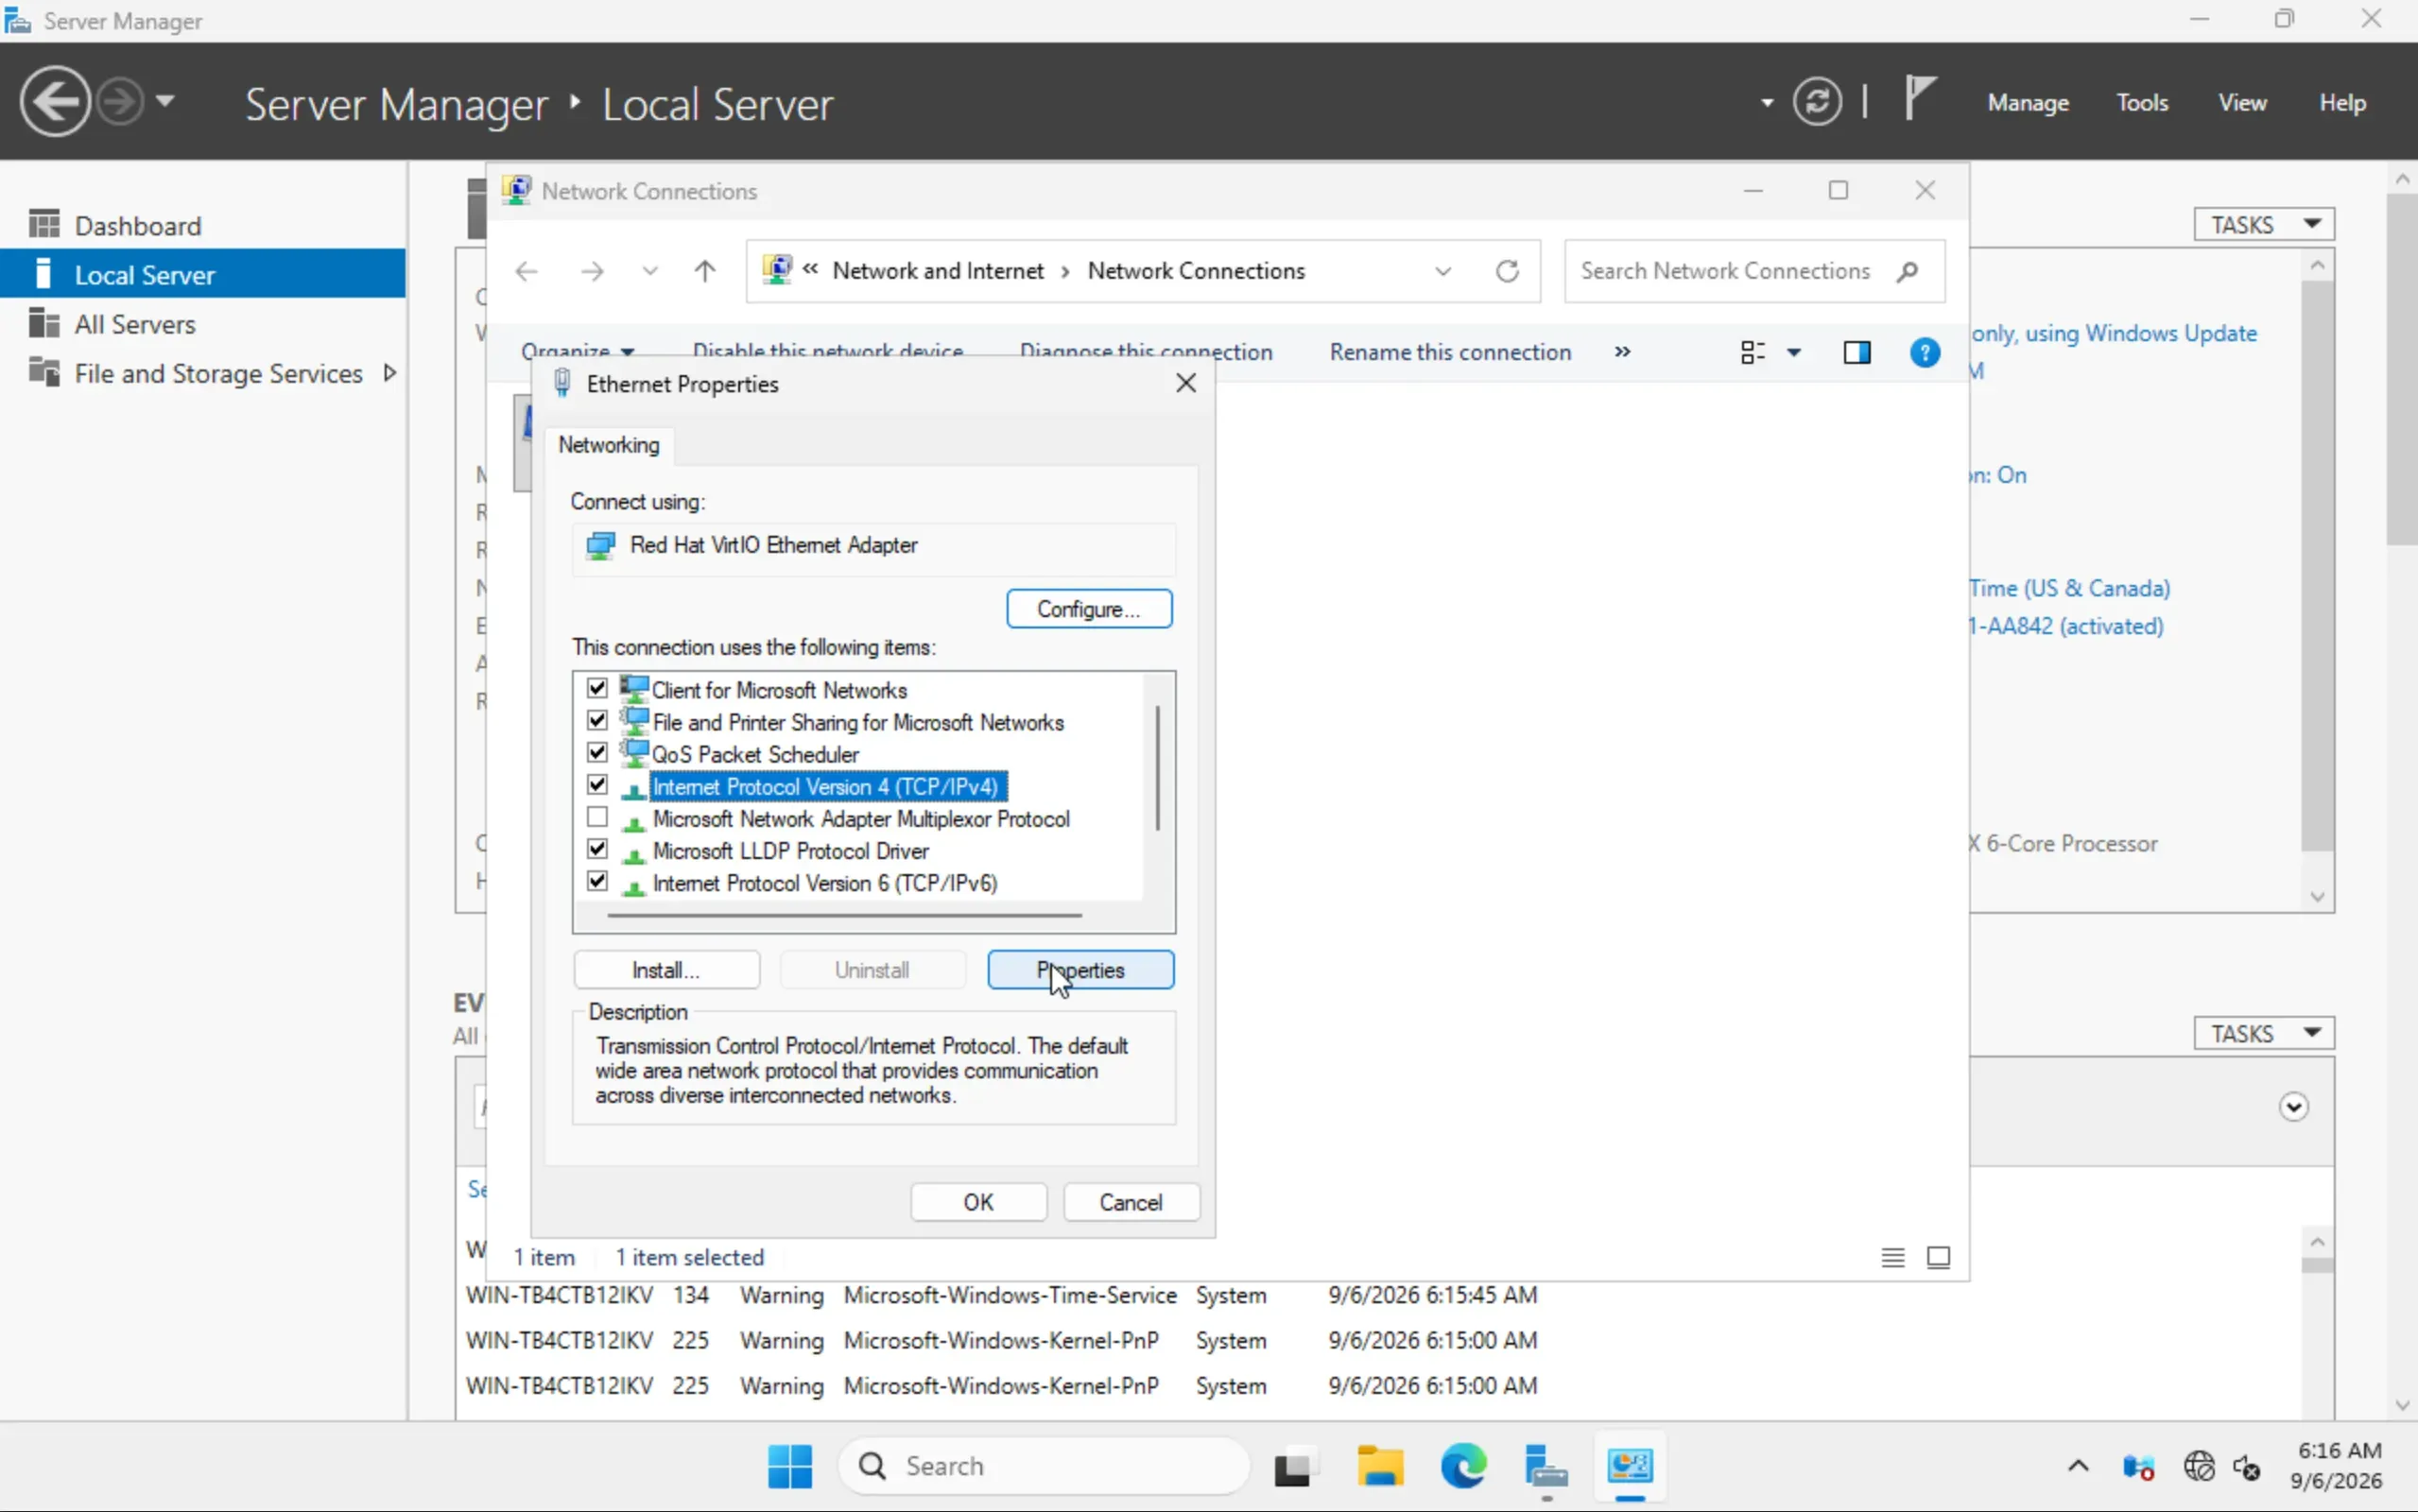
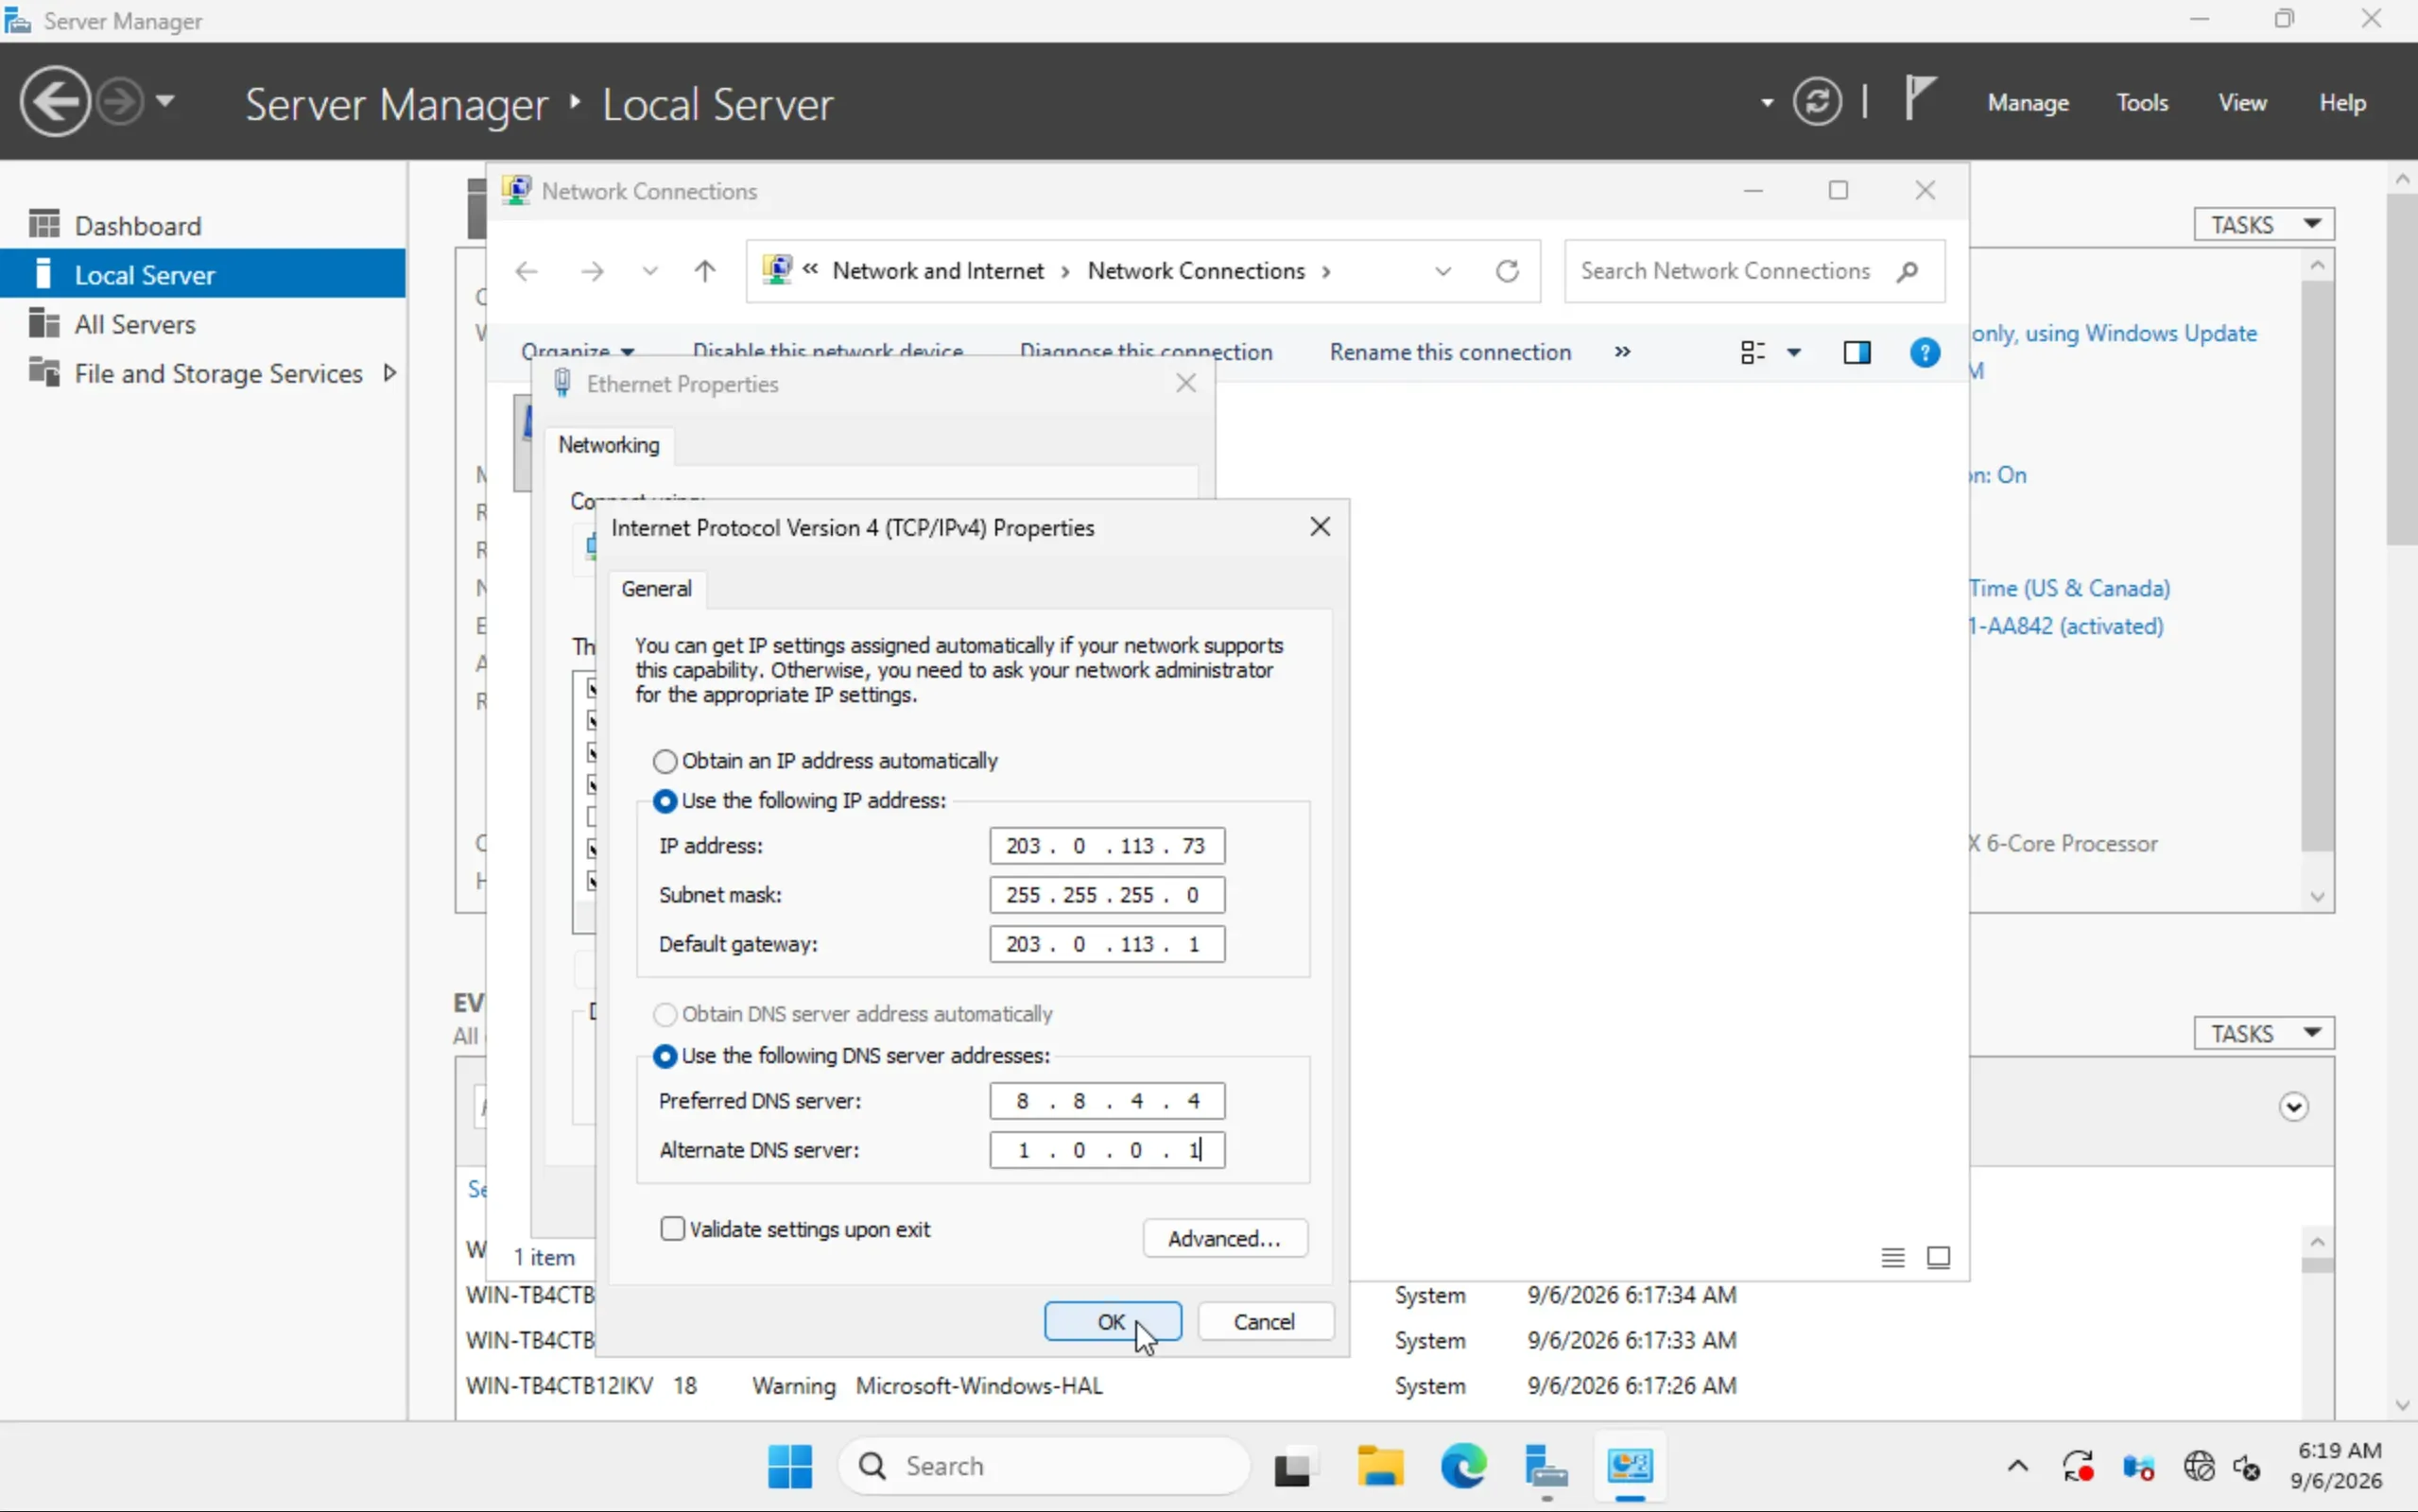
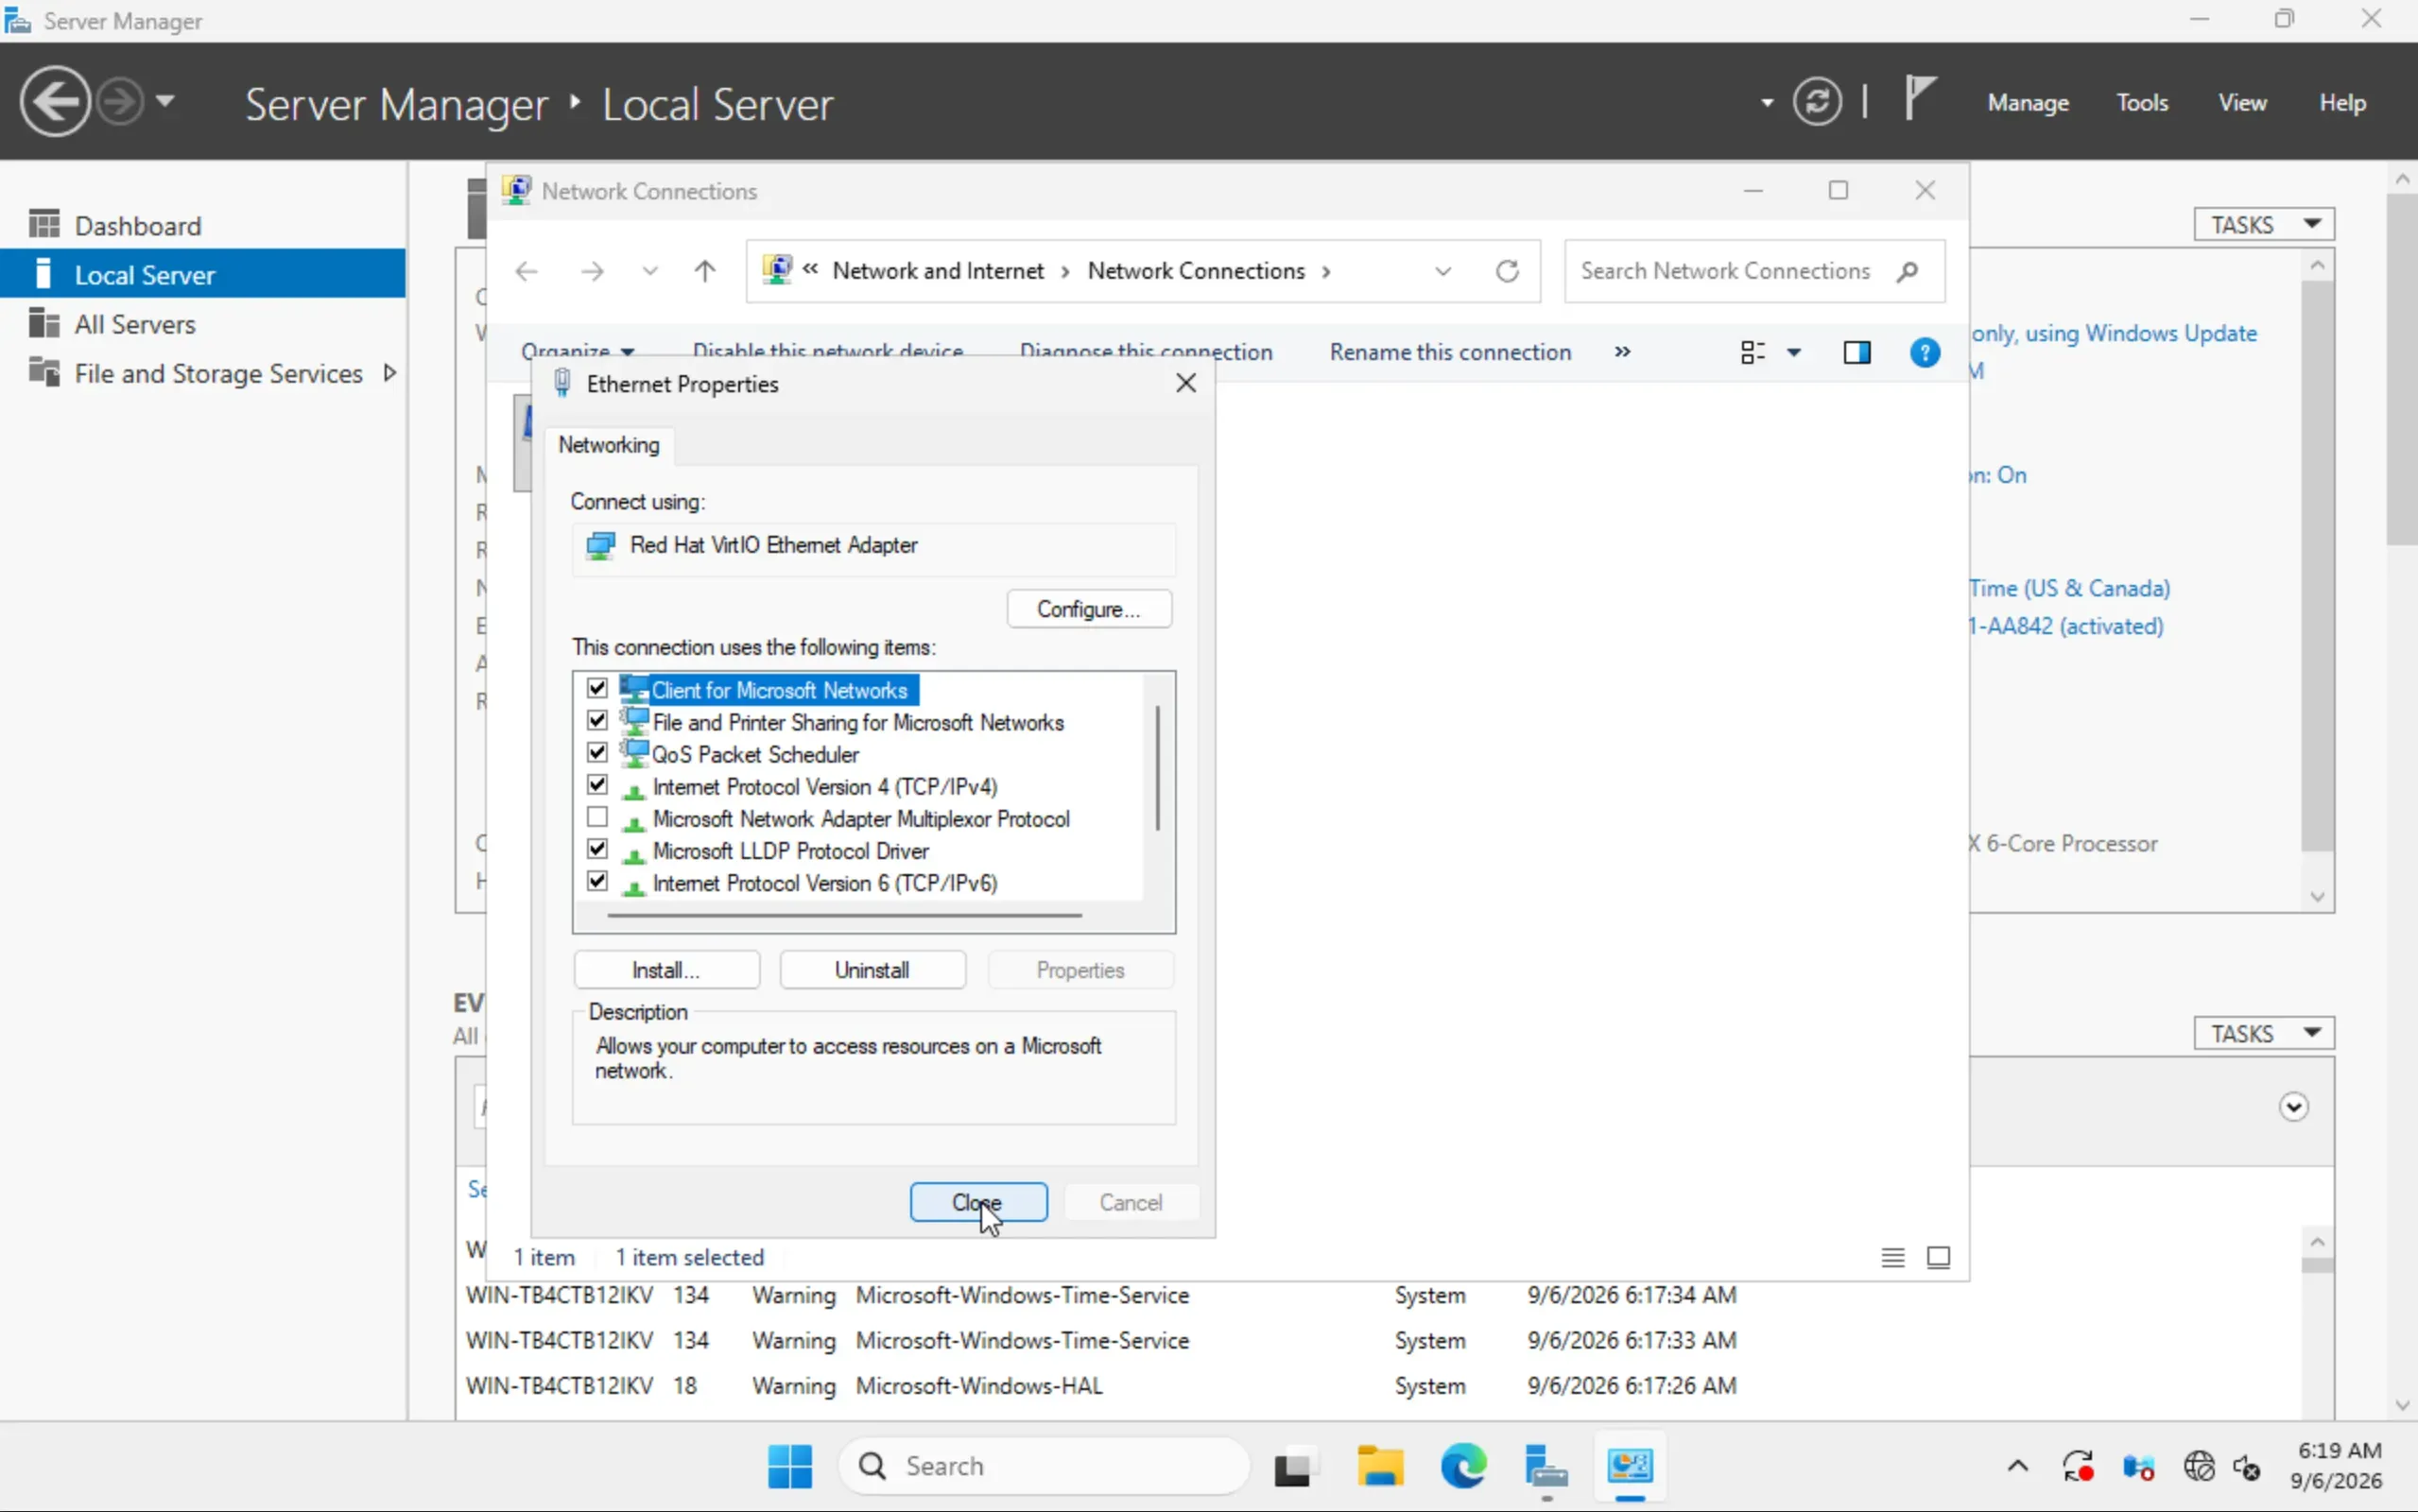
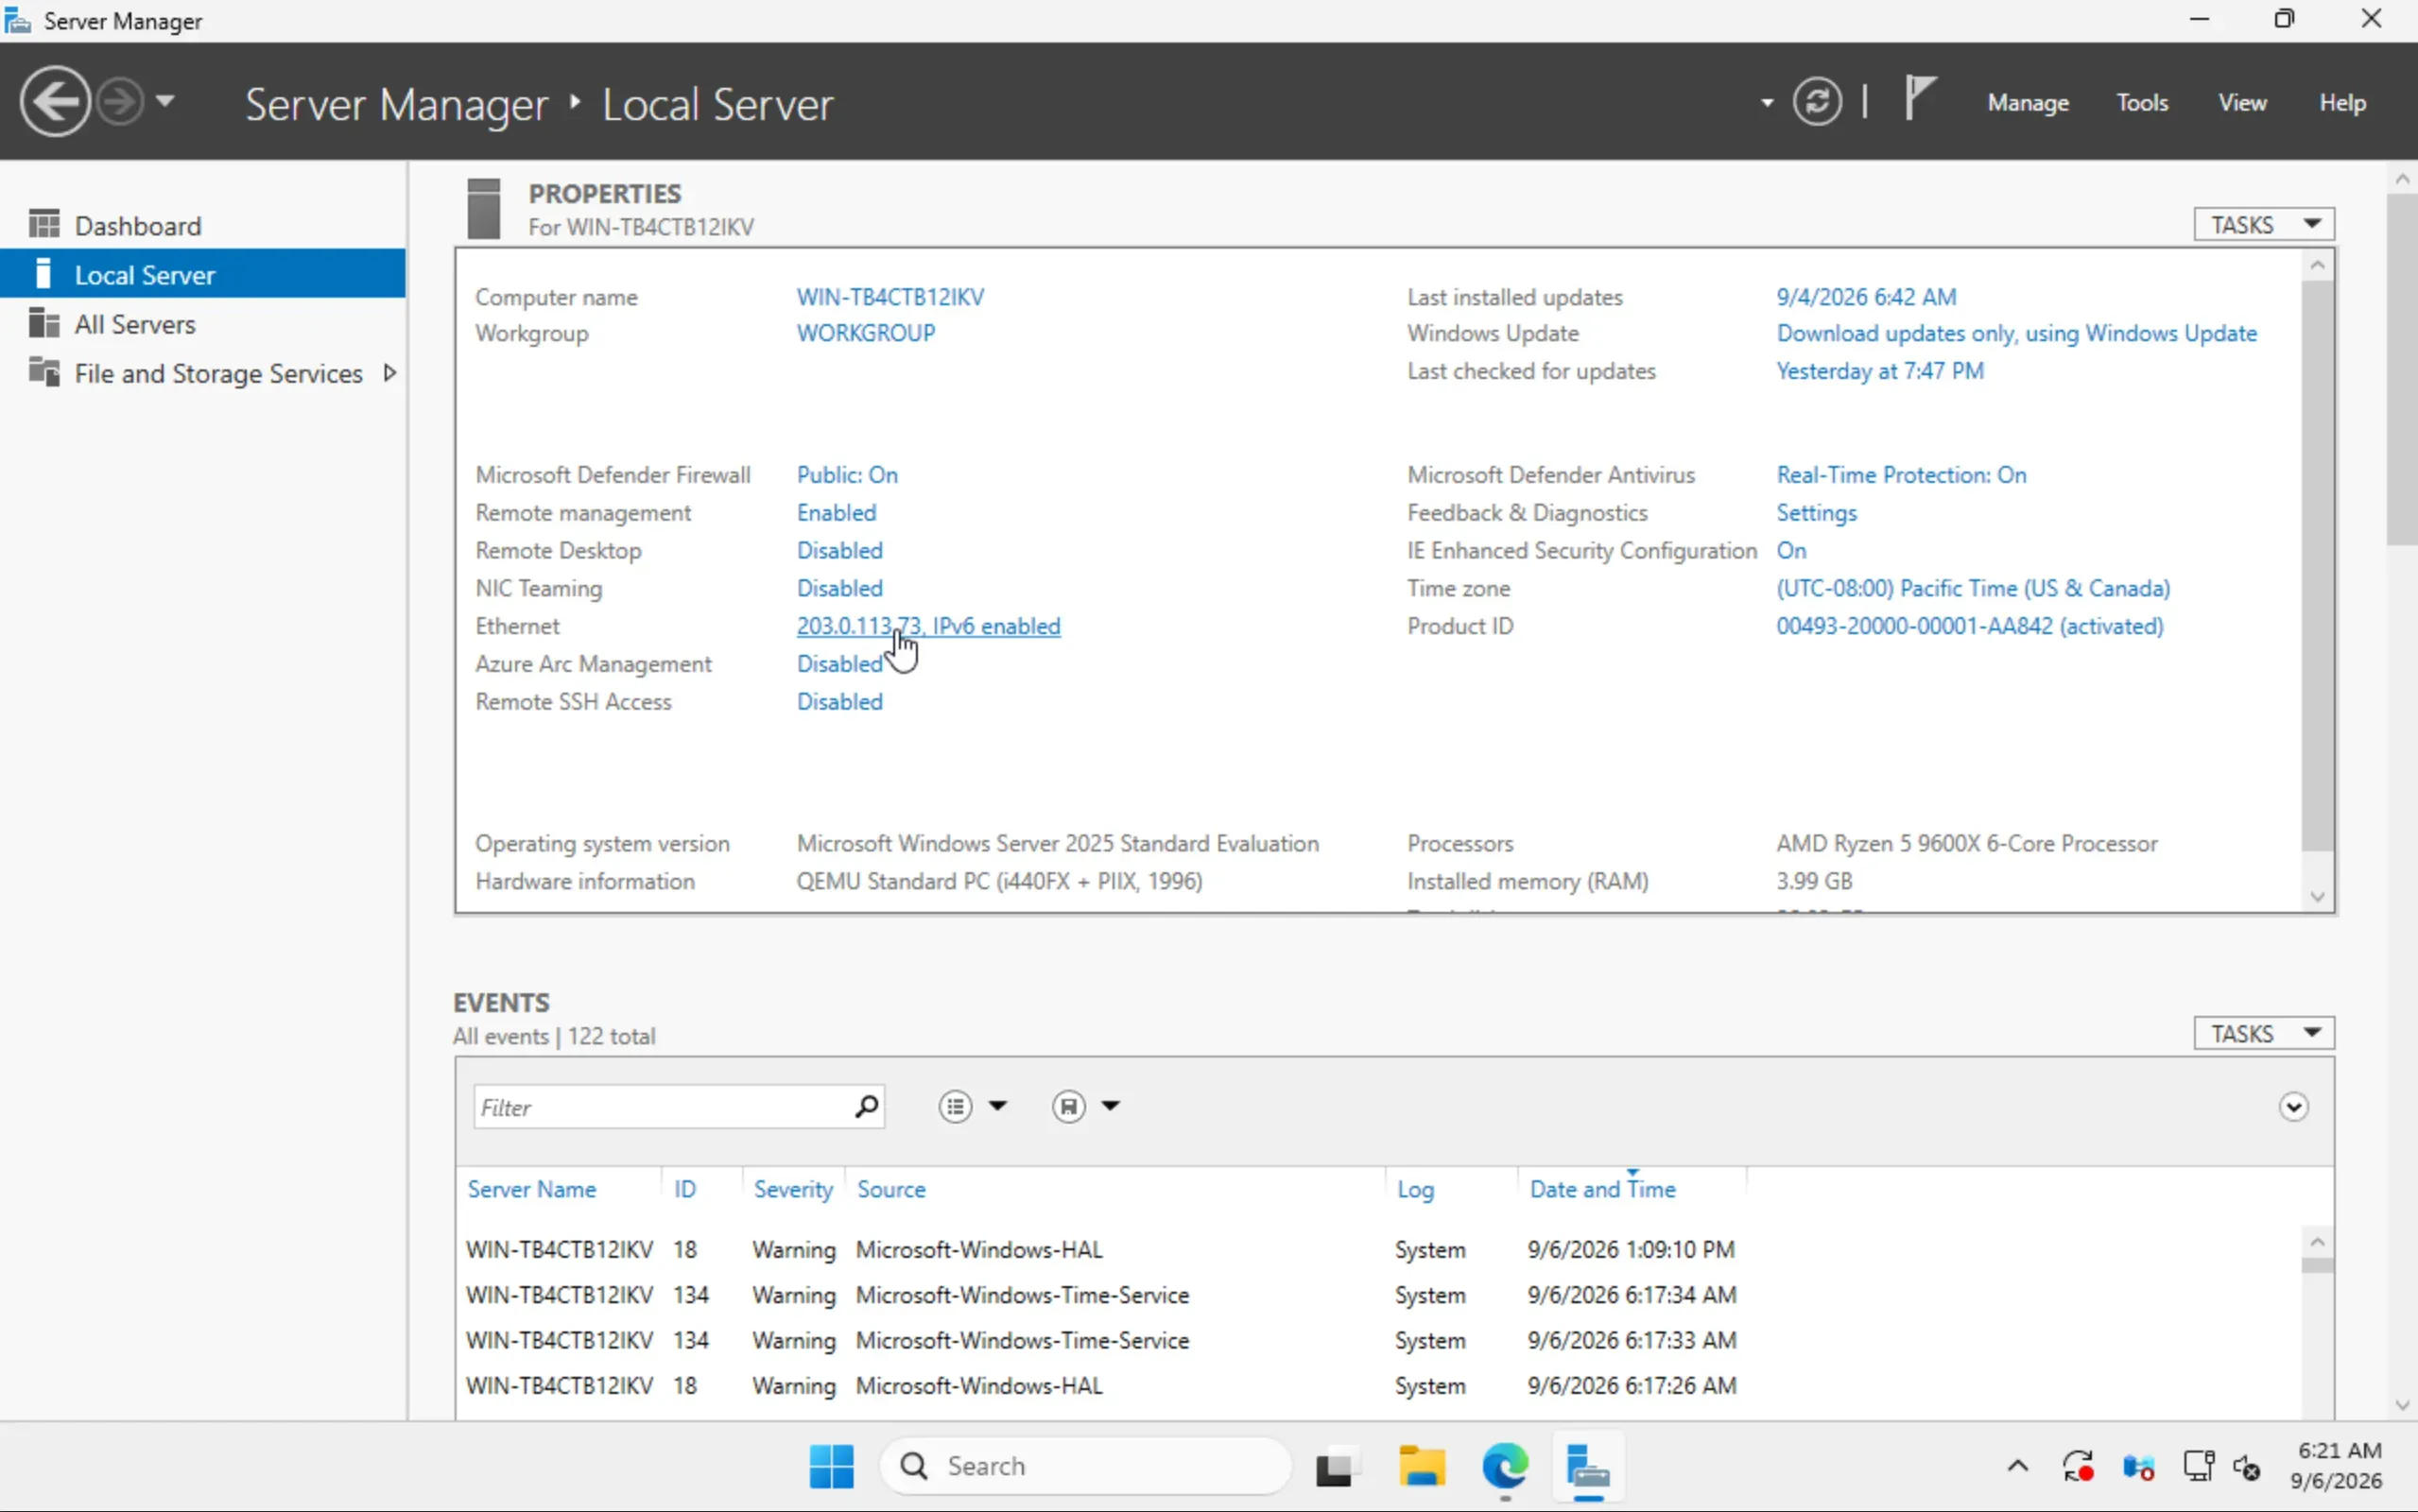
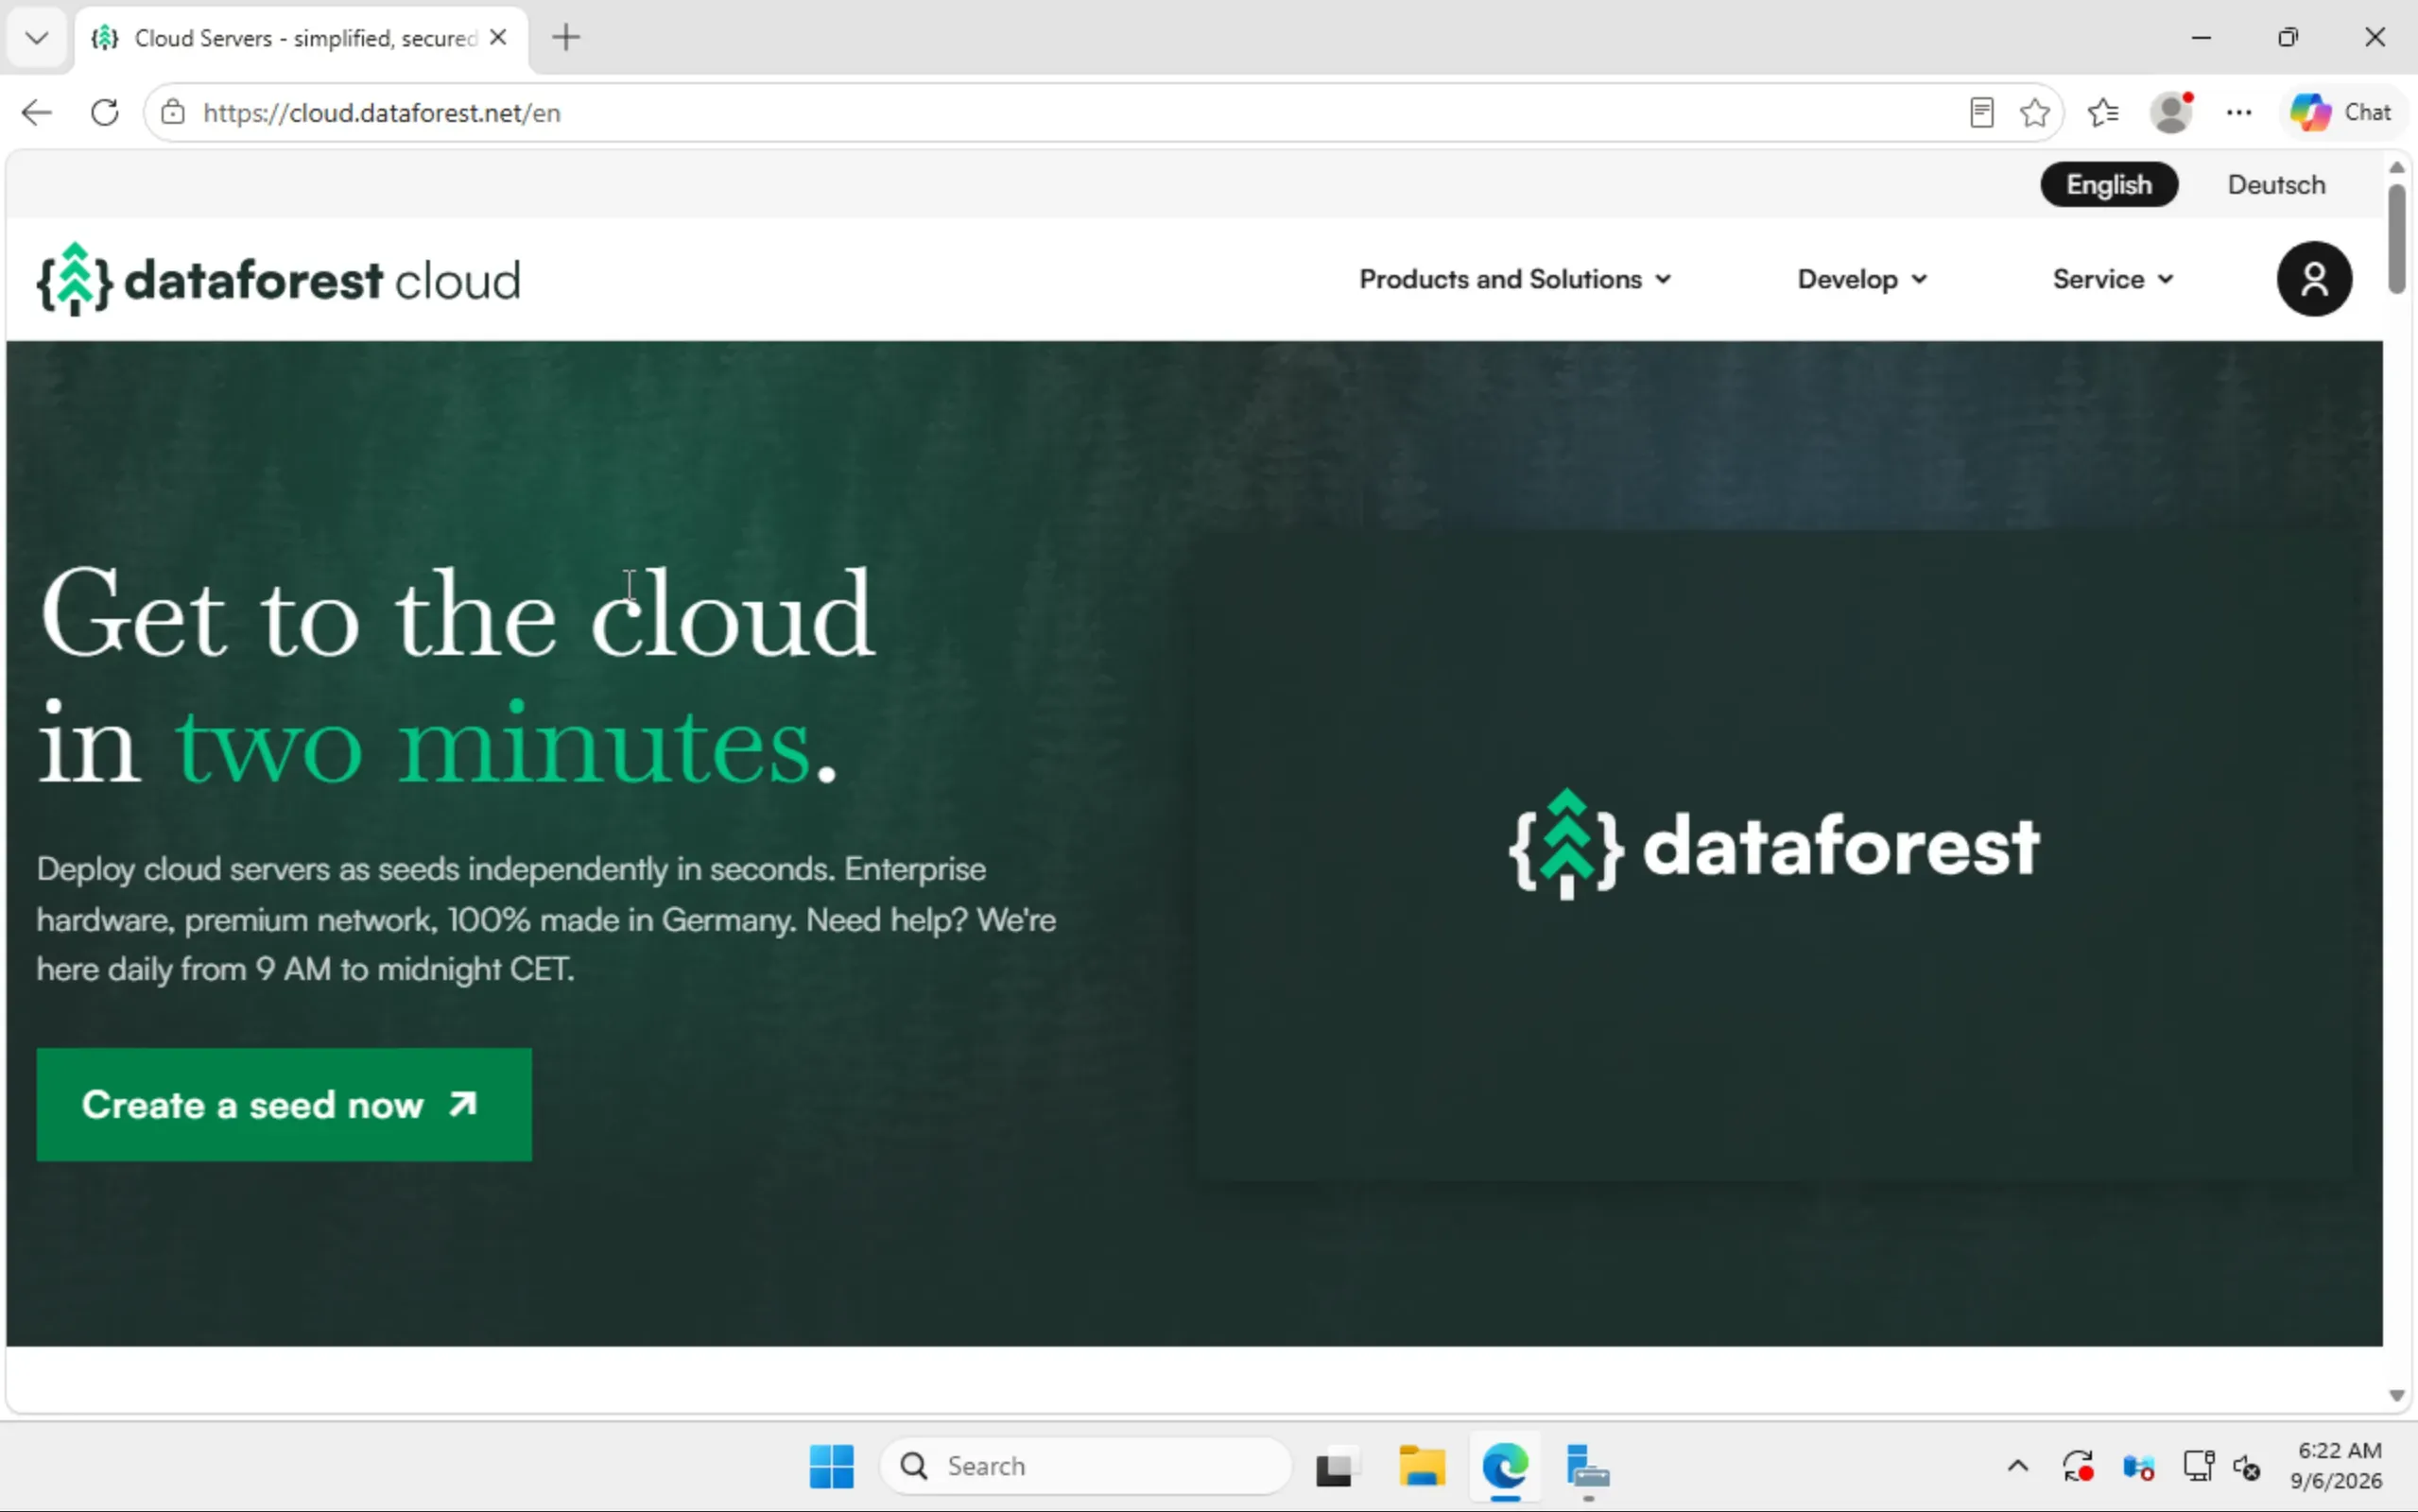
The quickest way to see whether it worked is the browser: open Edge and load any page. If nothing comes through, first compare address and gateway character by character against the Network tab: an address that is not assigned to the seed gets dropped, and the symptom looks exactly like a typo in the gateway.
Enable Remote Desktop
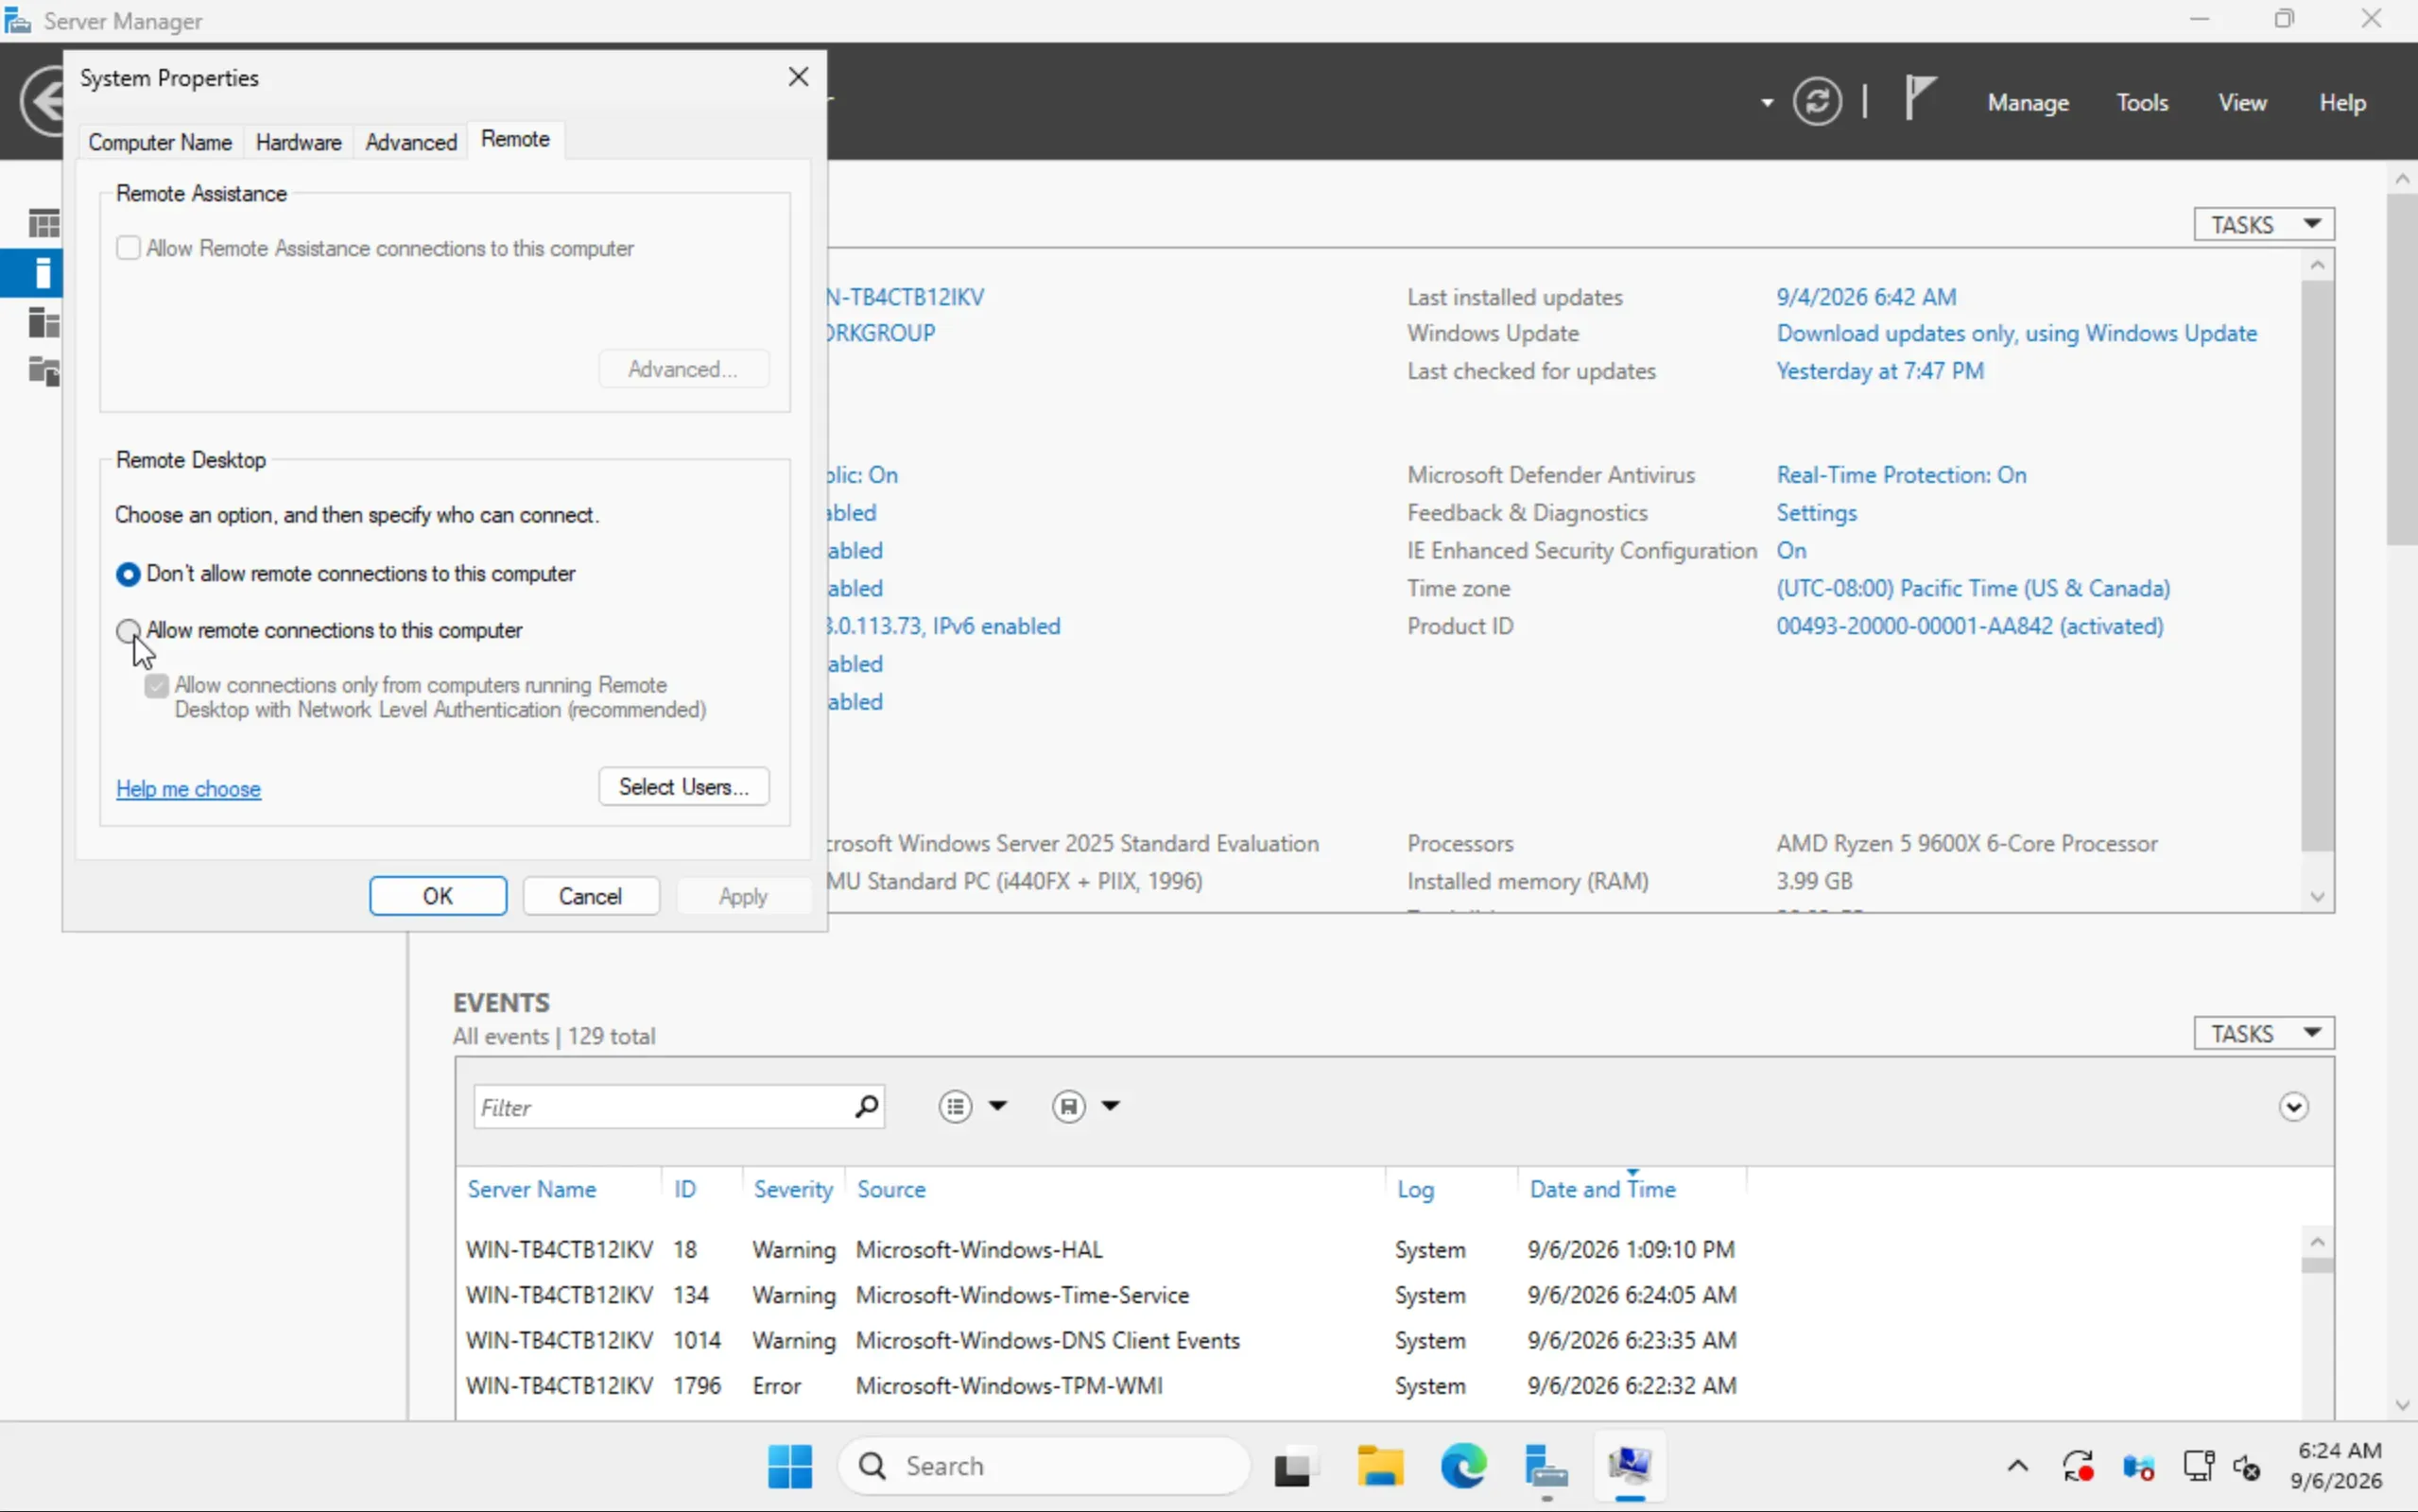
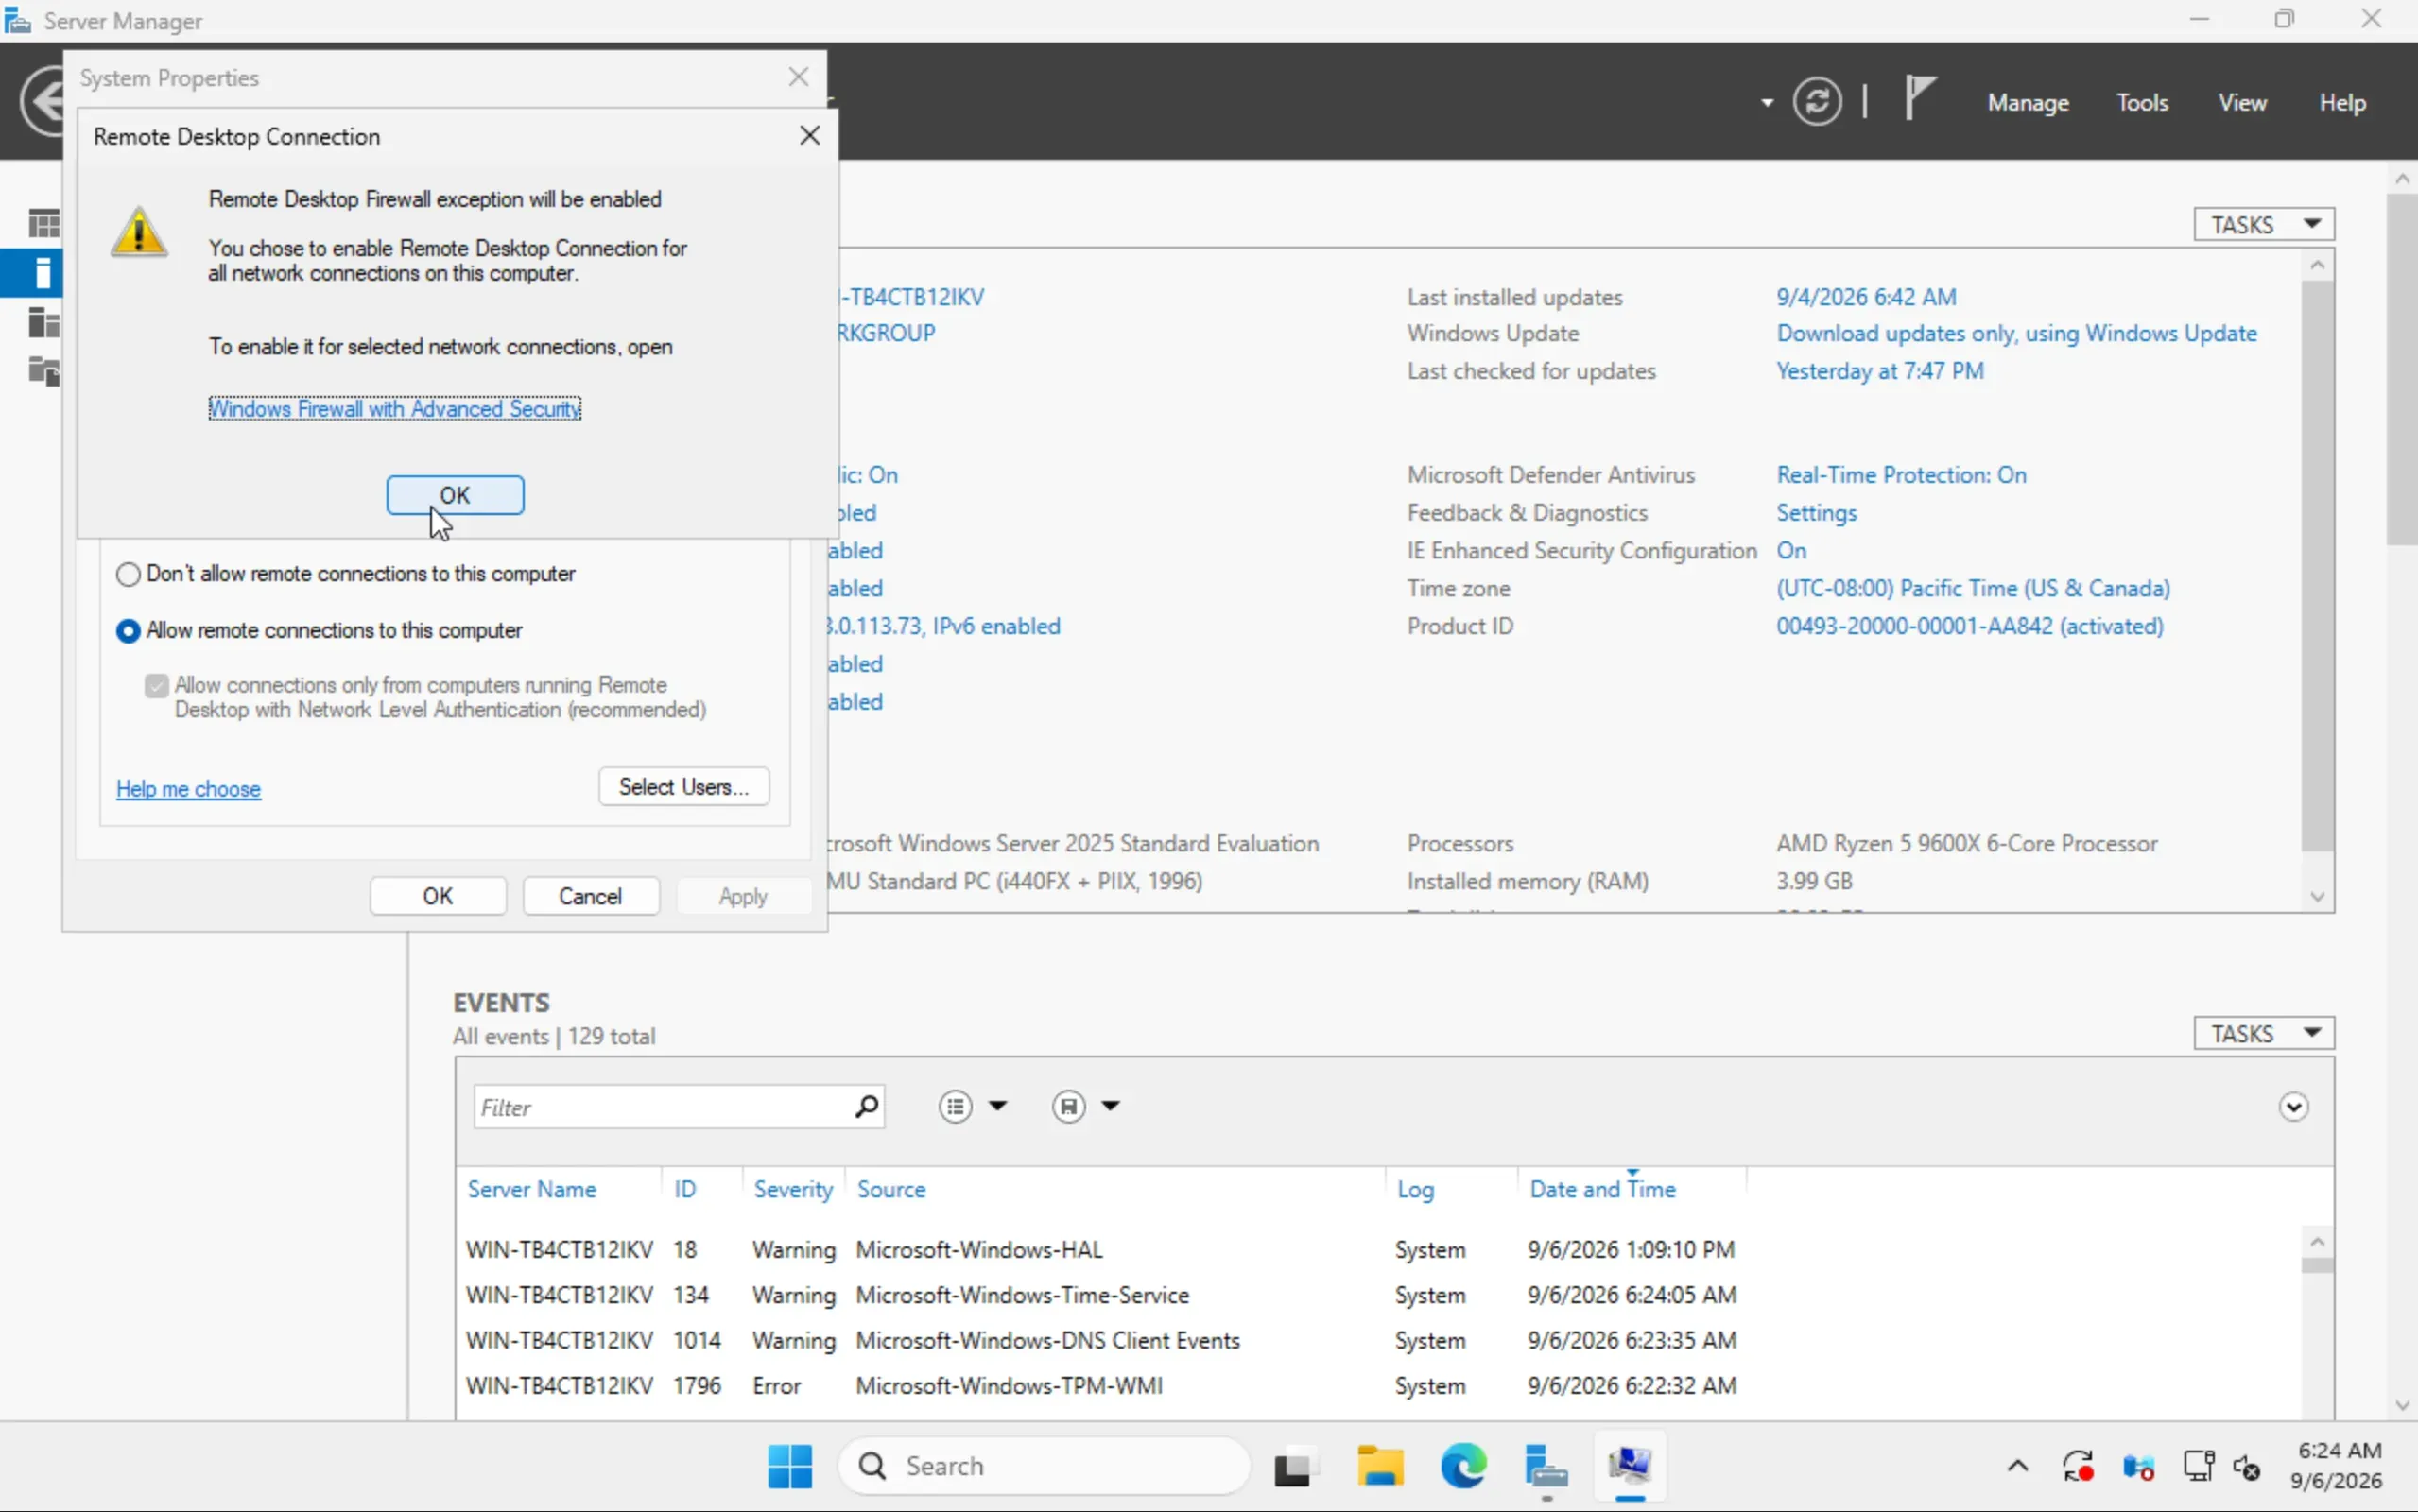
Working through the console alone makes Windows barely usable. Server Manager unlocks that too: under Local Server, click the value next to Remote Desktop, choose Allow remote connections to this computer in the dialog and confirm with OK. Windows tells you it creates the firewall exception itself; the recommended Network Level Authentication stays enabled.
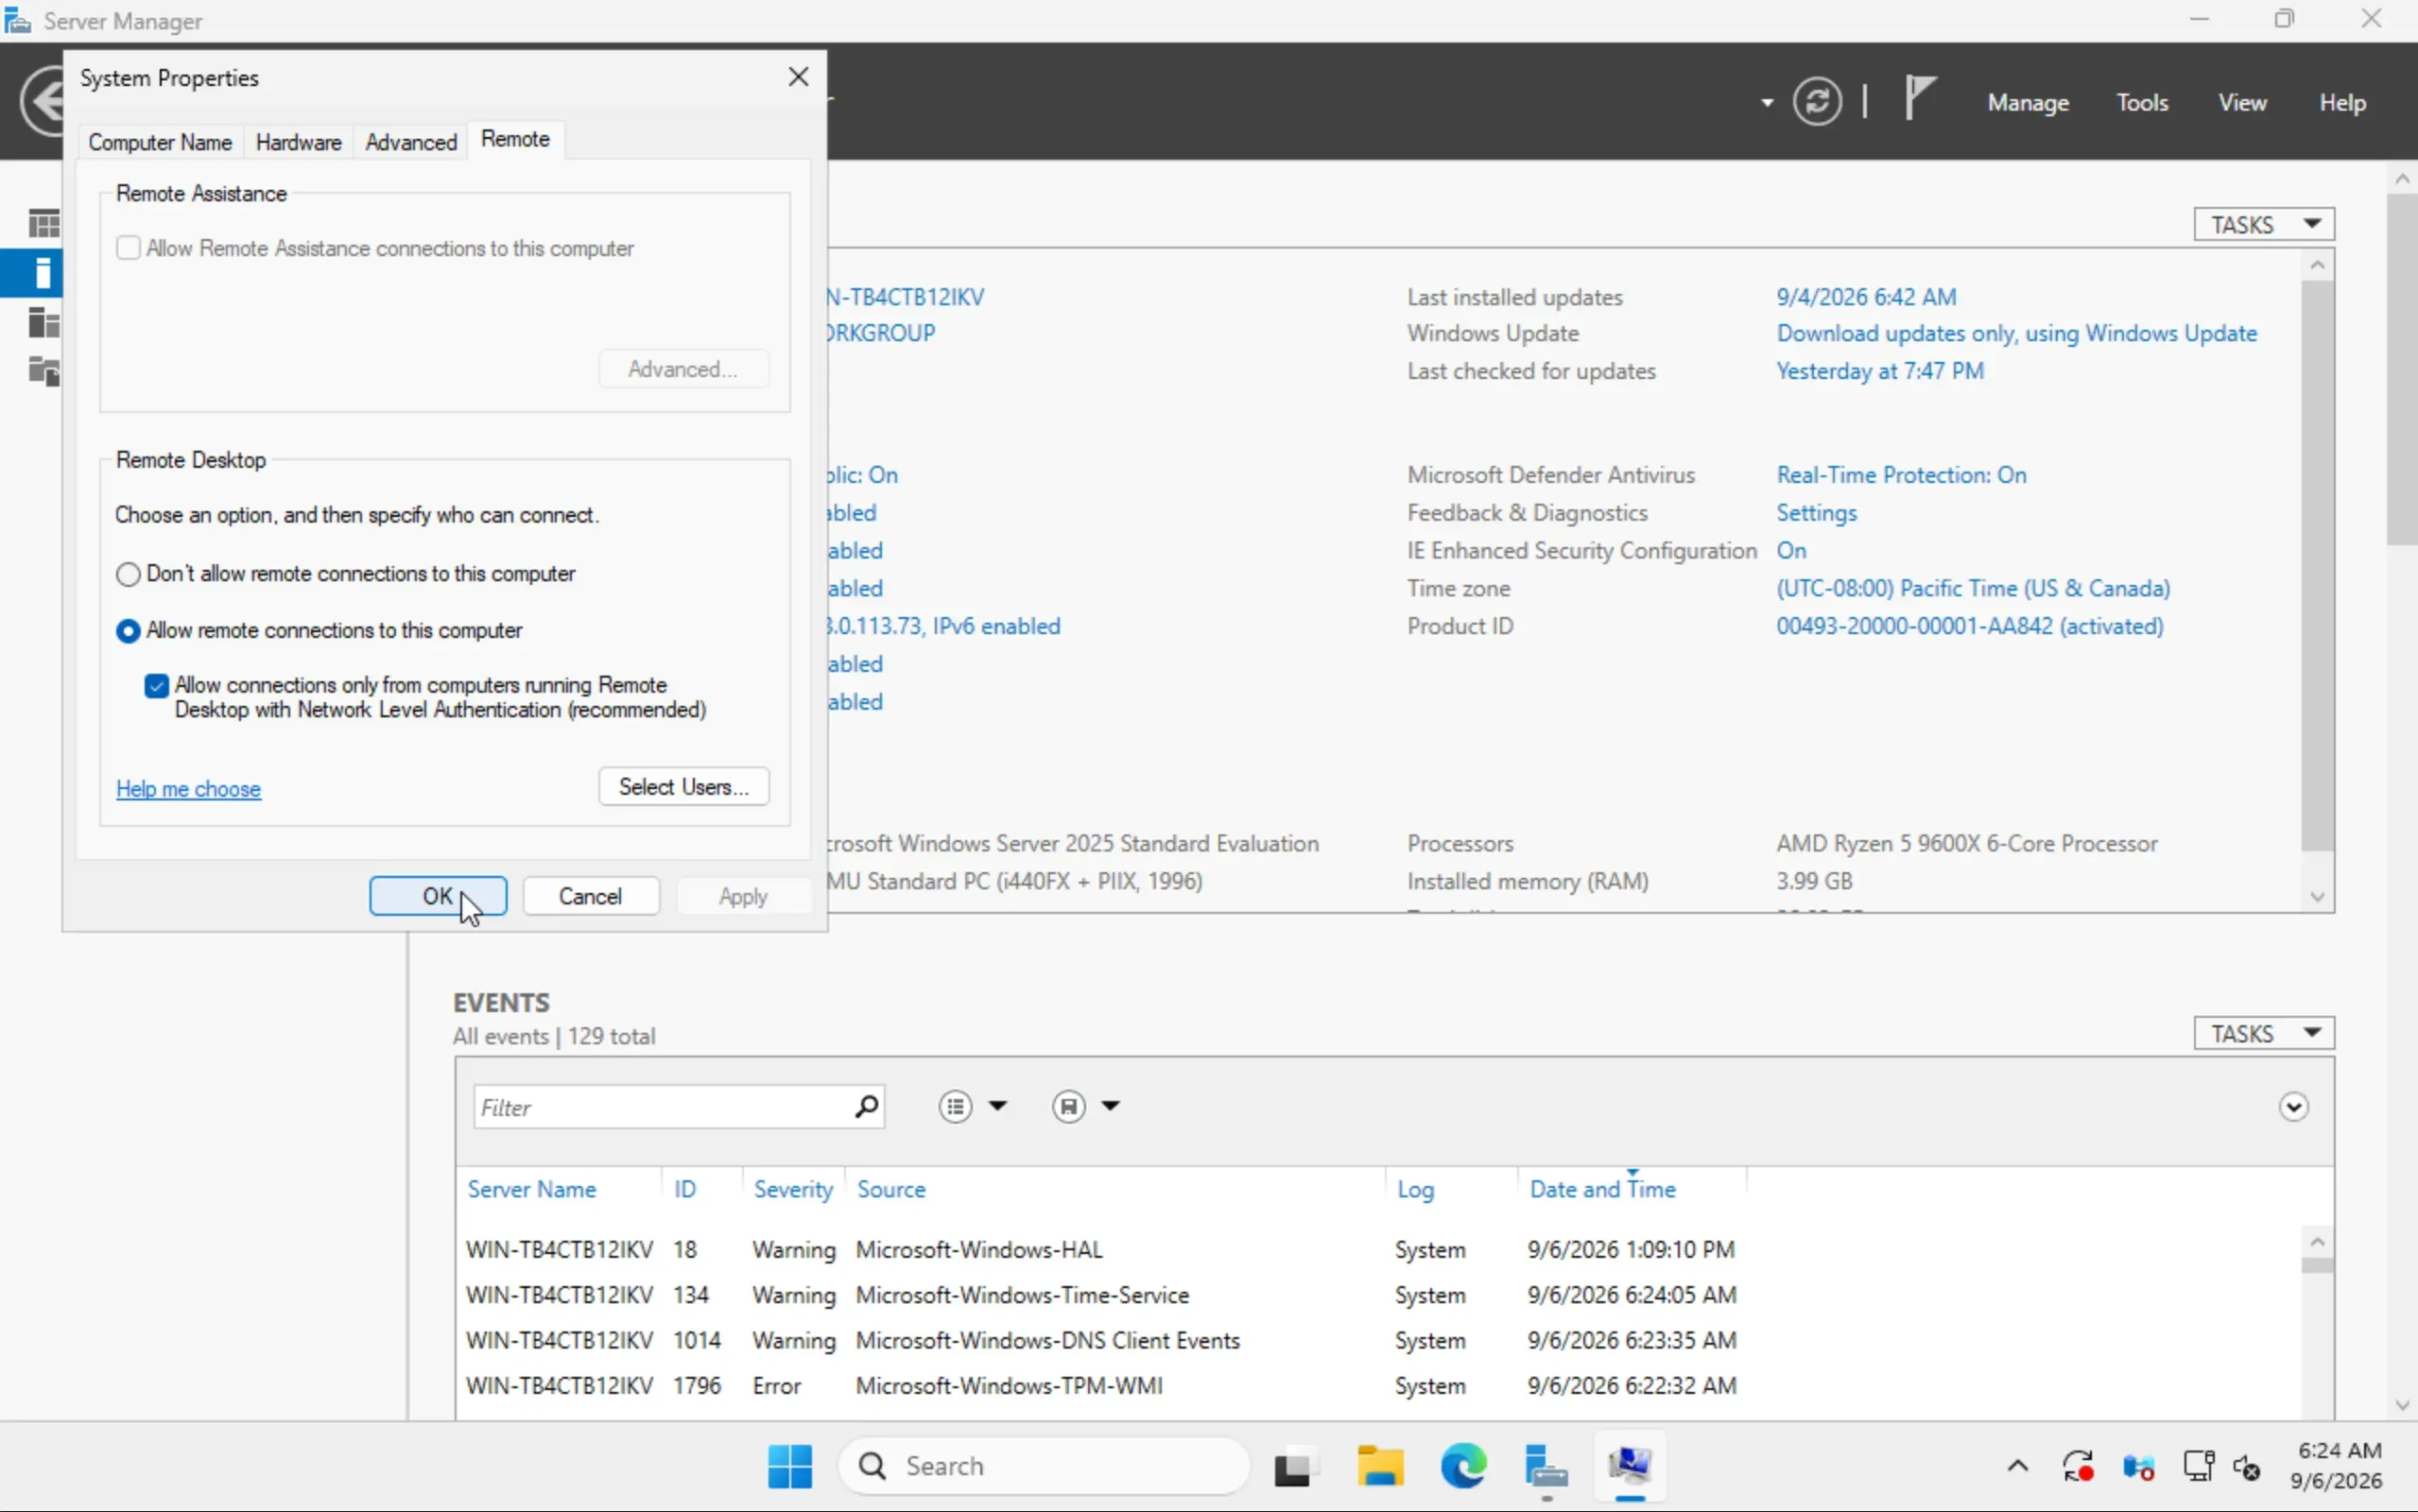
Then connect from your own machine to your seed's IP address. A Windows server with port 3389 open to the internet is probed within minutes. Create a firewall under Network › Firewalls that allows 3389 only for your own address, and assign it to the seed. Without an assigned firewall the seed is open to the outside.
Eject the ISO
Eject the ISO as soon as the installation is done: in the Mount ISO section, via Eject on the highlighted ISO. No restart needed.
While the medium stays mounted, the seed asks "Press any key" on every boot and loses five seconds, and an accidental keystroke lands you back in Setup. Just be careful not to eject during a running installation: it happens without a confirmation prompt and aborts Setup.
Done
Your seed now runs your own Windows Server. Things to keep in mind:
- Licence. The evaluation edition expires after 180 days. Have your own licence in place by then. See the note at the start of this guide.
- Additional IPv4 addresses. An address you add in the Network tab is routed to your seed immediately, but is not configured inside the guest. You have to add it in Windows yourself; you do not need a second default gateway for it.
- Backups and snapshots keep working unchanged. On a self-installed system they are your only safety net, because reinstalling through the cloud overwrites everything.
- Back to one of our images any time via Manage › Empty seed and reinstall. That lifts restricted mode, but wipes the disk.